Windows 11 User's Tutorial: Customizing Date and Time Display Preferences

Windows 11 User’s Tutorial: Customizing Date and Time Display Preferences
Quick Links
Key Takeaways
- To modify the date and time format, open the Settings app and navigate to Time and Language > Language and Region > Regional Format. Then, click on Change Formats and select your preferred format.
- To set the custom format, type “Region” in Windows Search to open region settings. Then, click Additional Settings and configure custom formats in the Date and Time tab.
If you don’t like the default date and time format and prefer something more intuitive, changing it is simple. You can either choose from the available formats or create a custom one. This guide will show you how to do just that.
Select From the Available Date and Time Formats
The first option to change the date and time format is to pick from preset formats using the Settings app. Right-click on the Start button and select “Settings.” Navigate to the “Time and Language” tab on the left and open the “Language and Region” settings on the right.

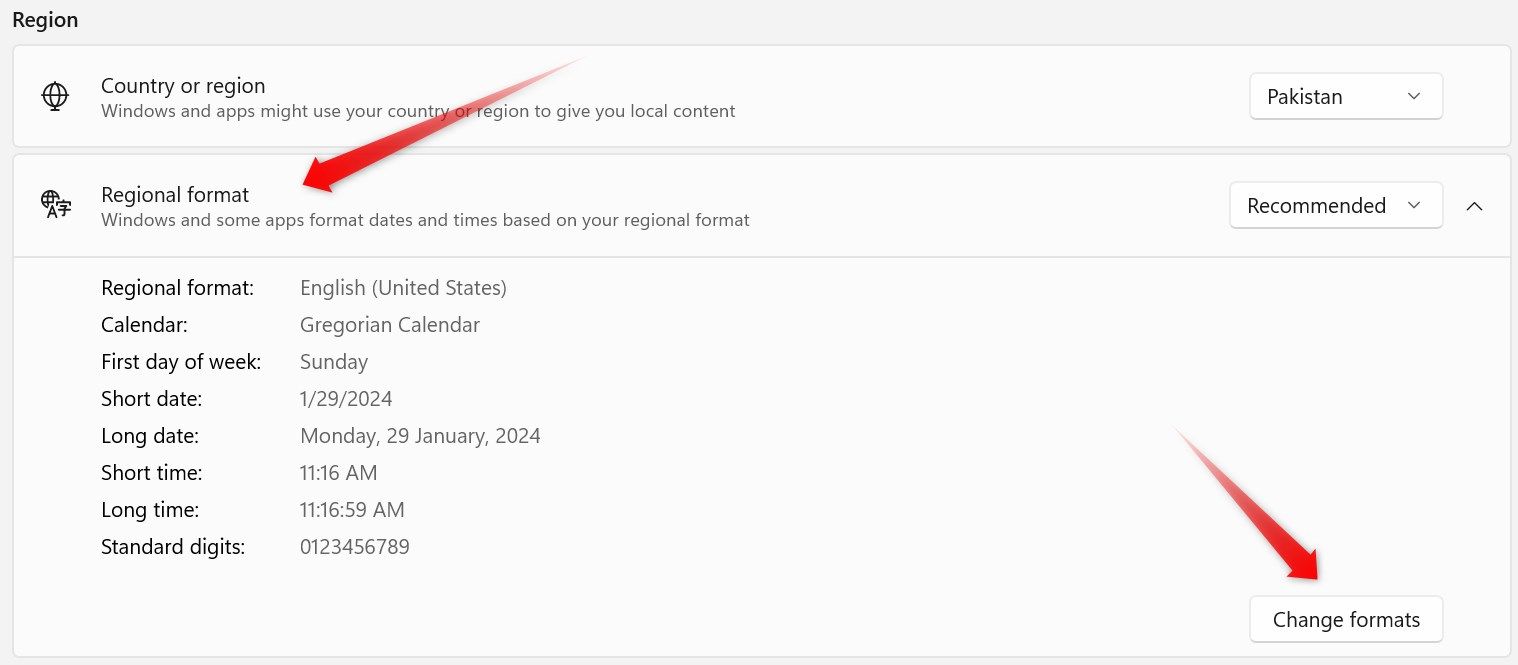
Within the Region section, click on the “Regional Format” option—ensure that you do not click on the dropdown menu but on the blank space. Then, click on the “Change Formats” button.

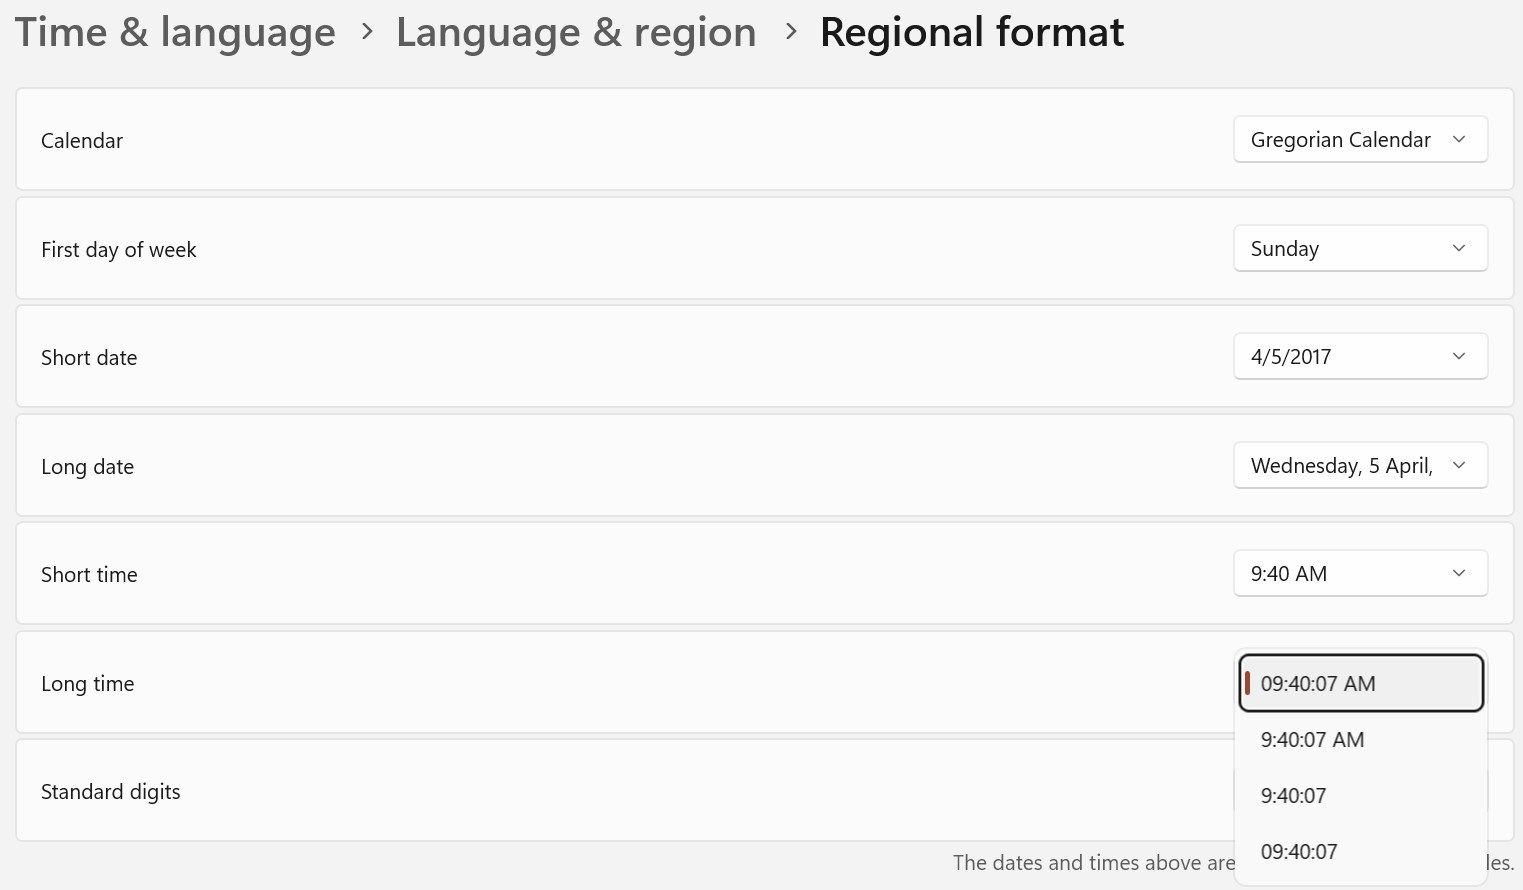
In this menu, select your preferred date and time format next to “Short Date” and “Long Date,” as well as “Short Time” and “Long Time.”

Remember that Windows displays the short date and short time formats in the taskbar. These are values you need to edit to have the taskbar display your preferred format. If you’re using Windows 10, the process to change the date and time format is slightly different.
Set a Custom Date and Time Format
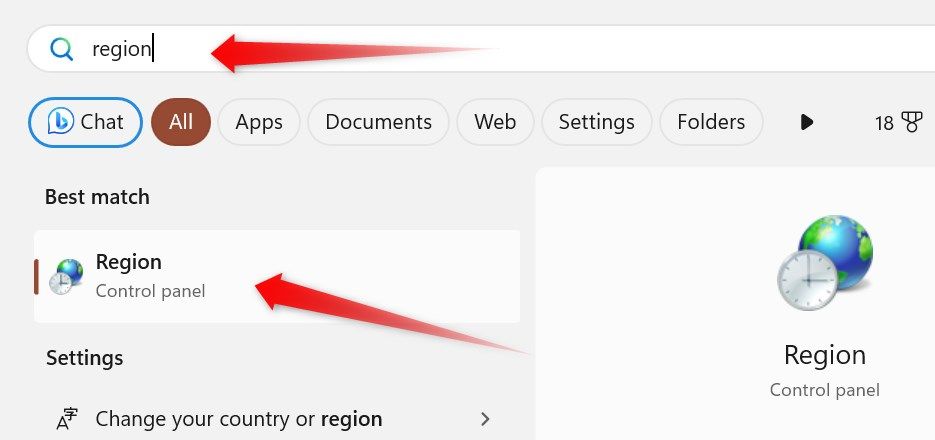
To set a custom date and time format on Windows, type “Region” in Windows Search and open the Region settings.

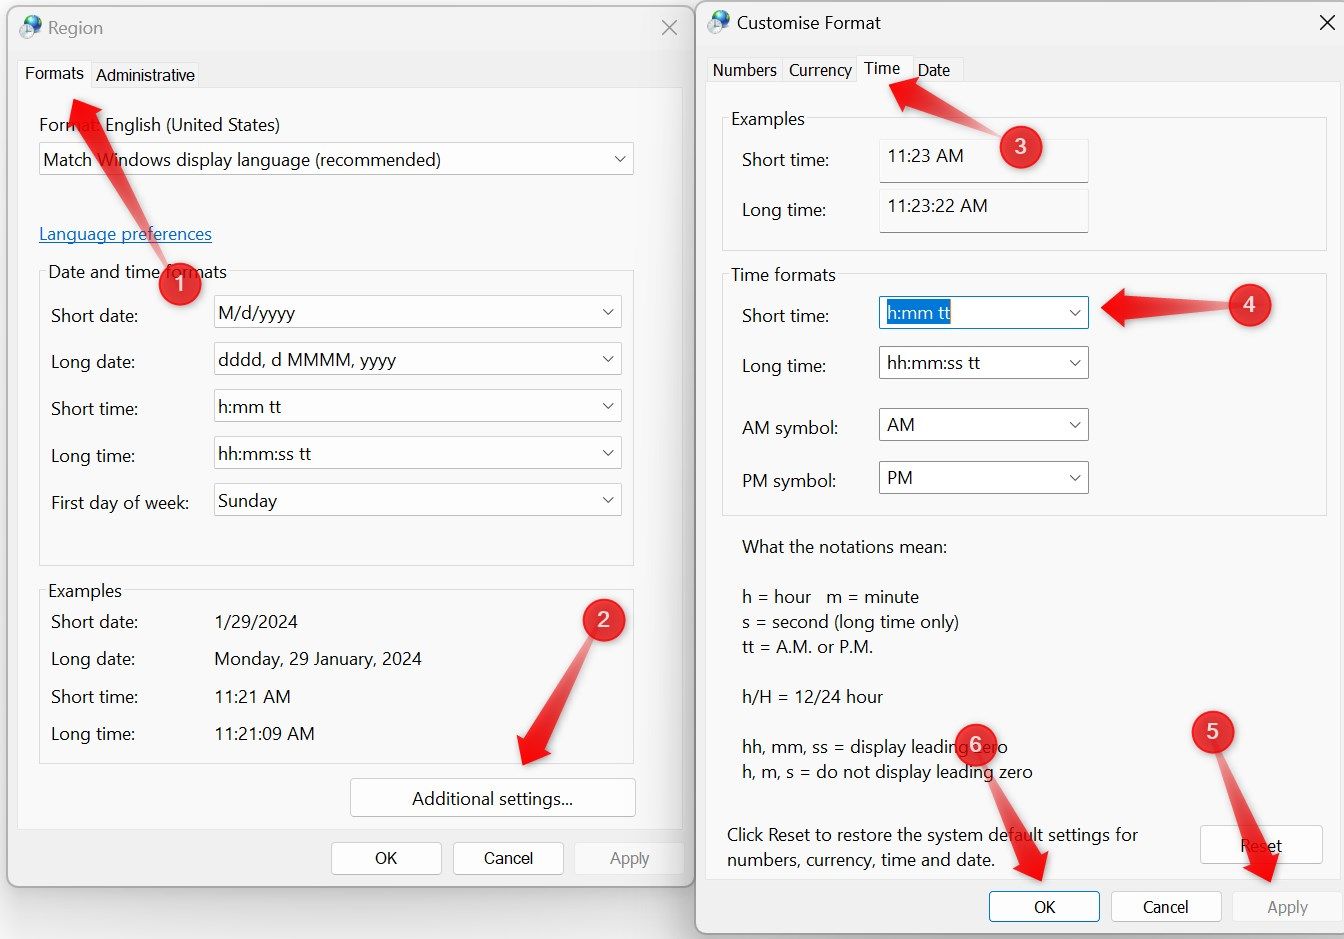
Navigate to the “Formats” tab and click the “Additional Settings” button in the lower-right corner. Then, move to the “Time” tab and select your preferred time format next to “Short Time” and “Long Time” from the options provided. Otherwise, use the notation provided at the end of the window to set a custom format. After adding the desired formats, click “Apply” and “OK.”

After that, navigate to the “Date” tab and choose your preferred date format next to “Short Date” and “Long Date” from the available options. Or use the provided notations to set a custom date format.

That’s how you can easily alter the date and time format on Windows. Changing the date or time and time zone is similar, and just as straightforward.
Also read:
- [New] In 2024, Dive Into the World of Books Top 5 Captivating VTTs Revealed
- [New] Simplified Techniques for Reordering YT Videos
- [New] Ultimate Hue Harmonizer Tool
- [Updated] In 2024, Enhancing Images Through Automated Dynamic Range Adjustments
- [Updated] Leveraging iOS 11 for Professional-Level iPhone Shots for 2024
- Full Guide to Hard Reset Your Infinix Note 30 | Dr.fone
- Full Guide to Hard Reset Your Infinix Note 30 VIP Racing Edition | Dr.fone
- How to Recover Apple iPhone XS Max Data From iOS iTunes Backup? | Dr.fone
- Optimal GPU: Founder's Model or AIB Edition Selection
- Overhauling Non-Operational CCleaner on Win11
- Remove Google FRP Lock on Poco C65
- Tactical Approach to Monitoring Xbox Gaming
- The Easiest Methods to Hard Reset Samsung Galaxy A14 5G | Dr.fone
- Title: Windows 11 User's Tutorial: Customizing Date and Time Display Preferences
- Author: Ian
- Created at : 2025-02-17 17:19:02
- Updated at : 2025-02-19 21:47:36
- Link: https://techidaily.com/windows-11-users-tutorial-customizing-date-and-time-display-preferences/
- License: This work is licensed under CC BY-NC-SA 4.0.