
Unlock locked iPhone 14 without Passcode or Face ID
Unlock iPhone 14 without Passcode or Face ID
A problem commonly faced by all iPhone users is that they forget the password, and then they are stuck because they cannot use their phone anymore. This might seem impossible because iPhone users cannot use the phone without a passcode, but let us show you a magical application that makes this impossible.
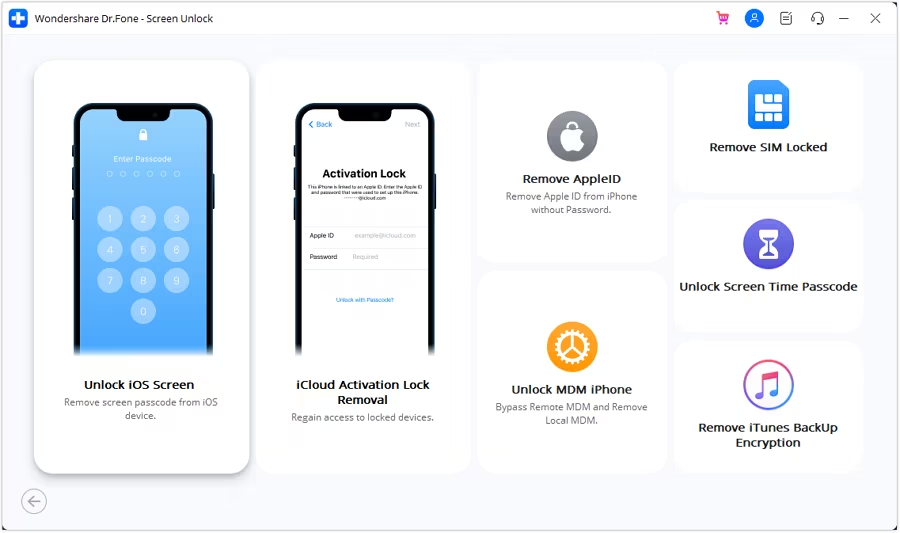
Dr.Fone - Screen Unlock, the well-known application among most iPhone users, can resolve the problem quickly. This is a very secure platform for iPhone users because it promises to safeguard user’s personal information. The application is easy to use, that even a new person can use it without facing any trouble. Let us highlight its features.

- It runs on all major iOS versions.
- It can unlock the phone. It doesn’t matter if it’s second-hand or if you forgot the password.
- Easy to handle and use, no technical skills are required.
- It can even unlock a disabled phone without using its passcode.
This might be possible that not all iPhone users know about Dr.Fone – Screen Unlock, so, for such users, let us take you through the steps that are required to unlock iPhone 14 using Dr.Fone – Screen Unlock without a passcode.
- Step 1: Download and Install the Application
First of all, the user is supposed to download Dr.Fone – Screen Unlock from its official website and install it on your Windows or Mac system. Once it is installed, the application is all set and ready to use; launch it in the time of need and unlock your iPhone 14 without a passcode.
After the application is launched, the Welcome Screen will appear with different options. The user is requested to select the option of ‘Screen Unlock.’

- Step 2: Connect Phone with System
In the second step, the user should connect their phone to the system and let Dr.Fone ‘s application automatically detect it. Whenever you are ready to initiate the process, click on the button ‘Unlock iOS Screen.’

- Step 3: DFU Mode Activation
Once the application has detected your iPhone 14, you now need to activate the DFU mode. Step by step illustration on how to activate DFU mode is shared on-screen.

- Step 4: Download Firmware Update
A new window will appear now on which the application will ask for some information regarding your iOS device. Provide the application with asked information and click on the ‘Download’ button to get the firmware update for your iPhone 14.

The user is requested to wait for some time, as the firmware update is being downloaded for your phone. Once that is done, now click on the ‘Unlock Now’ button to complete the process.

- Step 5: Confirmation Code
The application will now ask for the confirmation code. Just provide the on-screen confirmation code and let the process complete itself. As soon as that is done, the application will notify you through the interface. The process can also be repeated by clicking on the ‘Try Again’ button.

Unlock Locked iPhone 14 by Restoring it to Default Settings – iTunes
iPhone users make sure that they connect and sync their devices with iTunes because their data is safe. iPhone users live without the fear of losing their data because it is backed up. Taking more advantage of this, iPhone users can restore their phone to default settings and can even unlock their iPhone without using a passcode.
Let us show you how to unlock iPhone 14 without using a passcode;
Start the process by turning off your iPhone 14.
After that, plug in your phone to the computer and open iTunes.
Once the phone is connected with iTunes, click on ‘Summary’ that will appear on the screen’s left side.

After the summary screen is opened, you will see the option of ‘Restore iPhone’; click on that option.
This option will bring you to a new window that will be asking for your confirmation on the decision to restore your device.
As soon as that is done and iTunes has finished the process, your iPhone 14 will be restored to default settings.


Unlock Disabled iPhone 14 Using iTunes or macOS Finder
Of course, there is an official way that Apple provides for users to restore device firmware using iTunes or macOS Finder. For this, iPhone 14 is put under Recovery Mode manually and Finder or iTunes is used to reinstall software on it directly from Apple. This process is fine for people who are conversant in tech, since this process can throw up a lot of errors that are just numbers, and people can get confused as to what they mean, resulting in frustration.
Step 1: Connect your iPhone 14 to a Windows/ macOS device and launch iTunes. If you are on a Mac that runs macOS Catalina or higher, open Finder since you would not have access to iTunes anymore.
Step 2: Pick your iPhone 14 and do the following:
- (2.1) Press the volume up button and let it go.
- (2.2) Press the volume down button and let it go.
- (2.3) Press the Side Button (power button, on the right side of your iPhone 14) and keep it pressed till Finder or iTunes detects the phone in Recovery Mode.

- Step 3: Choose Restore to download and reinstall the latest iOS on your iPhone 14 and unlock your iPhone 14.
When the iPhone 14 reboots, it will be reset to factory settings, and you can set it up again as you did when brand new.
How to use Face ID on iPhone 14 to pay with Apple Pay
- Step1: If Apple Pay is supported by banking institutions in your country, you can set it up by adding a supported bank‘s credit card, debit card, or prepaid card to the Wallet app on your iPhone 14.

Step2: When a card is added and ready to use, check that Apple Pay is enabled under Settings > Face ID and Passcode.
Step3: For App Store/ Book Store/ iTunes Store purchases, it works as always, you double-press the Side Button to authenticate and use your default card.
Step4: Look at your iPhone 14 to authenticate yourself using your Face ID and make the purchase.
Step5: When paying at retail outlets, hold your iPhone 14 (top being close to the reader) and wait for the checkmark and Done message.
Step6: To pay using Apple Pay on websites, choose Apple Pay as the payment method, double press the Side Button, look at your iPhone 14, and wait for the Done message and checkmark to finish the process.
How to Unlock Apple ID on iPhone 14

It is unfortunate you are facing a locked Apple ID. Apple tries its best to make users aware of safety protocols they need to follow to minimize and mitigate such unfortunate occurrences, such as using two-factor authentication, trusted devices, trusted phone numbers, passwords, passcodes, etc. that serve as deterrents to prevent unauthorized access to devices and accounts. Yet, when the unfortunate happens, what to do?
Here are the steps to unlock your Apple ID:
Unlock Apple ID Via Two-Factor Authentication
Apple implemented two-factor authentication a long time ago to prevent unauthorized access to Apple ID accounts. If you have it enabled, you would be able to use two-factor authentication to unlock your Apple ID again.
- Step 1: Go to https://iforgot.apple.com .

Step 2: Key in your Apple ID and proceed.
Step 3: Confirm your mobile number associated with the Apple ID.

If you have another device associated with the Apple ID and it is a trusted device, you can now receive instructions to proceed with a two-factor code on that device.

- Step 4: Use that code to unlock your Apple ID using two-factor authentication.
Unlock Apple ID Via a third party tool
Dr.Fone is a name that will be instantly familiar to anyone who has ever had any issue with their mobile devices and would be able to vouch for the quality and efficacy of this software at fixing issues quickly and efficiently.
Dr.Fone is a collection of carefully crafted modules that helps you when most needed. Ranging from helping you wipe your devices securely with Data Eraser to maintain your privacy when you sell your device or give it to service and helping you erase not just junk on your device but also user data such as SMS (whether single or batch) to free up some space on your iPhone 14, to Phone Transfer that helps you to easily transfer data you’re your old phone to your new iPhone 13 including restoring from iCloud Backups, Dr.Fone is a venerable utility from Wondershare that does it all and lives up to its name. Naturally, this tool was designed to help you unlock your Apple ID as well.

- Step 3: Click Unlock Apple ID to start the process.

- Step 4: Connect your device to the computer and wait for Dr.Fone - Screen Unlock (iOS) to detect it. You must know the passcode of your device.

You will be asked on your iPhone 14 to Trust the computer, and then you will need to enter the passcode.
- Step 5: Unlocking Apple ID via Dr.Fone - Screen Unlock (iOS) will erase the contents of the device. You need to confirm this by typing
six zeroes (000 000)in the popup.

- Step 6: Follow the on-screen instructions to reset all your settings on the iPhone and then reboot to start the unlocking process.

Dr.Fone - Screen Unlock (iOS) will notify you when the process is complete.
How to use Face ID on iPhone 14 to make purchases in App Store, Book Store, and iTunes Store
- Step1: Check if Face ID is enabled for purchases in these stores by going to Settings > Face ID & Passcode and ensuring that iTunes and App Store are toggled On.

- Step2: On any of these stores, when you tap on the option to buy some content, a payment confirmation popup will be displayed along with instructions to authenticate yourself using Face ID.

The instructions are simple: press the side button twice to authenticate yourself using your Face ID and make the purchase.
When done, a satisfying ting and a checkmark will confirm the action.
Unlock Disabled iPhone 14 Using iCloud Website
unlock your disabled iPhone 14 is using the iCloud website to gain access back. This is a fairly easy way and doesn’t require going through complex hoops.
Find My is available both online via the iCloud website and on iOS devices and on Macs. In case the only Apple product you own is the currently disabled iPhone 14, you can use Find My on the iCloud website from any other computer you may have to unlock your disabled iPhone 14.
Step 1: Visit https://icloud.com and log in into the same iCloud account/ Apple ID as the disabled iPhone 14.
Step 2: Go to Find My, select your iPhone 14.

- Step 3: Click Erase iPhone and confirm.
This will start the wipe process on your iPhone remotely and your iPhone will be reset to factory settings. You can now proceed to setup your iPhone once again.
Unlock Disabled iPhone 14 Without iTunes/ iCloud
We know and understand that the word troubleshooting can remind you of long telephone calls with support or making appointments and driving down to specialists and spending obscene amounts of money to get solutions. You do not want that. How about a way you could unlock your iPhone 14 in a simple, 1-click way instead?
Dr.Fone - Screen Unlock (iOS) is a tool that can help you unlock your iPhone 14 without iTunes or iCloud. It is a simple and easy-to-use tool that can help you unlock your iPhone 14 in a few minutes. It is a safe and reliable tool that can help you unlock your iPhone 14 without any data loss. It is compatible with all iOS devices and all versions of iOS. It is a simple and easy-to-use tool that can help you unlock your iPhone 14 in a few minutes. It is a safe and reliable tool that can help you unlock your iPhone 14 without any data loss. It is compatible with all iOS devices and all versions of iOS.
Step 1: Launch Dr.Fone and click the module titled
"Screen Unlock"Step 2: Choose the
"iOS"option, then select"Unlock iOS Screen"on the subsequent screen to continue unlocking your iPhone 14.
- Step 3: Follow the provided instructions to start the disabled iPhone 14 in
Recovery Modeto unlock it. If for any reason the phone does not boot in Recovery Mode, there are instructions provided at the bottom to enter what is calledDFU mode.

- Step 4: Dr.Fone will read and display your phone model and the software installed on it. If the model displayed is incorrect, use the dropdown to pick the correct detail. Click
"Start"to download the specific firmware file for your particular iPhone 14 model.

- Step 5: After the download completes, please click
Unlock Nowto start unlocking the disabled iPhone 14.

Your iPhone 14 will be unlocked in a short span of time. Please note that all data would have been wiped out from the device. When you set the device up again, if you set it to use iCloud, data such as Contacts, iCloud Photos, iCloud Drive data, etc. will be downloaded onto your device again. The apps you had on your iPhone 14 prior to it getting disabled can be downloaded again from the App Store. If you did not use iCloud but backed up the data manually, you will have to manually restore that data onto the device again.
Also read:
- [New] Ultimate Tutorial for SRT Tagging in MP4 Videos 2024
- [Updated] 2024 Approved Discovering the Best Top Hexa-Copters
- Android/iOS Resolve YouTube Freezing for 2024
- Exclusive Offer: Snag the Nintendo Switch OLED for a Bargain Price of Just $60 This Labor Day - Find Out How on ZDNET!
- Fix the Unfixable? Your Complete Manual for Resolving 'advapi32.dll Not Found' Problems
- Hard Resetting an Tecno Camon 20 Premier 5G Device Made Easy | Dr.fone
- How do I reset my Oppo Reno 11F 5G Phone without technical knowledge? | Dr.fone
- How To Free Up Apple iPhone X Space | Dr.fone
- In 2024, Mac OS Video Editor Turn Photos Into Beautiful Slideshows
- Innovative Approaches to Console Playback on PC Hardware for 2024
- Remove Google FRP lock on Y100t
- Things You Dont Know About Honor Play 7T Reset Code | Dr.fone
- Transform with the 10 Most Exceptional Yoga Video Platforms for 2024
- Undelete lost data from Motorola Edge 40 Pro
- Useful ways that can help to effectively recover deleted files from Motorola Moto G04
- Title: Unlock locked iPhone 14 without Passcode or Face ID
- Author: Ian
- Created at : 2024-11-09 02:04:13
- Updated at : 2024-11-13 17:15:06
- Link: https://techidaily.com/unlock-locked-iphone-14-without-passcode-or-face-id-by-drfone-ios-unlock-ios-unlock/
- License: This work is licensed under CC BY-NC-SA 4.0.