Ultimate Guide: Performing a Complete System Restore on Your MacBook Air/Pro and Other Mac Models

Ultimate Guide: Performing a Complete System Restore on Your MacBook Air/Pro and Other Mac Models
Quick Links
- Requirements (And Tips for Older Macs)
- How to Erase All Content and Settings on an Apple Silicon Mac
- How to Factory Reset an Older Mac
Key Takeaways
- A factory reset is crucial for selling or refreshing a Mac but make sure to back up all your data first. Watch out for different steps based on the Mac model and macOS version.
- Apple Silicon Macs running macOS Monterey and later have a simple “Erase All Content and Settings” option, just like iPhones.
- Intel Macs or older macOS versions require a more complex reset process involving reinstalling macOS.
Are you planning to sell your Mac? Or is it getting cluttered up with apps and data and you want to give it a good spring clean? A factory reset is what you need. Let’s take a look at how to do it on both Apple Silicon and Intel Macs.
Requirements (And Tips for Older Macs)
All Macs powered by Apple Silicon, along with those that have a T2 Security Chip and run at least macOS Monterey (macOS 12), have a handy “Erase All Content and Settings” option in the System Settings. It works in the same way that you would factory reset an iPhone and simplifies the whole process.
If your Mac uses an Intel processor, or you’re running a version of macOS older than Monterey, you’ll need to perform a more complex series of steps to factory reset your Mac. We’ll explain how to do that below, or check out our guide to reinstalling macOS for more detail.
How to Erase All Content and Settings on an Apple Silicon Mac
If you have a Mac that uses Apple Silicon or has a T2 Security Chip and runs macOS Monterey or later, you can quickly wipe it through the built-in Erase Assistant tool. You can click Apple > About This Mac to see the processor family (anything above M1 is Apple Silicon) and macOS version.
Make sure to back up your data before you get started, using Time Machine, iCloud, or any other Mac backup service . The data will be wiped during the reset, and you’ll need to restore it later. This applies to any other user accounts you’ve got set up, too, as they’ll all be removed. Alternatively, you can use the Migration Assistant to transfer your data and settings to a new Mac.
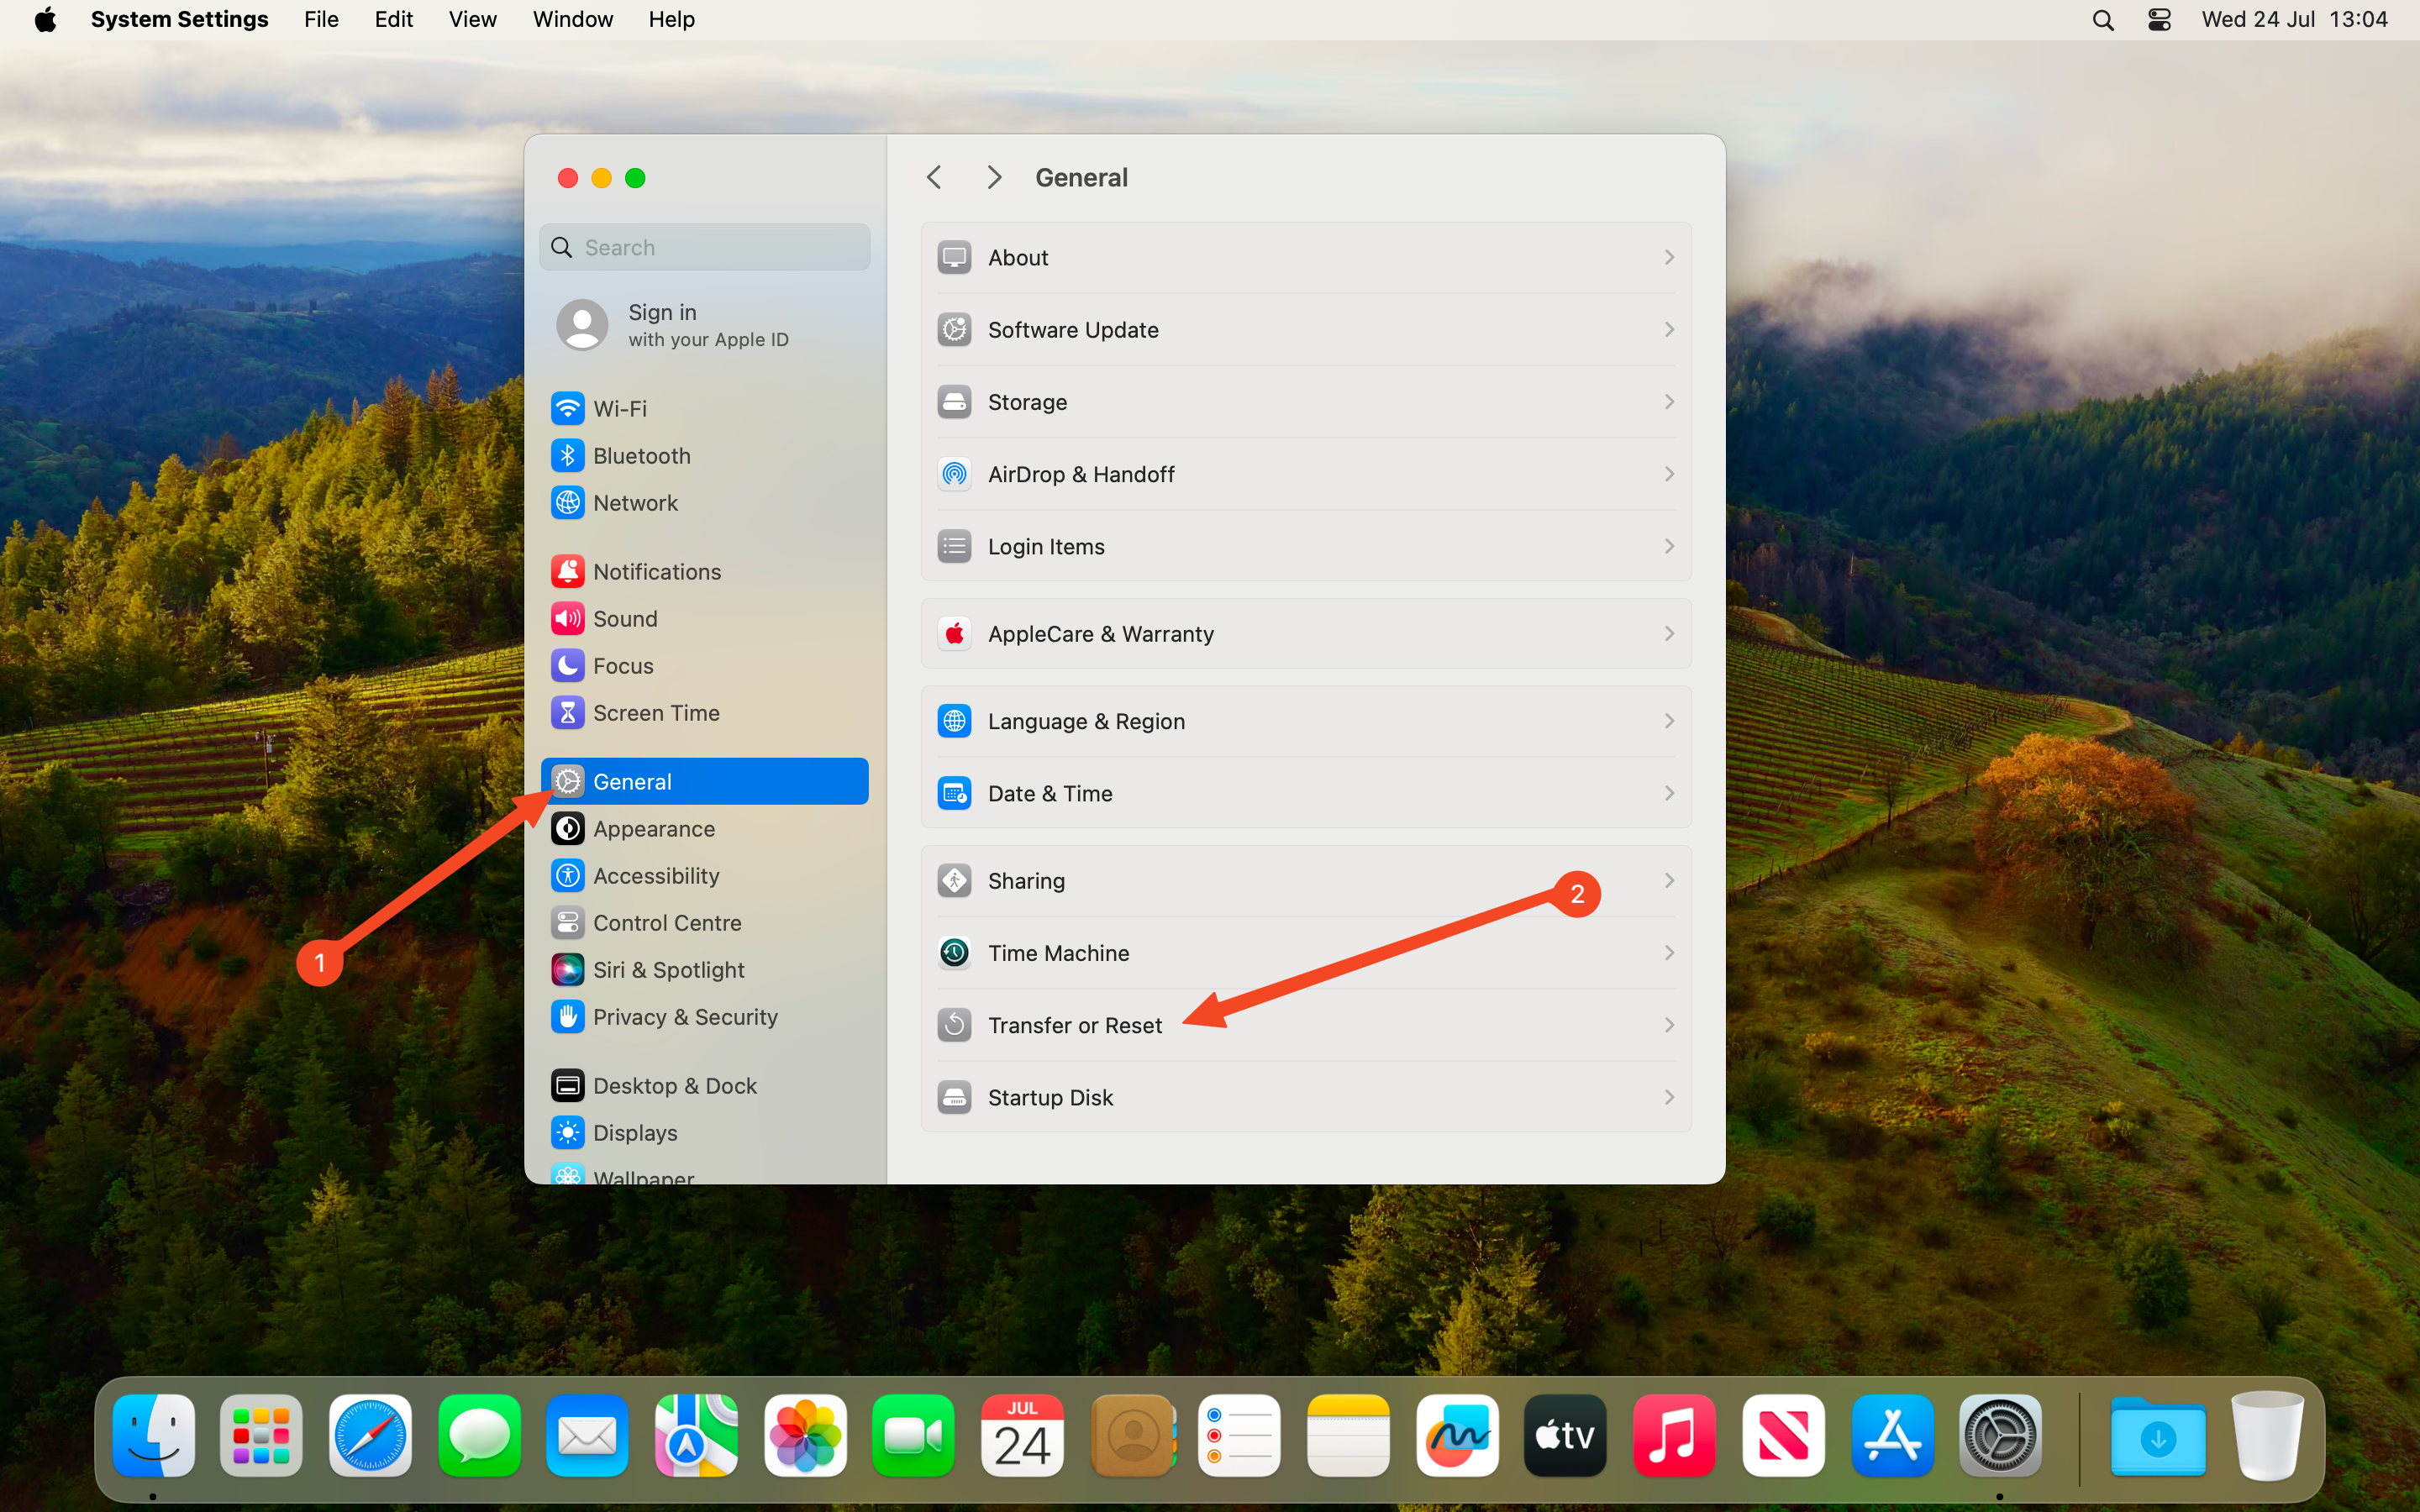
How you find Erase Assistant differs slightly depending on what OS version you’re using. For macOS Ventura, Sonoma, and Sequoia, click the Apple icon on the menu bar in the upper-left corner of the screen, select “System Settings,” and then go to General > Transfer or Reset.
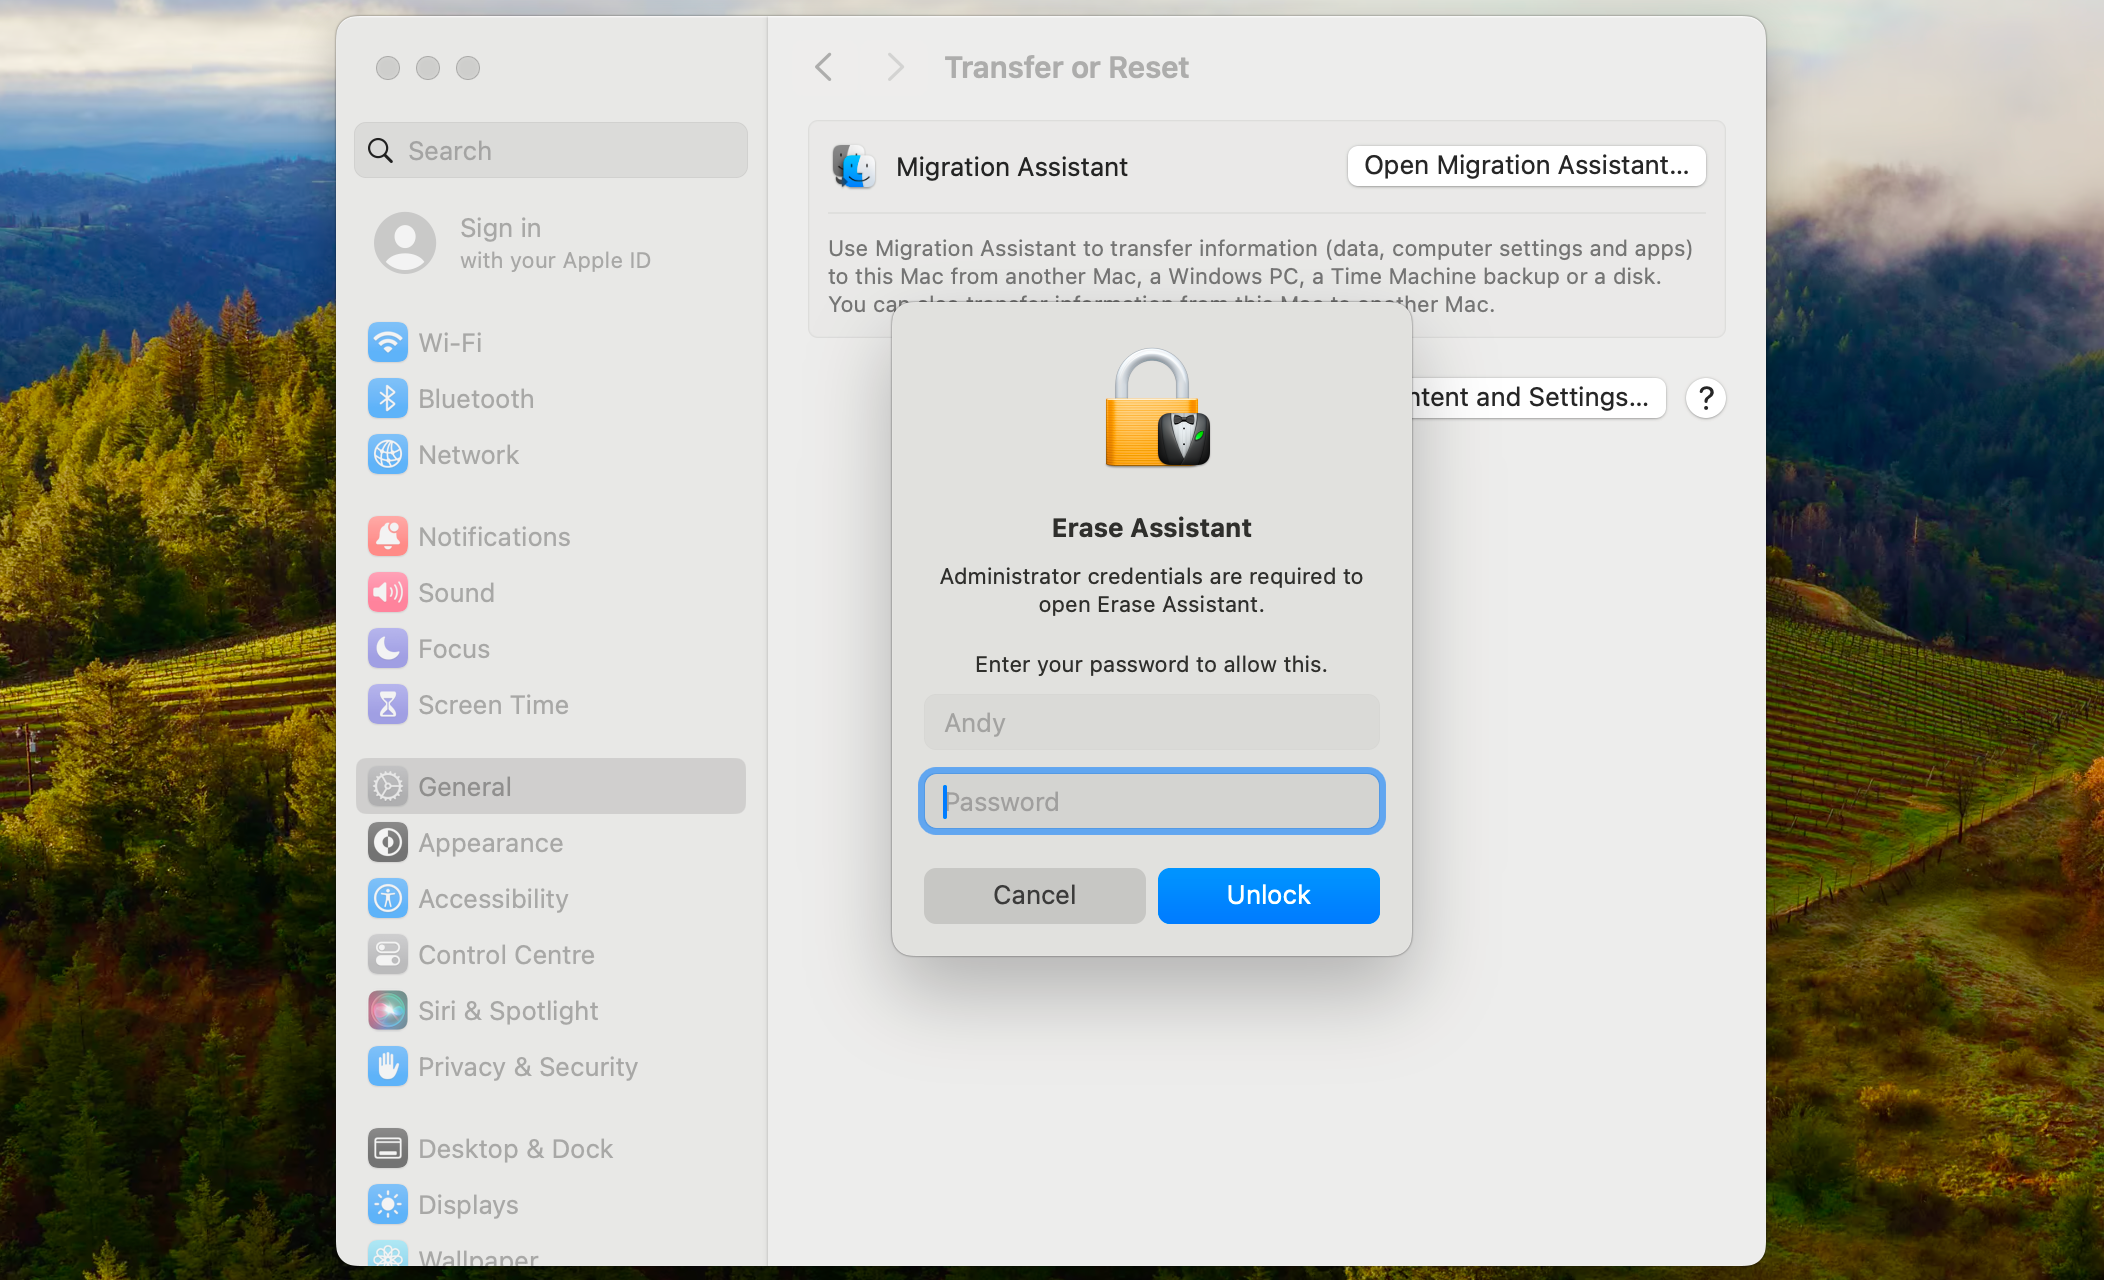
Select “Erase All Content and Settings.” Enter your password when prompted and this will launch the Erase Assistant.
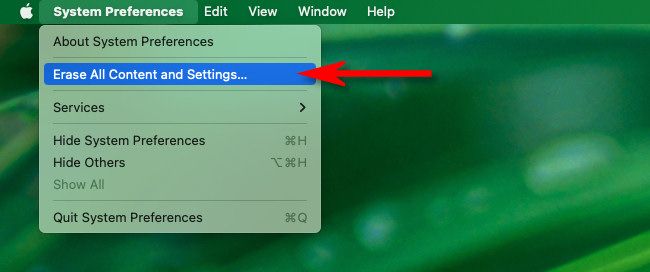
For macOS Monterey, click the Apple icon and select “System Preferences.” Ignore the window that appears and look at the top of the screen again. Go to System Preferences > Erase All Content and Settings, and enter your password when prompted.
With Erase Assistant launched, you’ll see exactly what will be removed during the factory reset. Along with your data, apps, and settings, you’ll be signed out of your Apple ID, your Touch ID fingerprints will be removed, Bluetooth accessories will be unpaired, and the Mac will no longer appear under the Find My service.
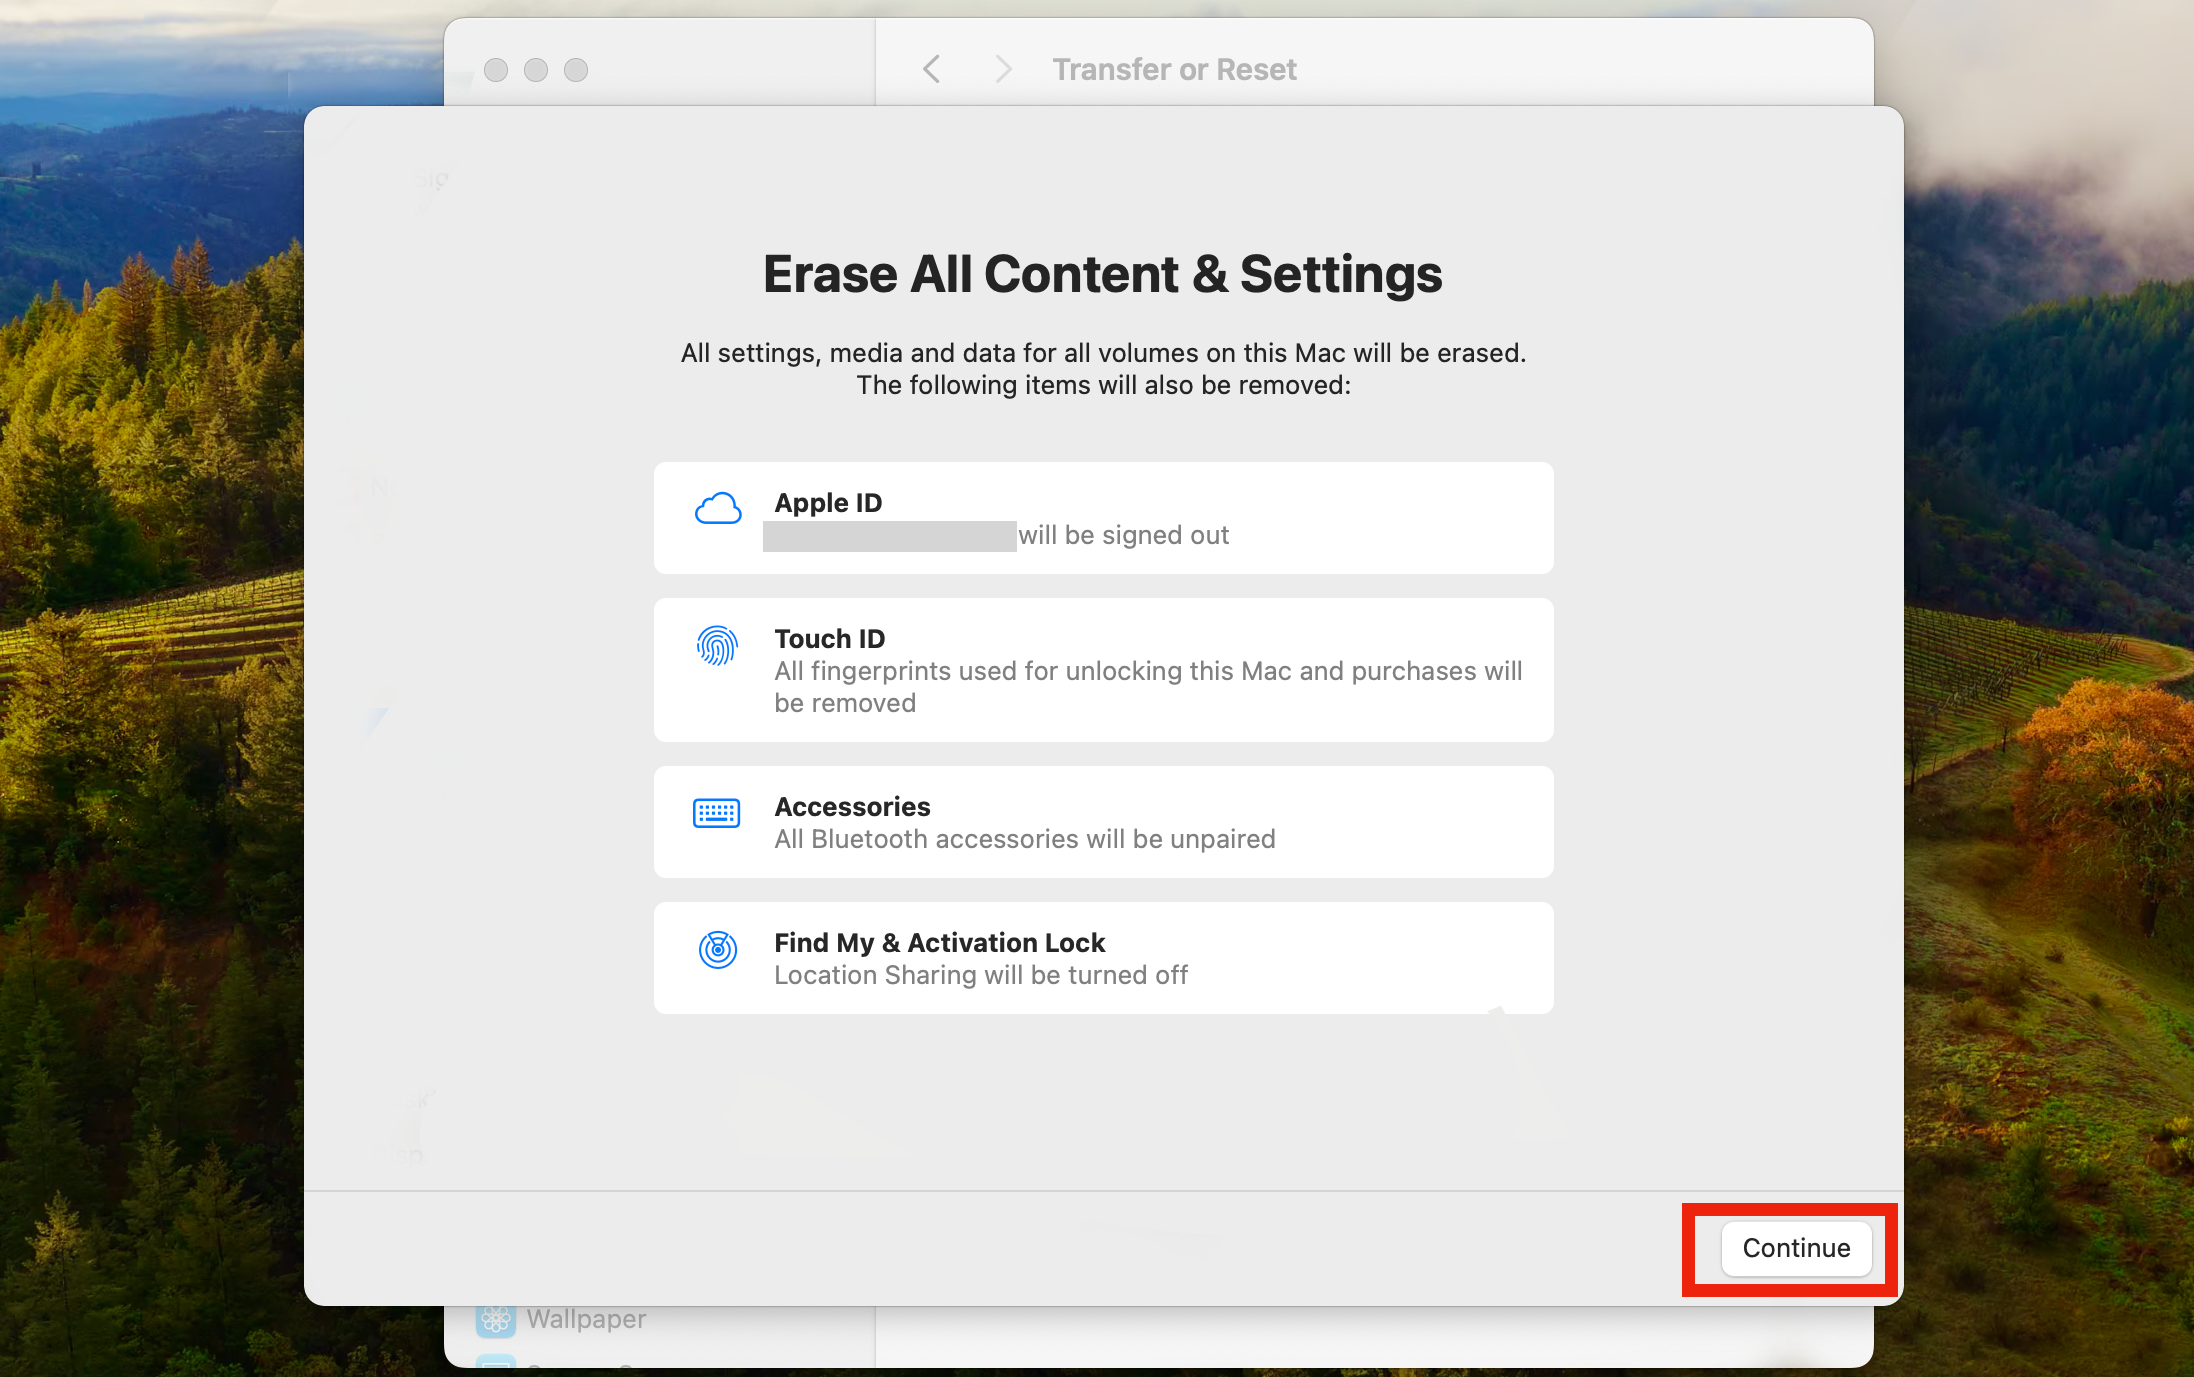
If you’re happy to proceed, click “Continue.” For security reasons, you’ll be prompted to enter your Apple ID password, which will then sign you out.
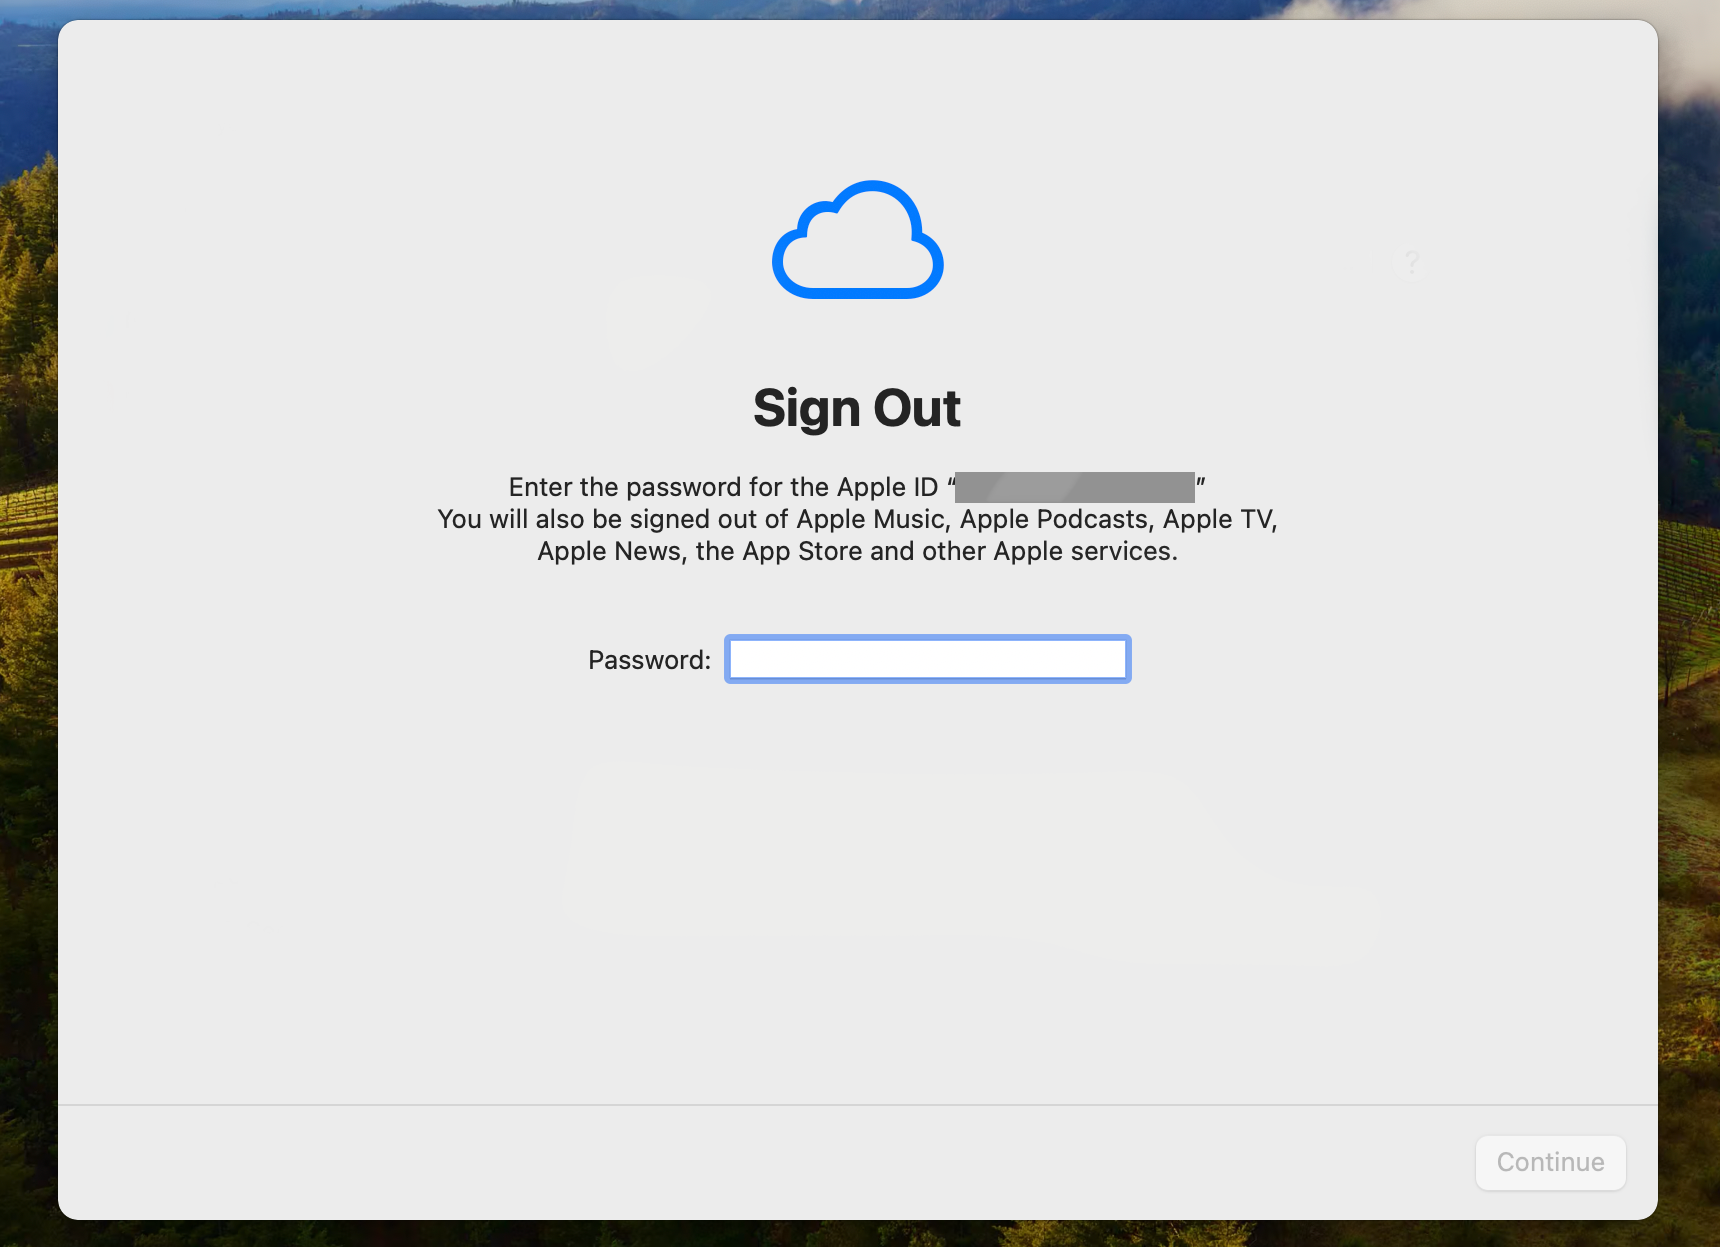
You might now be asked if you want to back up your Mac using Time Machine. Do this if you haven’t already, because once your data has been wiped, you won’t be able to get it back. For the final step, you’ll be asked to confirm that you want to perform the factory reset.
Click “Erase All Content & Settings” to continue.
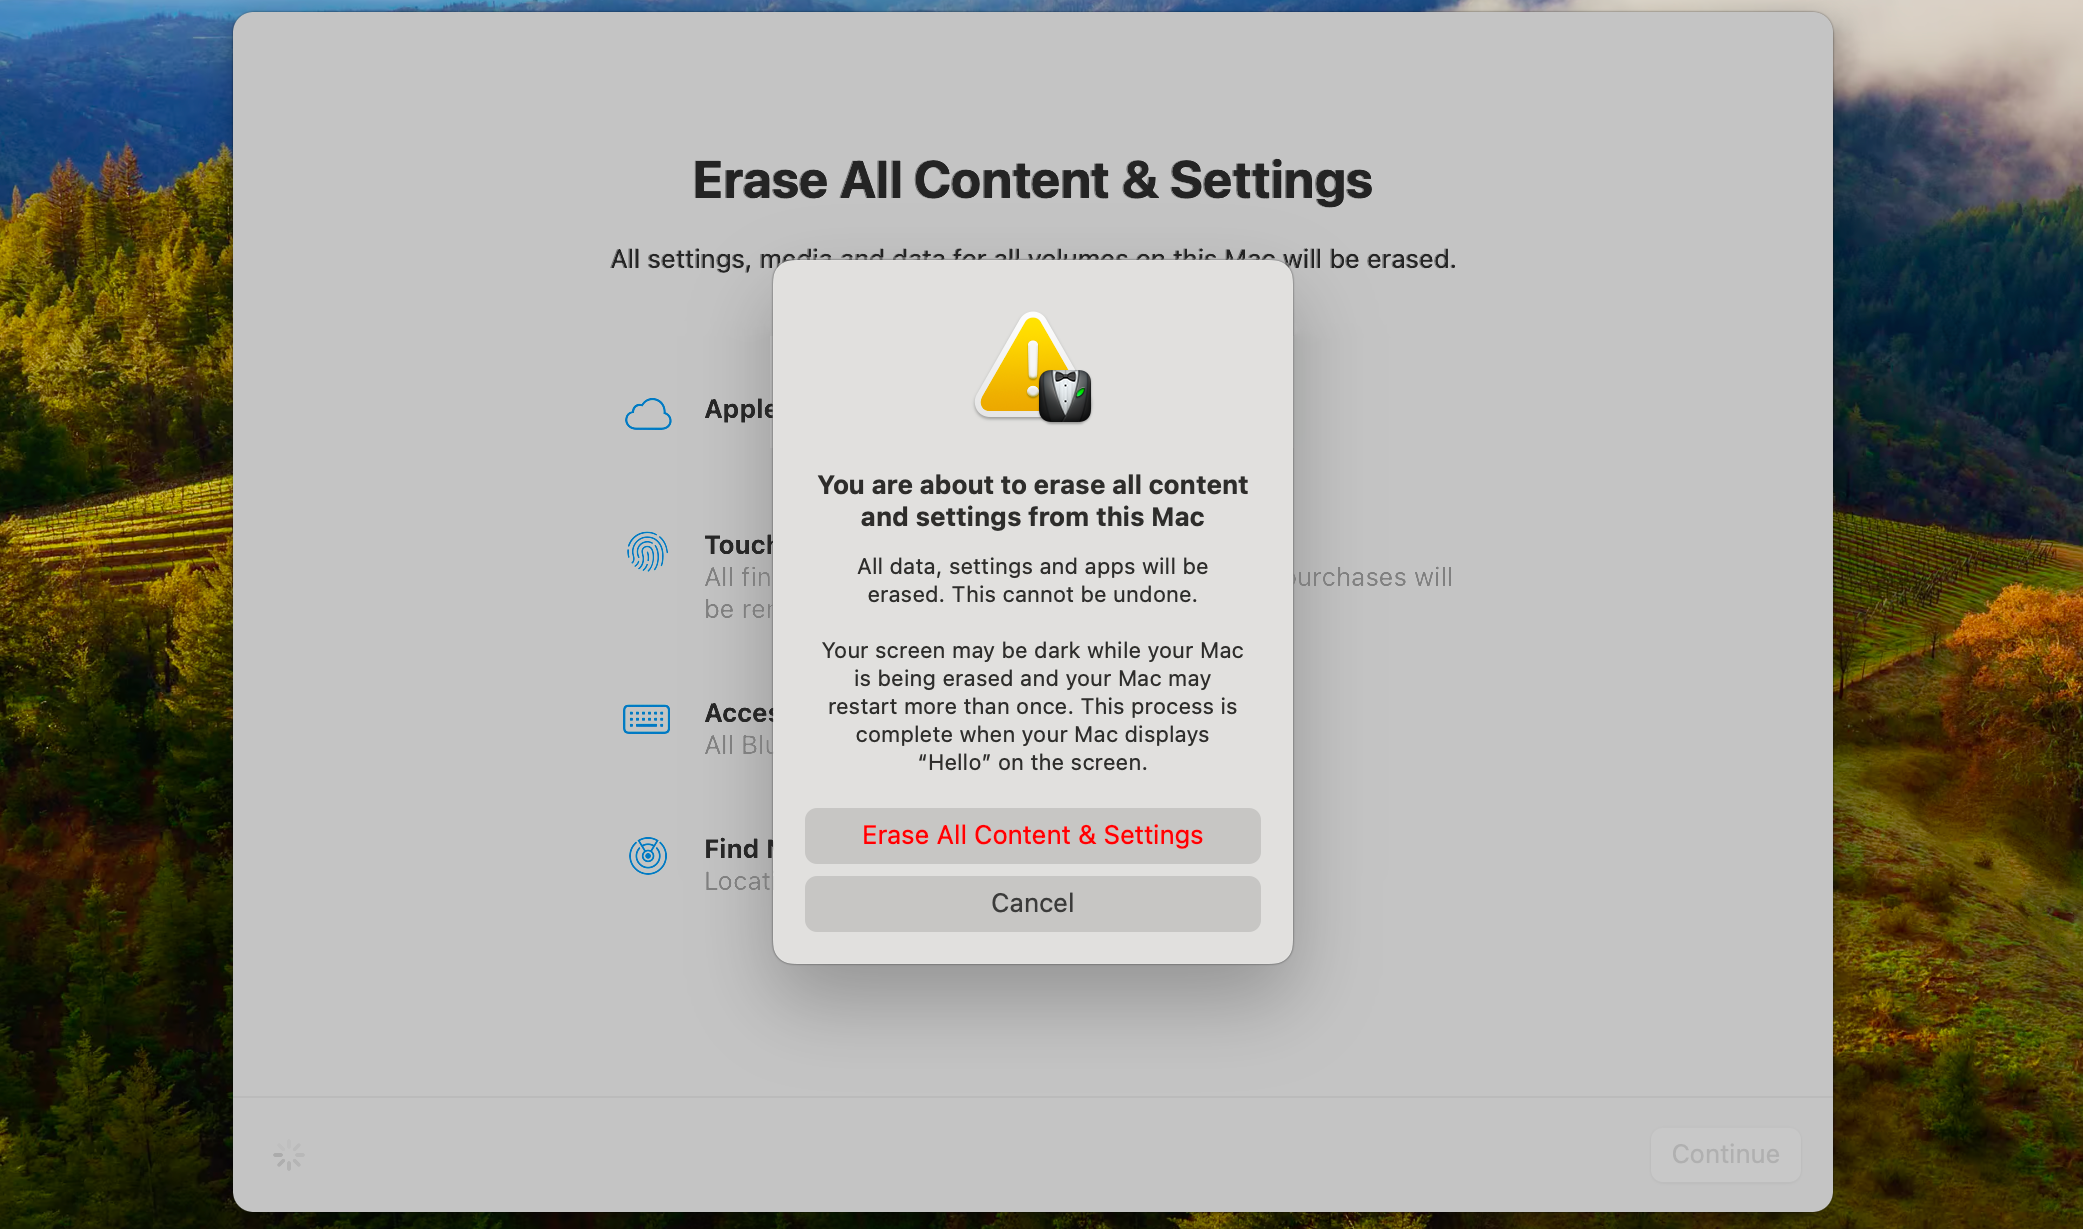
After clicking, your Mac will restart and show a progress bar as it erases all the content on your device. When it’s done, you’ll be asked to set up your Mac again. You can start from scratch as if it were a brand-new Mac, or hand it off to someone else to set up later.
How to Factory Reset an Older Mac
If you’re running macOS Big Sur or earlier, or you have a Mac that isn’t running Apple Silicon or doesn’t have a T2 security chip, you’ll need to perform a more complex series of steps to wipe your Mac and reinstall macOS—especially if you are going to sell it or give it away to someone else.
First, back up your files using Time Machine and ensure the backup was successful by examining the files on the external drive. If you don’t have backups, you will lose all the data stored on the Mac you’re about to wipe.
Next, you’ll need to perform several account sign-outs, which are important if you’re handing over your Mac to someone else:
- Sign out of iCloud at System Preferences > Apple ID > Overview > Sign Out.
- Sign out of iMessage in the Messages app by going to Messages > Preferences > iMessage > Sign Out.
- Sign out of iTunes if you have a Pre-Catalina version of macOS at Account > Authorizations > Deauthorize This Computer.
After that, you’ll need to enter Recovery Mode. Shut down your Mac (Apple Menu > Shut Down), then turn it back on and press Command+R when you see the Apple logo on the screen. Enter an Administrator password if necessary, then click “Disk Utility” in the menu that appears.
Once in Disk Utility, select “Macintosh HD” in the sidebar. Make sure you have backups, then click “Erase” in the toolbar. You will lose all data on the drive.
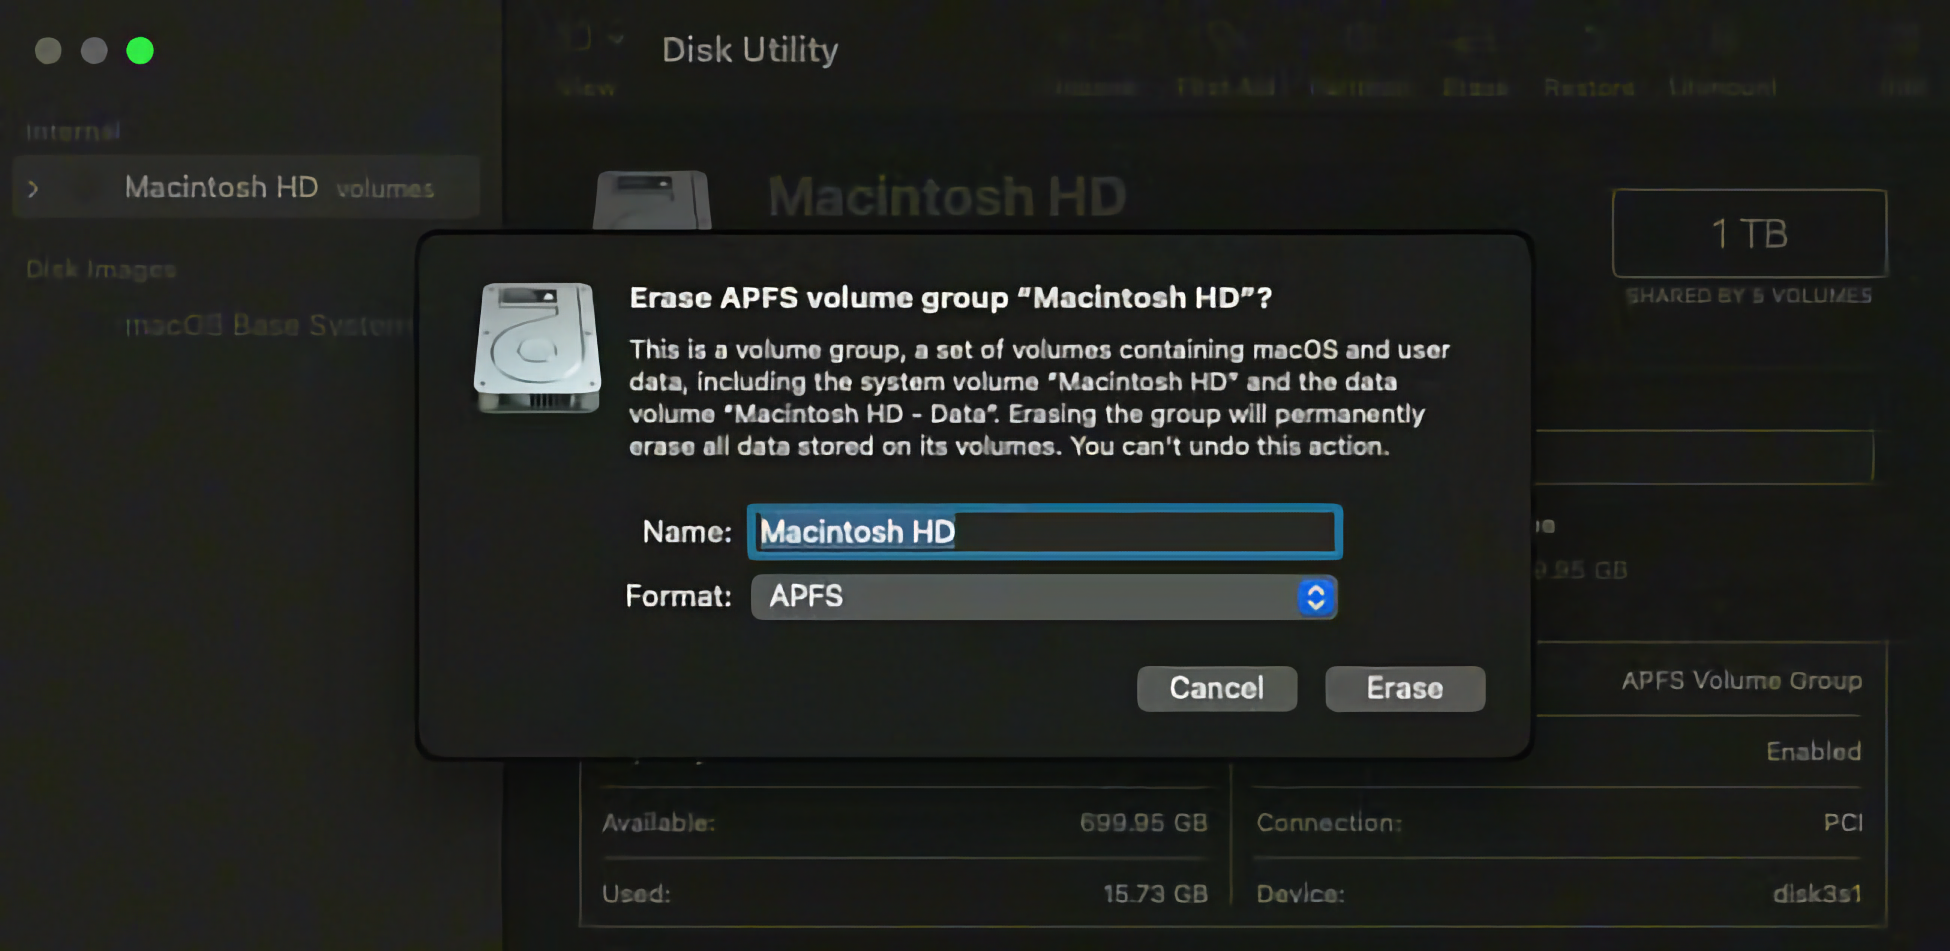
When you’re done erasing the drive, quit Disk Utility using the menu bar and select “Reinstall macOS” in the Recovery menu, then follow the on-screen instructions.
If you’re giving your Mac to someone else, press Command+Q at Setup Assistant and shut down the Mac. When you power it back on, press Option+Command+P+R and hold it for about 20 seconds. This will reset the NVRAM , which clears user settings from a special type of memory on your Mac. After that, you can either set up the Mac again or press Command+Q to shut down the Mac, and it’s ready for a new owner. Good luck!
A factory reset is a great way to make your Mac feel new again , and is essential if you’re planning to sell it. While you have to jump through a few hoops on older Macs, Apple has fortunately made the process on all the latest machines a lot easier. Just remember to back up all your essential data before you start.
Also read:
- [New] Unlocking Revenue How to Profit From YouTube Short Videos
- [Updated] In 2024, Dissecting Instagram's Per-Post Video Quota
- [Updated] The Ultimate Resource Compendium for Optimizing On-Screen Captioning for 2024
- How do I reset my Samsung Galaxy M14 4G Phone without technical knowledge? | Dr.fone
- How to Easily Hard reset my OnePlus 11 5G | Dr.fone
- How to Reset Tecno Spark Go (2024) Without the Home Button | Dr.fone
- How To Use Special Features - Virtual Location On Lava Yuva 3? | Dr.fone
- In 2024, Top 10 No-Cost YouTube SBD Tools
- The Freshest 20 Online Games for Instant Enjoyment
- Things You Dont Know About Samsung Galaxy M14 4G Reset Code | Dr.fone
- Title: Ultimate Guide: Performing a Complete System Restore on Your MacBook Air/Pro and Other Mac Models
- Author: Ian
- Created at : 2025-02-17 19:52:40
- Updated at : 2025-02-19 17:48:29
- Link: https://techidaily.com/ultimate-guide-performing-a-complete-system-restore-on-your-macbook-airpro-and-other-mac-models/
- License: This work is licensed under CC BY-NC-SA 4.0.