
Step-by-Step Guide: Integrating Full-System Colour Selection on Windows 10 PCs
Step-by-Step Guide: Integrating Full-System Colour Selection on Windows 10 PCs
Quick Links
Key Takeaways
- Install Microsoft’s PowerToys utility to quickly bring up a color picker and identify any color on screen in hex, RGB, or HSL format.
- Press Windows+Shift+C to copy color values, adjust colors, and add them to your saved color palette using the color picker window.
- You can change the Color Picker hotkey by navigating to PowerToys Settings > Color Picker, and setting a new hotkey.
Need to figure out a color quickly? Using Microsoft’s free PowerToys utility for Windows 10 , you can instantly bring up a color picker with a keyboard shortcut and use your mouse cursor to identify any color on screen in hex, RGB, or HSL format. Here’s how to do it.
Install PowerToys and Enable Color Picker
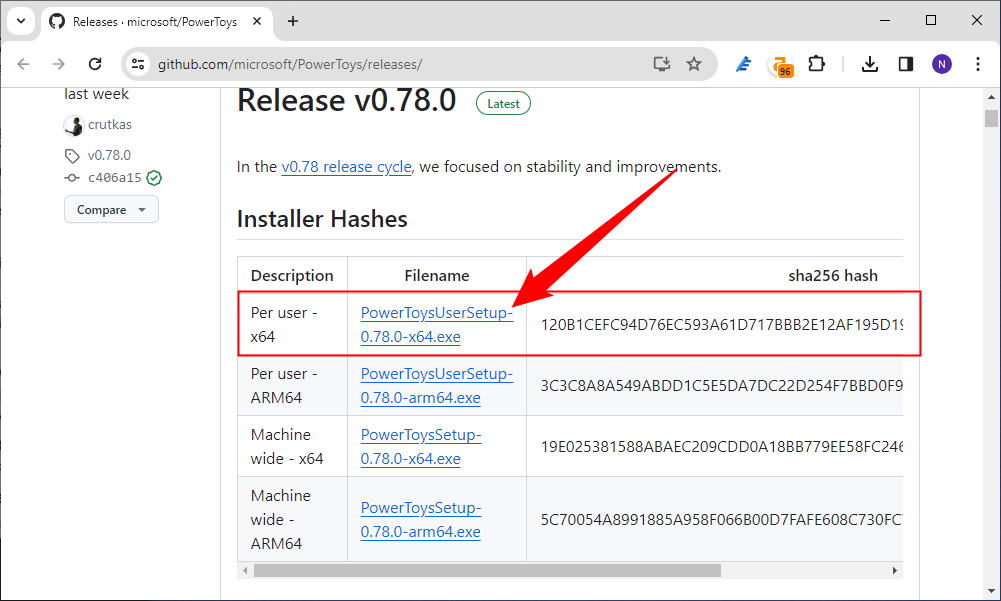
To use Microsoft’s handy system-wide color picker, you’ll need to download PowerToys from Microsoft’s website first. You’ll find the latest release listed toward the top of the download page linked above. Download an EXE file such as “PowerToysSetup-0.78-x64.exe” (The name will vary based on the latest release.) and run it.
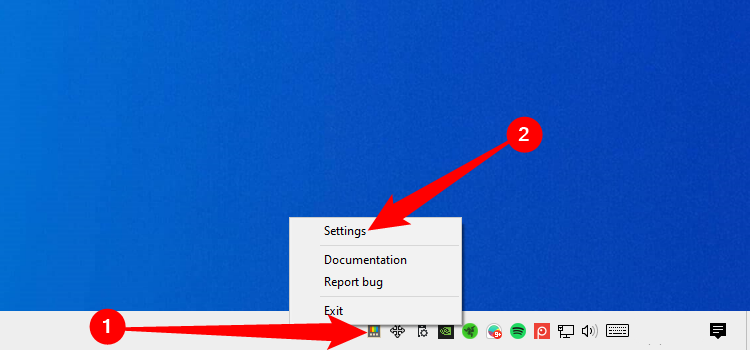
After the installation process is complete, launch PowerToys Settings by right-clicking the icon on your taskbar, or from your desktop or the Start menu.
Click “Color Picker” in the sidebar, then make sure that the “Enable Color Picker” switch is in the “On” position.
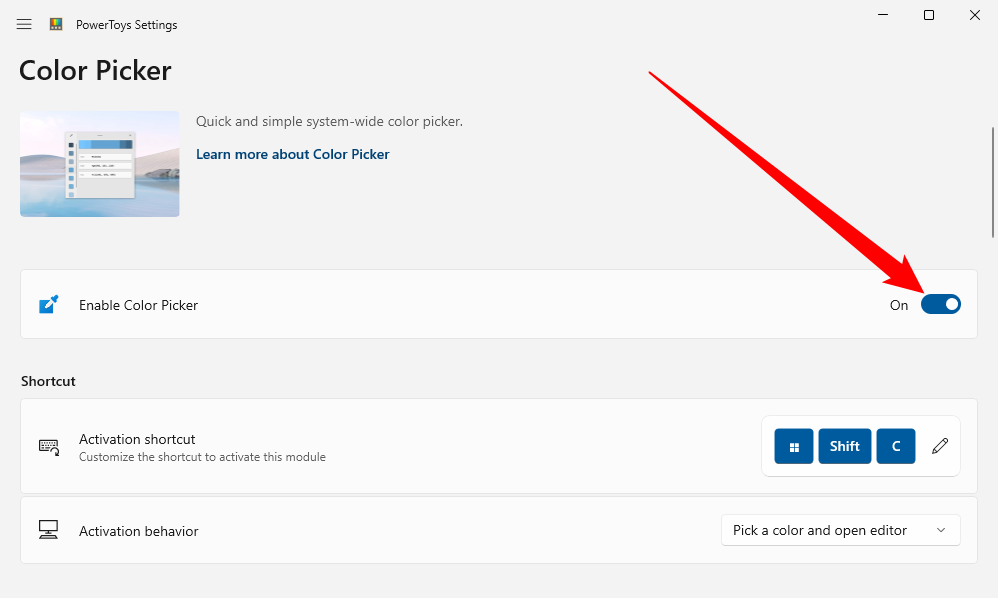
By default, you’ll use Windows+Shift+C to activate the color picker. You can change this keyboard shortcut to your preferred one from this screen, if you like.
Next, close PowerToys and get ready to grab some colors. The PowerToys Settings app does not need to be running for Color Picker to work.
Activate Color Picker With a Keyboard Shortcut
Once Color Picker is enabled, you can use it at any time by pressing Windows+Shift+C (or whatever keyboard shortcut you chose) on your keyboard. After pressing the shortcut, you’ll see a small pop-up box beside your mouse cursor that shows a square preview of the color you’re pointing to and the hexadecimal code (often called “hex” for short) for that color.

You can point your cursor at any color on screen that you want, including icons, applications, images, desktop backgrounds, the taskbar, and more. If you want more info on the color, click the left mouse button while hovering over it, and a window will pop up.
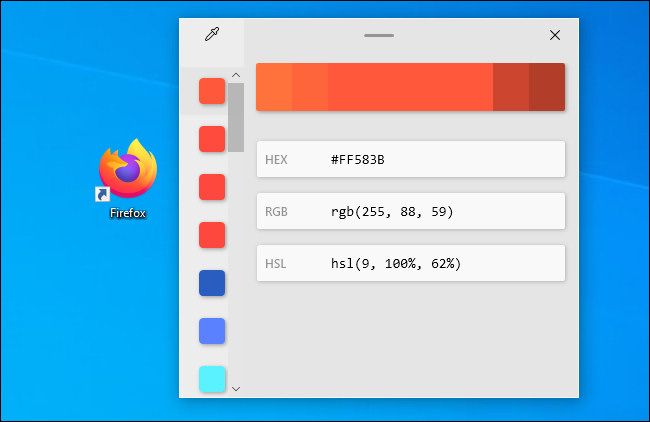
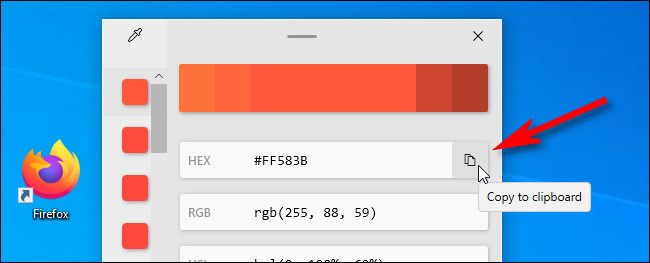
This window displays the hex color code, the RGB (red, green, blue) value, and the HSL (hue, saturation, lightness) value of the color you just selected. If you’d like to copy one of those values (as a text string) to the clipboard, hover over it and click the “copy” icon that appears.
Also, you can adjust the color value you just selected within Color Picker by clicking the center of the large color bar near the top of the window.
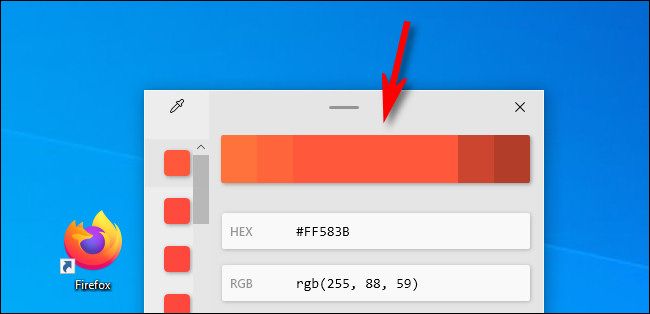
After clicking the color bar, you’ll see another screen with sliders that allow you to adjust the color with your mouse or by entering values with your keyboard.
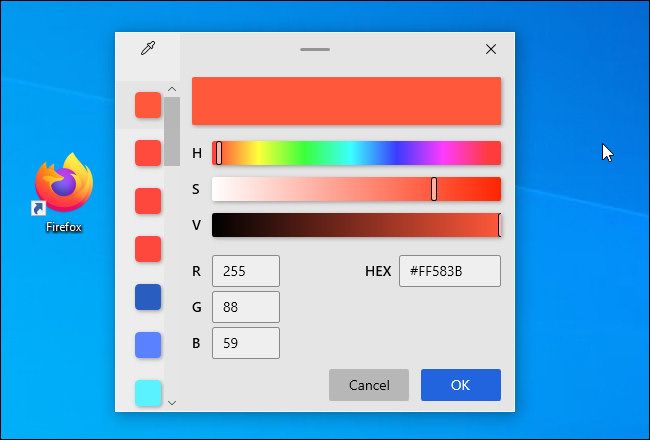
When you’re done, click “OK,” and then the color will be added to your saved color palette, which is the vertical column of boxes along the left side of the window. If you need to remove a color from the palette on the side of the window, right-click the color square and select “Remove.”
If you’d like to leave this window and pick another color, click the eyedropper icon in the upper-left corner of the window.
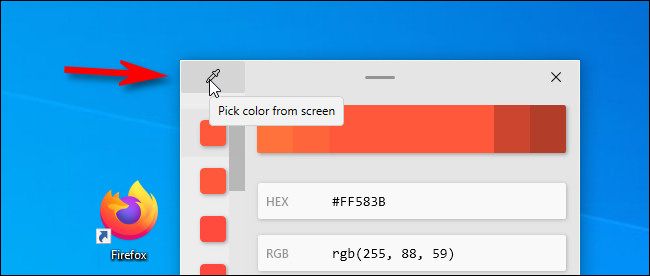
The detail window will close and you can repeat the process again, selecting any color you’d like.
To leave Color Picker at any time, press Escape on your keyboard or click somewhere to call up the detail window again and click the “X” button in the upper-right corner to close the window. Whenever you need Color Picker again, just hit Windows+Shift+C from anywhere and you’ll be back to picking colors in no time.
It’s a colorful world out there, so have fun!
Also read:
- [Updated] 2024 Approved Crafting a Digital Identity with Inspiring Instagram Captions
- [Updated] 2024 Approved Leading the Edge Professional Cameras That Rotate Full Circle - 2023
- [Updated] Synopsis of VLLO Consumer Voices
- [Updated] The Ultimate Sourcebook on Valheim Farming Techniques for 2024
- 3 Solutions to Hard Reset OnePlus Ace 2V Phone Using PC | Dr.fone
- Budget-Friendly Ultimate Docking Solution: Discover Our High-Tech 13-in-1 Dual 4K HDMI Dock at Just $49, Review & Buy Now!
- Hard Reset Meizu 21 in 3 Efficient Ways | Dr.fone
- How do I reset my Infinix Zero 5G 2023 Turbo Phone without technical knowledge? | Dr.fone
- How to Factory Reset Nokia C12 Plus in 5 Easy Ways | Dr.fone
- How To Fix iPhone 13 mini Could Not Be Activated/Reached Issue
- How to Perform Hard Reset on OnePlus 12? | Dr.fone
- How to Reset a Vivo Y100t Phone That Is Locked | Dr.fone
- How To Transfer Data From Apple iPhone 7 To Other iPhone 11 devices? | Dr.fone
- In 2024, How to Unlock OnePlus Open Pattern Lock if Forgotten? 6 Ways
- Three Solutions to Hard Reset Google Pixel 8 Pro? | Dr.fone
- Transform Your View with Ease: Simple Tips for Tweaking Display Options on Windows eOS
- Turn Off Screen Lock - K11 5G
- Title: Step-by-Step Guide: Integrating Full-System Colour Selection on Windows 10 PCs
- Author: Ian
- Created at : 2025-02-14 21:02:46
- Updated at : 2025-02-19 19:26:52
- Link: https://techidaily.com/step-by-step-guide-integrating-full-system-colour-selection-on-windows-10-pcs/
- License: This work is licensed under CC BY-NC-SA 4.0.