
Solutions to Repair Corrupt Excel File 2016 | Stellar
Solutions to Repair Corrupt Excel File
Summary: MS Excel can throw various errors due to corrupted Excel files. This blog discusses the error messages that indicate Excel file corruption and the methods to prevent data loss due to a corrupt file. It also discusses the reasons behind the corruption in Excel file and their solutions. It also mentions a “Stellar repair for Excel” tool that can help to repair the corrupt or damaged Excel file.

Is your Excel file corrupted? And you don’t have backup of your data? There is no need to worry. There are some simple solutions to repair Excel file 2019. But before heading towards the solutions, let’s discuss the possible reasons for Excel file corruption and how you can prevent losing your data.
Error Messages that Indicate Excel File Corruption
When an Excel file gets corrupted, different error messages appear. For example:
- “Excel found unreadable content in
. Do you want to recover the content of this workbook, click Yes.” - “Can’t find project and library.”
- “The workbook cannot be opened or repaired by Microsoft Excel because it is corrupted.”
- “Microsoft Excel has stopped working.”
Reasons Behind Excel File Corruption
The reasons for corruption in Excel file could be any of the following:
- Improper system shutdown
- Computer virus/malware attack/Hacker attack
- Outdated anti-virus definition
- Hardware failure
- Unintentional deletion of files
- Large Excel files
- Bad sectors on storage media
How to Avoid Data Loss Due to Excel File Corruption?
Excel users should follow the below precautionary measures to prevent data loss due to Excel file corruption:
1. Create an Automatic Backup Copy
When you create an Excel spreadsheet, it is advised to Save As your document, as follows:
- In Save As window, click Tools next to Save option.
- Select General Options from the drop-down menu.
- Then check the dialogue box Always create back up and click OK.

This will always create a backup of your Excel. If it’s deleted or corrupted at any time, it can be recovered.
2. Create Recovery File at Different Time Periods
Steps are as follows:
- Go to File and then click Excel Options.
- Click Save and then select the Save Auto Recover information every checkbox
- Add the required minutes and location. Ensure that Disable AutoRecover for this workbook only box is unchecked.

Methods to Repair Corrupted Excel 2019 File
Try using these 5 methods to restore your Excel file and recover data:
Method 1: ‘Open and Repair’ Excel Files
Excel automatically opens the corrupted file in Recovery Mode. If not, you can repair Excel file manually through the following steps:
- Click on the File and select Open.

- Go to the location where the corrupt workbook is stored. In the Open window, select the corrupt file.
- Click Open and then select Open and Repair.
- In the window that opens, click Repair.
If the Repair option doesn’t work, you can select Extract Data and try to extract the values and formulae safely from the corrupt file.
Method 2: Recover Data from Open Workbook
If you face issues while working in an Excel file, you can choose to return to the last saved version of the Excel file. For this:
- Click File. Then select Open.
- Double click on the name of the workbook (the one that is open in your Excel).
- Click Yes to reopen it.

- The workbook will now appear.
Please note that it will show the last saved version and changes made after that won’t be recovered.
Method 3: Set Calculation Option as Manual
You can also recover data from Excel workbooks that you’re unable to open. For this, you need to configure the calculation option as manual in Excel. You can do this through the following steps:
- Click on File. Select New and open a Blank workbook.
- From File, select Excel Options.

- From the Formulas category, under the section Calculation options, select Manual. Now click OK.

- Then click File, and select Open to open the corrupted or damaged Excel file.
Method 4: Recover Content by Using External Links
You can also recover specifically the content (leaving formulas/calculated values) from the workbook by using external references (to link Excel workbook). For this:
- Click on File, Select Open.
- Navigate to the folder that contains the corrupted workbook.
- Now, right-click on the file name of the corrupted workbook and click Copy.
- Click File button. Then, select New and create another blank workbook.
- In the first cell (A1), type =!A1 and press Enter.
- Select the corrupted workbook in the Update Values dialogue (if it appears). Then click OK.
- Select the relevant sheet in the Select Sheet dialogue (if it appears). Then click OK.

- Again, select the cell A1, go to Home and select Copy.
- Now select (start from the cell A1) an area equal to that of the data in the original workbook.
- Go to Home now and select Paste.
- Again, go to Home, and Copy the data (the same selection of cells).
- Go to Home, and then click on the arrow below Paste. Then click on Values.
By pasting values, you removed the links to the corrupted workbook and only the data is left behind.
Method 5: Excel Repair Software
If the above-mentioned methods do not help in repairing the corrupt Excel file, try an Excel repair software.
One of the most commonly used Excel repair tools is Stellar Repair for Excel. Its trial version is available for free download, which lets you scan and preview the repaired Excel files. Once you’ve ascertained the effectiveness of the software, you can save the file after activating the software.
Here’s the complete repairing process of the corrupt Excel file
Conclusion
This post shared the reasons behind Excel file corruption and precautionary measures to prevent data loss. It also outlined different methods to repair corrupt Excel file 2019. There are several in-built utilities in Microsoft Excel to repair corrupt workbooks and recover data from it. In case these methods didn’t work, you can use Stellar Repair for Excel – an easy-to-use DIY tool that can fix all Excel corruption errors and restore data with all original properties.
[Fixed] The Workbook Cannot Be Opened or Repaired By Microsoft Excel
An MS Excel workbook (.XLS/.XLSX) file may not open due to damage or corruption caused by various reasons, such as:
- Sudden power failure
- System crash
- Virus or malware intrusion
- Large or oversized Excel file
- Incompatible add-ins
- Drive errors
- Damaged MS Office/Excel program files
As a result, when you try to open or access a corrupt Excel document, the program displays errors, such as “The workbook cannot be opened or repaired by Microsoft Excel because it is corrupt.” This may lead to a data loss situation.

Methods to Fix ‘The Workbook Cannot Be Opened’ Error
When an Excel workbook gets corrupt, MS Excel automatically detects and starts the file recovery mode to open and repair the file. However, when it fails to repair the corruption or recover the Excel file automatically, it displays the error message, “The workbook cannot be opened or repaired by Microsoft Excel because it is corrupt.” In such a situation, you can follow these methods to repair and recover the Excel document manually.
If the manual methods fail to resolve the error, you can use an Excel repair software, such as Stellar Repair for Excel. The software repairs corrupt XLS/XLSX file, recovers all the data, and saves it in a new Excel document with 100% precision, while keeping the cell formatting and properties intact.
NOTE: Before performing the below methods to repair or recover Excel documents, create a backup copy of the original file. This will help you recover data by using an Excel repair tool and avoid permanent data loss.
1. Repair Excel Workbook Manually
If the automatic repair fails, you may try manual repair to fix the damage or extract the data from the damaged Excel workbook. The steps are as follows:
- Navigate to File > Open and then go to the location where the spreadsheet is located.
- In the Open window, select the corrupted workbook that you want to fix and then click on the arrow next to the Open button.
- From the available options, choose Open and Repair…

- Then click ‘Repair‘ if you want to recover maximum data from the workbook or click ‘Extract data‘ if the repair option fails to fix the issue. It will extract all the values, formulas, tables, etc., from the corrupt workbook.

If both options fail to fix the issue, head to the next method.
2. Remove Faulty or Incompatible Add-ins
Faulty or incompatible add-ins may also cause this error. To find and remove such add-ins, follow these steps:
- Press **Windows key + R.
**
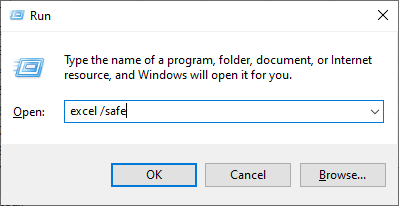
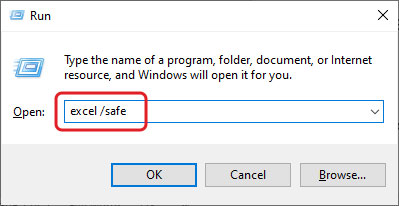
- Type Excel /safe and press ‘Enter‘ or click ‘OK.’ This opens MS Excel in Safe Mode.
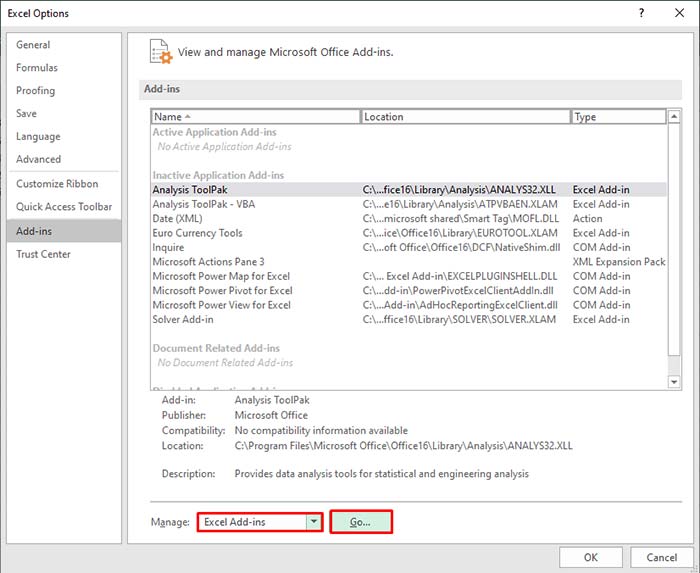
- Go to File > Options and then select ‘Add-ins.‘
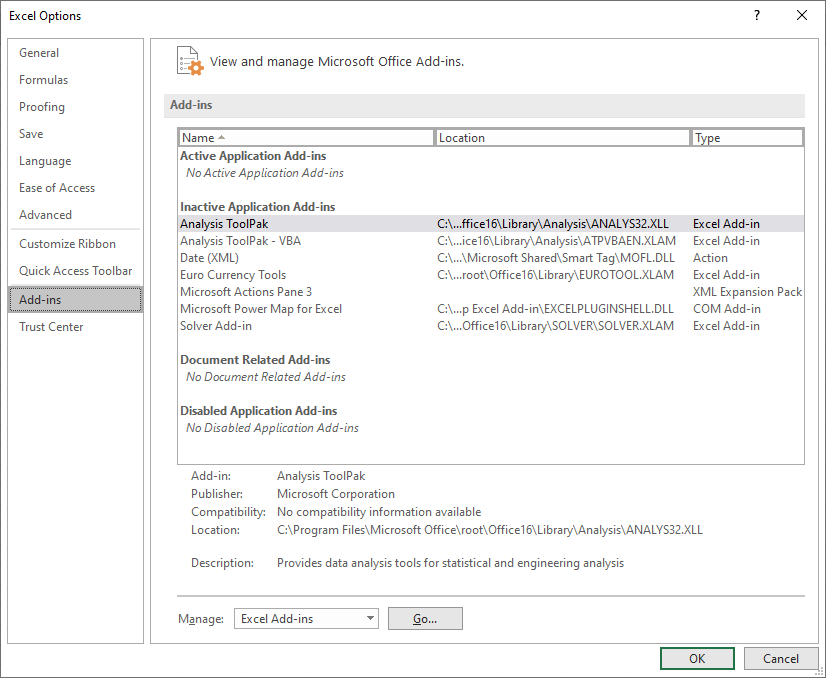
- Choose ‘Excel Add-ins‘ from Manage: option and then click on the Go button to view all Add-ins.
- Uncheck the checkboxes of Add-ins and then click ‘OK‘ to disable them.
Now close the Excel program and run it normally. Click ‘File > Open‘ and choose the Excel file you want to access.
3. Repair MS Office Installation
Damaged Excel program files may also lead to such errors. However, you can easily repair MS Office installation to fix the problem. The steps are as follows:
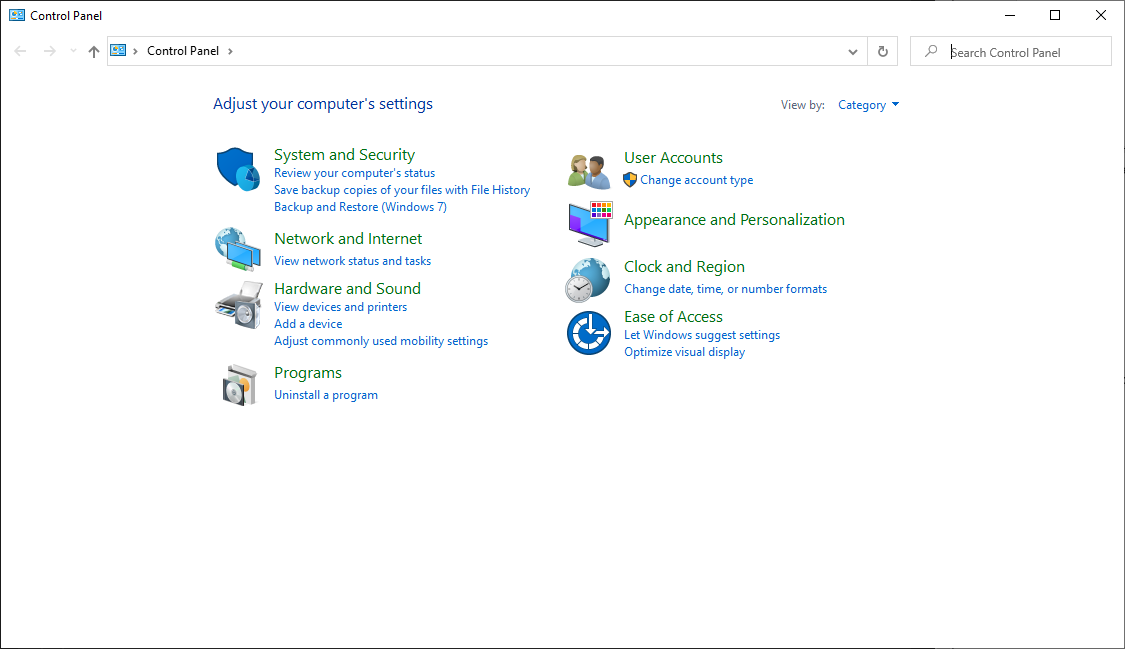
- Open Control Panel and select ‘Uninstall a program.‘
- Search and choose MS Office from the programs list. Then click on the ‘Change’ button.
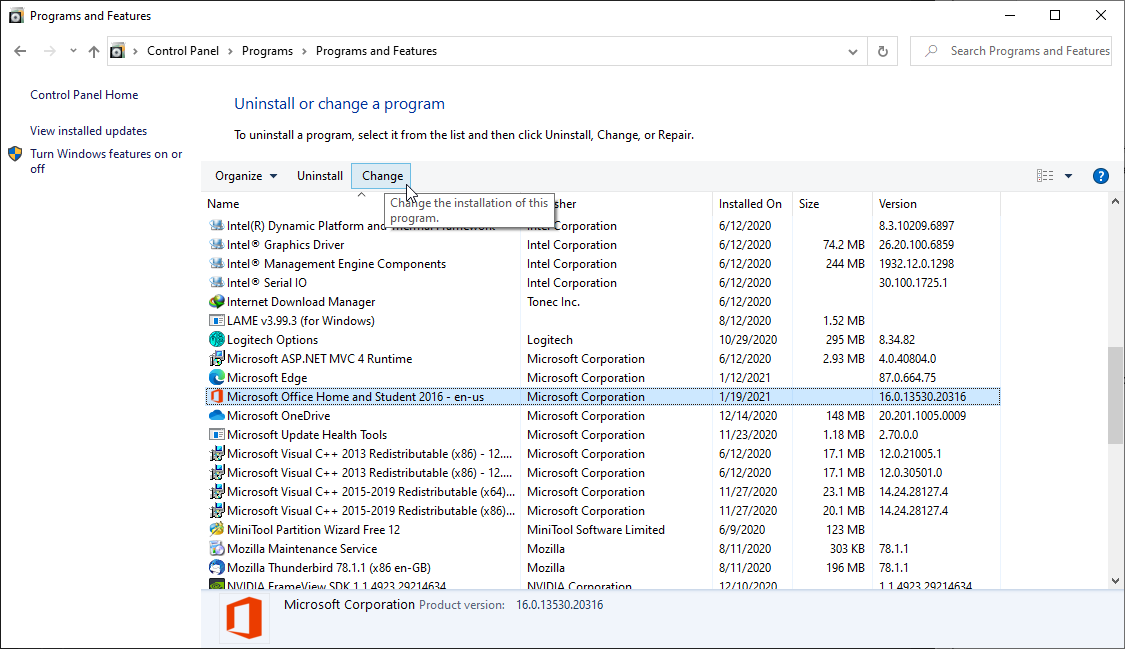
- Select ‘Repair’ and follow the wizard to fix the damaged program files.

If this fails to address the issue, you can uninstall and then fresh install MS Office on your system. Alternatively, try accessing the file on another PC.
4. Use Excel Repair Software
The best option is to use an Excel repair software, such as Stellar Repair for Excel , to repair the file, resolve the error, and access the Excel (XLS/XLSX) worksheet. The software can repair an Excel file without any size limitation.
After recovering the Excel file using the software, you can open it in any MS Excel program without encountering the error message.
Conclusion
A corrupt or damaged Excel workbook may lead to errors, such as “The workbook cannot be opened or repaired by Microsoft Excel because it is corrupt,” and cause a data loss situation. The most efficient way to fix such corrupt Excel files is to repair them by using an Excel repair tool, such as Stellar Repair for Excel.
Unlike manual methods that may fail to resolve the issue or lead to further damage, this software extracts the data from the damaged Excel file and saves it in a new Excel workbook. Thus, it is 100% safe to run on an original Excel file, as it does not overwrite or alter the original file.
The software is free to download. You can scan, repair, and preview a corrupt Excel file by using the demo version. Once you are satisfied with the results, activate the software to save the repaired Excel workbook data in a new sheet.
4 Ways to extract data from corrupt Excel file
Summary: Excel files can become corrupt due to numerous reasons. This blog will discuss the reasons behind the corrupted Excel files. Sometimes the file becomes inaccessible. This post includes four ways to extract data from a corrupt Excel file. It also mentioned Stellar Repair for Excel to repair severely corrupted files. The tool helps you recover data from damaged Excel files with complete integrity.
Imagine the frustration of an employee if an Excel workbook he took hours to complete became corrupted for some reason threatening to erase all the data saved in it. Not just that, a corrupted Excel workbook can wreak havoc for the organization too since it poses a risk of permanently deleting critical business information like work records or employee trackers.
Unless a backup of all important Excel files exists, recovering data lost due to damage/corruption to them is next to impossible. However, we’ve conducted some research and found some pretty neat hacks to help you extract data from corrupt excel files without much hassle.
Primary reasons triggering Excel file corruption
As we always point out, to solve a problem for good, getting to its root is imperative. Here are the main reasons that cause Excel file corruption. Knowing these reasons can help you keep Excel corruption at bay for a considerably long time.
- Abrupt system shutdown when you’re editing an Excel sheet
- Bugs / Defects in your Excel application or installation
- Hardware failures like bad sectors on the hard drive where Excel sheets are saved
- Virus Infection / Malware Attack
- Excessive data storage within a single Excel file
- Faulty Excel Macros and CSE Formulas
Depending upon the extent of damage, there can be several ways to perform corrupt Excel file repair.
How to repair corrupt Excel files?
There are a couple of manual methods that can help you repair corrupt Excel files .
- If the damaged Excel sheet can be opened, immediately save its copy; thereafter:
- Open it with a later version of Excel and save it as a new workbook.
- If this doesn’t work, open it in Excel’s latest version and save the workbook in HTML or HTM format.
- Once this is done, reopen the HTML file and save again in XLS format.
- Lastly, open the file and try saving it in SLK format (symbolic link)
Note: It is important to note that saving an Excel workbook in HTML format causes loss of features like custom views, scenarios, unused styles or number formats, natural language formulas, data consolidation settings, custom function categories, etc. In SYLK format only the active worksheet is saved so if using this method, you’ll need to repeat these steps for each worksheet.
- Use Excel’s inbuilt Repair function as follows:
- Launch Microsoft Excel and go to Office button -> Open
- In the Open dialog box, select the damaged Excel file
- On the bottom-right corner of the Open dialog box, you will find a drop-down next to Open Click on it and select Open and Repair
- This will launch the inbuilt Repair module of Excel and you’ll see a dialog box asking you to select an option from Repair or Extract Data
- Click on Repair to initiate the repair process.
- If this doesn’t work, repeat steps 1-4, and when Excel asks you to select an option, select Extract Data from corrupt excel file. Thereafter, follow the instruction Excel shows and you should be able to retrieve your data, but you may end up losing some formulas.
- If you cannot open the Excel, download Spreadsheet viewer from the Microsoft website and open the file using this program. Thereafter copy all data into a new Excel.
Note: This method will cause much of your formatting, formulas, and more to be lost.
- You can download Open Office from its official website OpenOffice.org and try opening the Excel in it. The two programs are very similar so all data should automatically align in the correct place and with the correct formatting.
Note: With this method, VBA code cannot be recovered due to incompatibility between OpenOffice.org and Excel.
Full-proof method for corrupt Excel file repair
If you find the above methods confusing, or you wish to perform Excel file repair without having to face any data and formula loss, or you cannot achieve the desired results with any of these methods, stop wasting any more time with methods that will only frustrate you more. Instead, download the sure-shot solution for dealing with severe Excel corruption –Stellar Repair for Excel and relax!

Stellar Repair for Excel is the best choice for repairing corrupt or damaged Excel (.XLS/.XLSX) files and restoring everything to a new blank Excel file. This competent software can skillfully repair single as well as multiple XLS/XLSX files while preserving worksheet properties and cell formatting. If you have this product by your side, you don’t need to worry about Excel corruption errors ever again.
To Conclude
Instead of giving up on corrupted Excel sheets, try repairing them with the simple tricks we’ve described. And if they don’t work, keep calm and turn to Stellar Repair for Excel.
How to Repair Excel Document on a Flash Drive
Summary: Microsoft Excel files are stored on flash drives if they need to be transferred between systems or if they need to be backed up. But sometimes unforeseen issues can corrupt the Excel sheets stored on flash drives. When that happens, it can be an arduous task to repair Excel documents on a flash drive. Through this post let us try to understand the reasons why Excel sheets stored on flash drives can get corrupted and how users can resolve them easily.
In this digital age, we all work with computers, files, and documents. Flash drives or USBs are common ways of storing data in an external place. Be it for a meeting or for a party playlist, these devices come handy when one wants to transfer data or access the files stored elsewhere.
You may need to access your data from another location. That’s when a USB flash drive might come in handy. And, that’s exactly why Excel sheets too end up on flash drives; either that or for backup purposes. However, there are many instances where an Excel file stored in a USB gets corrupted when one tries to access the file. The error message you get while trying to open the Excel file would be a great clue for figuring out the exact reason behind corruption.
This blog will provide insights into what are the reasons for the corruption of a USB and how the users can repair Excel on flash drive that has been corrupted.
Reasons for USB inaccessibility
Sometimes flash drives or USBs can become unresponsive due to numerous reasons. There are two types of corruption – logical and physical. Physical corruptions occur due to broken stems and connectors, broken circuits, NAND gate, not recognised, RAW, need to format, not accessible, and dead drives (no power supply).
One of the main reasons behind such an error could be that the USB drive has been infected by some virus. This can affect any file – not only the ones which are there in the USB drive but also the ones which are there in the PC/Laptop where you connect the USB drive. It is recommended that you scan the USB drive with reliable antivirus software to detect viruses.
There can be various other reasons that may make your USB corrupt or unresponsive. But there are very slim chances that you will be able to recover a flash drive that has physical damage. However, you can try to run the check disk on the USB drive to fix the drive. We will be discussing this as you read on.
Recovery Methods for Corrupted Flash Drives
There are 3 tried and tested recovery methods. Try them and see which one works out for you.
- Restoring Excel Files from Windows backup
To bring back your old Excel files, fixing up the corrupt file is your best option. Importantly note that this method would work only if your system’s Windows backup option has been enabled.
Step-by-step process for restoring your older Excel files:
- Connect your USB drive
- Go to “My Computer”->USB Drive->Check if the file exists
- Right click on the excel file and click on the restore previous versions

- You will now see a list of older versions which were created
- Select one the backups and click on “restore”
- Using Command Line to Recover Excel Files
In case you are looking to repair Excel on flash drive, you can also resolve it by using the command line. Just follow the below steps to see if you can recover the excel files.
- Connect your USB Flash drive
- Open “Run” (press Windows+R) and then open “cmd”

- Type “attrib -h -r -s /s /d (USB Drive Letter):\*.*” where the (USB Drive Letter) is the drive letter you can find using “My Computer”
- Once this has been completed, Windows will start repairing your files
- After the process gets over, try accessing the excel file to see if the data has been recovered
- Running a “Check Disk” on flash drives
Follow the below steps while the USB flash drive has been plugged into your computer:
- Open “Run” and then open “cmd”
- Type in “chkdsk /X /f (USB Drive Letter)” where the “(USB Drive Letter)” is the letter of the corrupted USB Drive. You can get this letter easily from the “My Computer”.

It will now check your disk to and correct any corrupted records.
What if none of these methods works?
In case none of the above methods works to repair Excel document on a flash drive, then you would need a professional Excel repair software such as Stellar Repair for Excel to restore your files. Such software not only help repair corrupted Excel files on flash drives but also help in recovering the data stored within them in their original format.
Stellar Repair for Excel resolves corruption problems in Excel files and recovers all formulas, charts, cell formatting, and more from them. It can repair multiple Excel files in one go. Equipped with a fully interactive GUI, working with this product is extremely easy.

To sum it up
Although flash drives are quite popularly used, they are not the most reliable of storage devices. These drives can fail anytime without warning. Thus, always back up your data on other more robust devices instead of flash drives. We hope that with the above tried and tested methods you will easily be able to repair Excel document on flash drive if need be. For any queries that you have, feel free to leave a comment below!
How to Fix “Errors were detected while saving Excel” Error?
When trying to save the Excel file, you might face unexpected errors. The “Errors were detected while saving Excel” is one such error. It can also occur when using VBA in Excel. The complete error message appears as:
**“Errors were detected while saving [file name]. Microsoft Excel may be able to save the file by removing or repairing some features. To make the repairs in a new file, click Continue. To cancel saving the file, click Cancel.”
**
The error can occur if the features (Pivot tables, charts, macros) used in the Excel file get corrupted . However, there could be several other reasons behind the occurrence of the error. Let’s discuss them.
What Causes the “Errors were detected while saving Excel” Error?
There are various reasons why you encounter this error. Here are some of them:
- Incompatible pivot table in the Excel file
- Large or uncompressed images in the Excel file
- File-sharing properties are not allowing file saving
- Excel file is corrupted
- Large-sized Excel file
- File version incompatibility
- VBA code is corrupted
Ways to Fix the “Errors were detected while saving Excel” Error
You’re not able to save the Excel file if there is no storage space on your hard drive. So, first check if your hard drive has sufficient storage space to save the file. If this is not the case, then it might happen that your antivirus program is interrupting the saving process. To check this, temporarily disable your antivirus program and then try to save the file. If still your Excel is throwing the “Errors were detected while saving Excel” error, then follow the below given methods to fix the error:
Method 1: Open the Excel in Safe Mode and Disable the Add-ins
When you open Excel in safe mode, it opens without the third-party add-ins. This helps in finding out if any add-ins are causing the error.
Here’s how to open the Excel in safe mode:
Open the Run window by pressing Windows key + R.
Type excel /safe in the Run window.
?Next, click on OK.
It will open Excel in safe mode.
Now, try to open and save the affected file.
 ?
?If you are able to save the file without any issue, then this means that the error has occurred due to third-party add-ins or settings. You can try disabling the add-ins to fix the issue. To do this, follow these steps:
- First, open Excel.
- Then, go to the File tab and click Options.

- In Excel Options, click on the Add-ins

- Under the Manage section, select Excel Add-ins and then click on the Go
In the Add-ins dialog box, unselect the add-ins under the Add-ins available option and click OK.
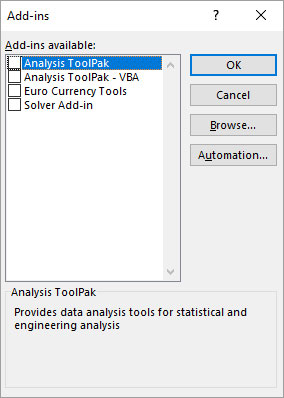
Note: Disabling add-ins does not remove them from the system. To remove them permanently, you need to uninstall them.
Method 2: Check the Excel File Name
Some users have observed this error when saving the Excel file with an invalid name. You can check the file name and ensure that it should not contain more than 218 characters. If the name exceeds the required limit, then try shortening the file name or move the file to a folder with a short path name.
Method 3: Copy the Data from the Affected File to a New File
If you are not able to save the Excel document, then try copying the data from the affected file to a new Excel file. Then, save the new file with a different name. This helps in resolving the issue.
Method 4: Check and Provide File Permissions
You may experience the “Errors were detected while saving Excel” issue when you do not have desired permissions to modify the folder in which your Excel file is located. To modify the folder, you should have read, write, and create permissions. You can check and provide the desired permissions using the below steps:
- Navigate to the Windows Program Files and then find the desired folder (where the Excel file is saved).
- Right-click on the folder and then choose Properties.
- Select the Security tab and then click
- Click on Change Permissions in the Advanced Settings
- Click Administrators and then click Edit.
- Now set the Apply to drop-down button to This Folder, Subfolder, and Files.
- Click on the Full Control field and then click Apply > OK.
Method 5: Check Pivot Tables in Excel Sheet
You can review Pivot tables to see if they are causing the “Errors were detected while saving Excel” error. To do so, follow the below steps:
Click Power Pivot > Manage.
Check the tabs in the Power Pivot
Check if all the formulas used in the table are correct. Sometimes, even a small typo can create an issue in Excel.

Method 6: Repair Your Excel File
The “Errors were detected while saving Excel” issue can also occur if the Excel file is corrupted. In such a case, you can take the help of the built-in utility in Excel – Open and Repair to repair your Excel file. Here’s how to use the tool:
- In Excel, click the File tab and then click Open.
- Click Browse to select the desired file.
- The Open dialog box is displayed. Click on the corrupted file.
- Click on the arrow next to the Open button and then click Open and Repair.
- Click on the Repair

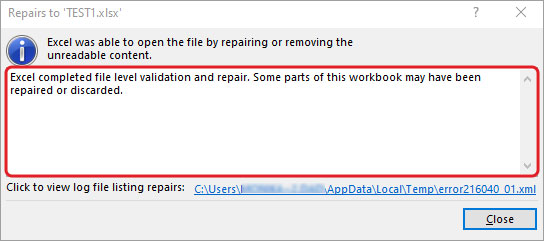
After repair, a message will appear (as shown in the below figure).
Click Close.
However, sometimes, the Open and Repair utility fails to fix the file if it is severely corrupted or large-sized. In such a case, you can take the help of a third-party Excel repair software, such as Stellar Repair for Excel. The tool performs a comprehensive scan of the corrupted Excel file to fix the issues and recover all the items from the file without changing the original formatting. It can recover pivot tables, charts, images, engineering formulas, etc. The tool is compatible with Windows 11/10/8.1/8/7. You can download the free trial version of the tool to evaluate its functionality.
Closure
Many Excel users reported facing the situation when they are saving the Excel file. You can check the file’s compatibility to fix the “Errors were detected while saving Excel” issue. If you are getting this error in a Macro-enabled file then you can try deleting the VBA project from a document to resolve the issue. However, deleting the entire VBA code cannot be a better solution as it can lead a data loss in the Project you are working on. In the above article, you have learned the reasons behind the issue and discovered how to fix the error. Follow the methods and if none of them works then try using Stellar Repair for Excel. It is an advanced tool that can quickly repair corruption in Excel worksheets at any level. It lets you restore the corrupted components from the corrupted file without removing the existing data.
[Fixed] Excel VBA Runtime Error 9: Subscript Out of Range
Summary: The runtime error 9 in Excel usually occurs when you use different objects in a code or the object you are trying to use is not defined. This post will discuss the reasons behind the Excel VBA error “Subscript out of Range” and the solutions to resolve the issue. It will also mention an Excel repair tool that can help fix the error if it occurs due to corruption in worksheet.
Many users have reported encountering the error “Subscript out of range” (runtime error 9) when using VBA code in Excel. The error often occurs when the object you are referring to in a code is not available, deleted, or not defined earlier. Sometimes, it occurs if you have declared an array in code but forgot to specify the DIM or ReDIM statement to define the length of array.
Causes of VBA Runtime Error 9: Subscript Out Of Range
The error ‘Subscript out of range’ in Excel can occur due to several reasons, such as:
- Object you are trying to use in the VBA code is not defined earlier or is deleted.
- Entered a wrong declaration syntax of the array.
- Wrong spelling of the variable name.
- Referenced a wrong array element.
- Entered incorrect name of the worksheet you are trying to refer.
- Worksheet you trying to call in the code is not available.
- Specified an invalid element.
- Not specified the number of elements in an array.
- Workbook in which you trying to use VBA is corrupted.
Methods to Fix Excel VBA Error ‘Subscript out of Range’
Following are some workarounds you can try to fix the runtime error 9 in Excel.
Method 1: Check the Name of Worksheet in the Code
Sometimes, Excel throws the runtime error 9: Subscript out of range if the name of the worksheet is not defined correctly in the code. For example – When trying to copy content from one Excel sheet (emp) to another sheet (emp2) via VBA code, you have mistakenly mentioned wrong name of the worksheet (see the below code).
1 | Private Sub CommandButton1_Click() |

When you run the above code, the Excel will throw the Subscript out of range error.
So, check the name of the worksheet and correct it. Here are the steps:
- Go to the Design tab in the Developer section.
- Double-click on the Command button.
- Check and modify the worksheet name (e.g. from “emp” to “emp2”).

- Now run the code.
- The content in ‘emp’ worksheet will be copied to ‘emp2’ (see below).

Method 2: Check the Range of the Array
The VBA error “Subscript out of range” also occurs if you have declared an array in a code but didn’t specify the number of elements. For example – If you have declared an array and forgot to declare the array variable with elements, you will get the error (see below):

To fix this, specify the array variable:
1 | Sub FillArray() |
Method 3: Change Macro Security Settings
The Runtime error 9: Subscript out of range can also occur if there is an issue with the macros or macros are disabled in the Macro Security Settings. In such a case, you can check and change the macro settings. Follow these steps:
- Open your Microsoft Excel.
- Navigate to File > Options > Trust Center.
- Under Trust Center, select Trust Center Settings.
- Click Macro Settings, select Enable all macros, and then click OK.

Method 4: Repair your Excel File
The name or format of the Excel file or name of the objects may get changed due to corruption in the file. When the objects are not identified in a VBA code, you may encounter the Subscript out of range error. You can use the Open and Repair utility in Excel to repair the corrupted file. To use this utility, follow these steps:
- In your MS Excel, click File > Open.
- Browse to the location where the affected file is stored.
- In the Open dialog box, select the corrupted workbook.
- In the Open dropdown, click on Open and Repair.
- You will see a prompt asking you to repair the file or extract data from it.
- Click on the Repair option to extract the data as much as possible. If Repair button fails, then click Extract button to recover data without formulas and values.
If the “Open and Repair” utility fails to repair the corrupted/damaged macro-enabled Excel file, then try an advanced Excel repair tool, such as Stellar Repair for Excel. It can easily repair severely corrupted Excel workbook and recover all the items, including macros, cell comments, table, charts, etc. with 100% integrity. The tool is compatible with all versions of Microsoft Excel.
Conclusion
You may experience the “Subscript out of range” error while using VBA in Excel. You can follow the workarounds discussed in this blog to fix the error. If the Excel file is corrupt, then you can use Stellar Repair for Excel to repair the file. It’s a powerful software that can help fix all the issues that occur due to corruption in the Excel file. It helps to recover all the data from the corrupt Excel files (.xls, .xlsx, .xltm, .xltx, and .xlsm) without changing the original formatting. The tool supports Excel 2021, 2019, 2016, and older versions.
Simple ways to Open Corrupt Excel file Without any Backup
Summary: The blog describes simple ways to open corrupt Excel file without any backup. It explains some manual workarounds that you can try to open the file. Also, it mentions about an Excel file repair tool that can quickly fix the corrupt file and recover data from it.
Do you have an Excel file that does not open because of corruption issue? And every time you try to open it, an error message ‘the file is corrupt and cannot be opened’ pops-up?

Excel File Corruption Message
Also, you don’t have a healthy backup of the Excel file to restore the data? If so, you can try repairing the corrupt file by using a few simple yet effective manual workarounds mentioned below.
How to Open a Corrupt Excel File without Backup?
Following are some manual methods that can help you open a corrupt Excel file:
Method 1: Repair Corrupt Excel File
When attempting to open a corrupt file, Excel automatically starts ‘File Recovery’ mode to repair the file. But, if the recovery mode doesn’t start, try Microsoft Excel’s built-in ‘Open and Repair’ feature to manually repair the file.
To use this feature, perform the following steps:
Step 1: Open a Blank workbook in Excel, and then click File > Open.
Step 2: In the Open window, browse and select the corrupt file.
Step 3: Click the arrow that is beside the Open tab, and select Open and Repair.

Open and Repair Option
Step 4: Implement one of the following:
- Click the Repair button. (This is to recover as much data as possible.)
- Click the Extract Data button. (This is to recover values and formulas from the Excel file if the repair process fails to recover the entire data.)

Excel Built-in Repair Options
If using Open and Repair does not work , move to the next method.
Method 2: Disable the Protected View Feature
Some Excel users have reported that turning off the ‘protected view’ feature in Excel helped them open the corrupt file. You can also try to disable this feature and open the file. To do so, follow these steps:
Step 1: Open a blank Excel file, click on File > Options.
Step 2: In the Excel Options window, select Trust Center, and then click Trust Center Settings.

Excel Trust Center Settings
Step 3: Click OK.
Now check if you can open the corrupt file. If not, try implementing the next method.
Method 3: Look For Automatically Recovered Excel File
If you have Excel’s AutoRecover feature enabled, you’ll have access to a copy of the Excel file corrupted or lost due to application crash, power outage, or accidental deletion.
The ‘AutoRecover’ feature saves Excel worksheets at a temporary location after a certain time interval. It saves the worksheets automatically and is turned on by default to reduce the chance of data loss.
Check if you can recover corrupted Excel file by following these steps:
Step 1: In Excel, open a Blank workbook.
Step 2: Go to File and click Options.

Figure 5 – Excel Options
Step 3: In the Excel Options dialog box, click Save, and then copy the ‘AutoRecover file location’.

Excel Options Window
Step 4: Open File Explorer window and paste the copied AutoRecover file location, and press Enter.
Step 5: A list of saved Excel files will be displayed. Choose the file you want to recover.
TIP: Use Excel’s AutoBackup feature to reduce chances of data loss, by saving a previous version of your spreadsheet automatically.
Use an Excel File Repair Software
If the above manual methods fail, repair the corrupt Excel file by using a third-party software, such as Stellar Repair for Excel**.** The software helps repair Excel (XLS and XLSX) files easily and effectively.

Read this: How to repair corrupt Excel file using Stellar Repair for Excel?
Some key features of Excel Repair software are as follows:
- Fixes all errors in the MS Excel file.
- Repairs multiple damaged Excel files in a go.
- Recovers chart, chart sheet, table, cell comment, image, formula, and sort & filter.
- Preserves properties and cell formatting of Excel worksheets.
- Previews recoverable Excel file data before saving.
- Recovers all data components from the corrupt files and saves them in a new blank Excel file.
- Compatible with Excel 2019, 2016, 2013, 2010, 2007, and lower versions.
Conclusion
You can try the workarounds discussed in the blog to open a corrupt Excel file without a backup. Disabling the protected view feature can help you open the file. If the issue persists then try repairing the corrupted Excel file using the Open and Repair utility. Although, it may not be able to fix a severely corrupted workbook. In such a case you can use Stellar Repair for Excel . It is an advanced tool that can help you repair a corrupted Excel file with 100% integrity.
Also read:
- [New] Transformative Tips Making an Indelible Mark in the Digital World
- [Updated] 2024 Approved TikTok User Birthday Visualization Pixels, Type, Elapsed
- [Updated] In 2024, Step-by-Step Guide to iPhone's Dynamic Images
- [Updated] The Exclusive Guide to Best 4K Screens for Mac Devotees
- Comprehensive Tutorial to Update System Fonts in Windows 11 Interface
- Different Methods for Resetting Poco X5 Phones with Screen Locked and Not | Dr.fone
- How do I reset my OnePlus Ace 2 Phone without technical knowledge? | Dr.fone
- How to Downgrade Apple iPhone 8 without iTunes? | Dr.fone
- How to Reset a Infinix Smart 8 Plus Phone That Is Locked | Dr.fone
- In 2024, How to use Pokemon Go Joystick on Honor 90? | Dr.fone
- In 2024, Methods to Change GPS Location On Nubia Red Magic 9 Pro+ | Dr.fone
- Recover Apple iPhone 15 Plus Data From iOS iTunes Backup | Dr.fone
- Resolve Compile Error in Hidden Module in Excel 2019 Causes & Solutions | Stellar
- Review Alert! The DDPai Mini3 - Bringing a New Level of Entertainment to Dashcams
- Top 6 Ways to Transfer Text Messages from Vivo Y55s 5G (2023) to Other Android Devices | Dr.fone
- Unlock android phone if you forget the Oppo A38 password or pattern lock
- Your Complete Guide To Reset Xiaomi Redmi Note 13 5G | Dr.fone
- Title: Solutions to Repair Corrupt Excel File 2016 | Stellar
- Author: Ian
- Created at : 2025-01-18 16:07:58
- Updated at : 2025-01-21 20:37:28
- Link: https://techidaily.com/solutions-to-repair-corrupt-excel-file-2016-stellar-by-stellar-guide/
- License: This work is licensed under CC BY-NC-SA 4.0.