
Repair Office 2010 Files (Word, Excel and PowerPoint)on Windows | Stellar
Repair Office 2016 Files (Word, Excel and PowerPoint)on Windows
If you frequently work with Microsoft Word (.docx), Excel (.xlsx), and PowerPoint (.pptx) files, then issues like file inaccessibility or corruption won’t be new to you.
Let’s discuss some common scenarios which may lead to corrupt MS Office 2016 files:
Scenarios behind Microsoft Office Files Corruption
Scenario 1 – Disruption during Data Migration
You decide to move Office files from your hard drive to other removable media. However, when you try to access the data within the files post-migration, you may find Word, Excel, and PowerPoint files showing gibberish characters. Due to a power surge, sudden system shutdown, and internal mechanical failure, the files may have turned corrupt.
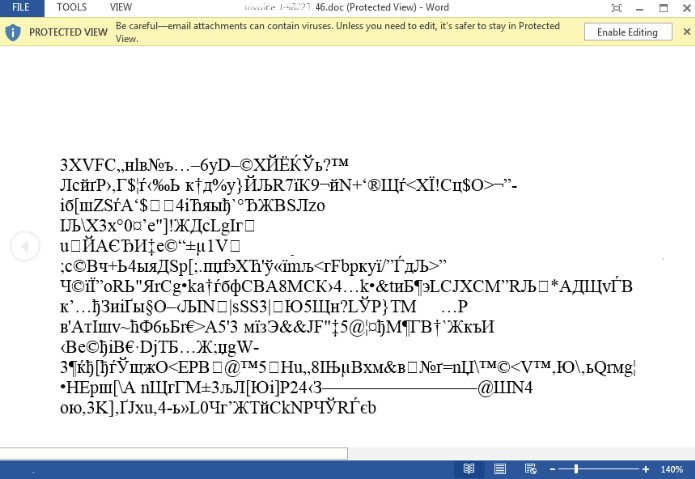
Figure 1- Microsoft Word file showing garbage characters
Scenario 2 – Office Files and Registry Entries Become Infected
When you open or use the Microsoft Office application, it crashes as soon as it opens. You assume that an add-in was causing the problem and restart the Office application without add-ins loaded, but the application still crashes. This may happen because of a virus infecting the Office files and registry values, thus leading to corrupt or damaged Office files.
Scenario 3 – Inaccessible or Lost Data
Suppose all your Office files are stored on a USB device, and you unplugged the device while it was still open in Windows. Now, when you attempt to open a Word or an Excel file, all the data is gone. Unsafe removal of USB or any other external storage device may corrupt the data inside your Office files or turn the file inaccessible.
How Can You Deal with Microsoft Office Files Corruption?
Here are a few solutions that can help you fix or repair Office 2016 Files Corruption:
Solution 1 – Use Microsoft in-built Repair Utility
Microsoft recommends using its in-built repair utility, ‘Open and Repair’, to fix corrupt Office files. Follow these steps to understand how you can use the utility to repair the corrupt Word, Excel, and PowerPoint files:
- Launch the MS Office application whose file you want to repair:
- To repair corrupt Word (.doc, .docx) files, launch MS Word
- To repair corrupt Excel files (.xls, .xlsx) files, launch MS Excel
- To repair corrupt PowerPoint (.ppt, .pptx) files, launch MS PowerPoint
- Click File, and then click the Open tab.
- Click Navigate to the location or folder where the Word, Excel, or PowerPoint file is stored.
- Select the corrupt file you want to repair by single-clicking on it, and then find the Open button and click on the drop-down menu next to it.
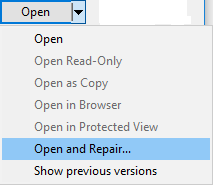
- From the drop-down menu, click the Open and Repair option and follow the subsequent instructions to repair Office 2016 files.
Solution 2 – Repair Office 2016 Installation
Try repairing the Office installation to fix the MS Office files. The steps to repair your Office installation may vary depending on the operating system you are using.
For Windows 7
- Open your PC’s control panel
- Click Programs
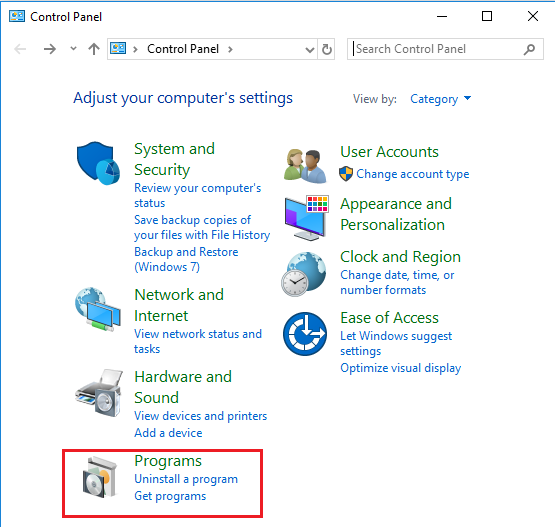
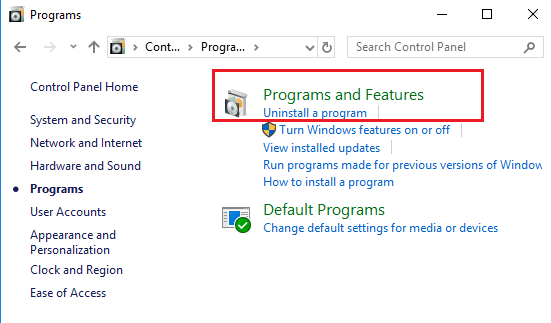
- Click Programs and Features, and then click Uninstall a program option
- Right-click on the Office application you want to repair, and then click Change
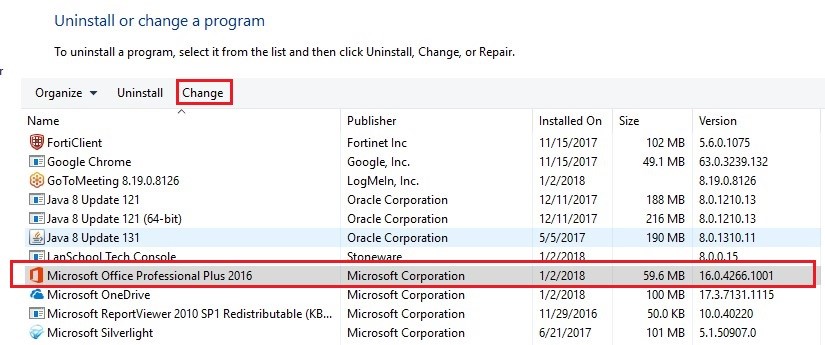
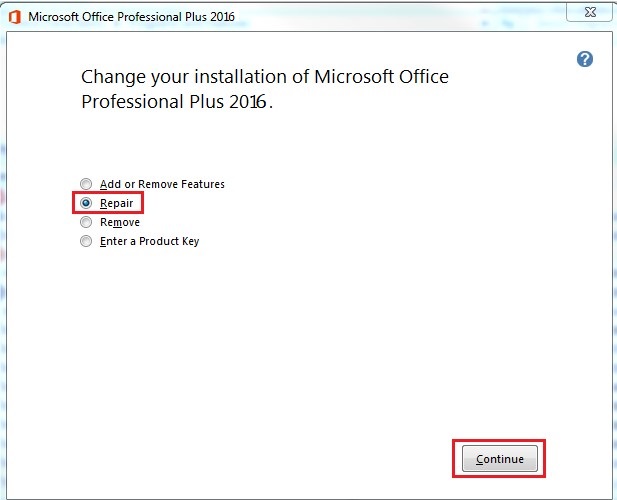
- Under Change your installation of Microsoft Office Professional Plus 2016, choose Repair and then click Continue.
For Windows 10
- Right-click the Start button, and type in Apps & Features (For Windows 10)

NOTE: This step will work for Windows 10/8/8.1/7 and Vista
- Click Programs from the window that opens, click on the MS Office product you want to repair, and then click on Modify
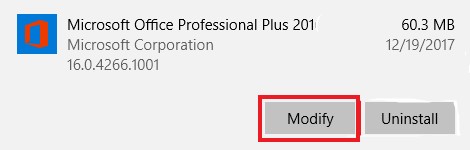
Note: Following the step will repair the entire Microsoft Office suite even if it contains only one application you want to repair such as an Excel or PowerPoint file. But, in case you have a standalone app installed, try to locate that application by name.
- Under Change your installation of Microsoft Office Professional Plus 2016, choose Repair, and then click Continue to initiate the repair process.
- Once the repair process completes, you’ll be prompted to restart your PC. Click Yes
Solution 3 – Use Stellar Toolkit for File Repair
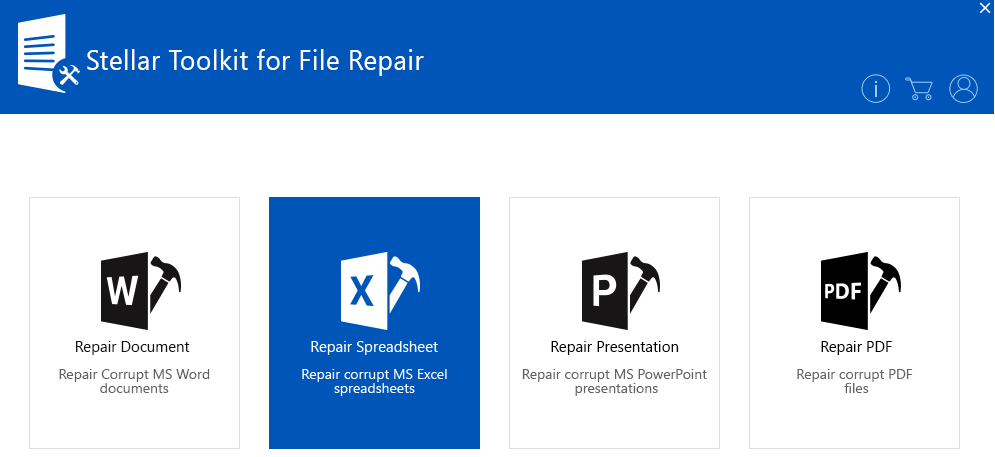
Repair MS Office 2016 files by using Stellar Toolkit for File Repair . This software comprises four essential utilities that can help you repair corrupt MS Word, MS Excel, MS PowerPoint, and PDF files.
The toolkit helps repair corrupt Office 2016 and other version documents and files while maintaining the original file format, which is less likely achievable with inbuilt methods. Follow these steps to repair MS Office 2016 documents by using the Office file repair tool:
- Download and install Stellar Toolkit for File Repair.

- Launch the software.
- From the software’s main interface, select the MS Office file you want to repair.
- From the window that pops up, select the corrupted file to be repaired.
Note: If you don’t know the exact location of corrupt office files or if they are large in number, you can locate the files by using the Find/Search option included in the software.
- After selecting the file, click the Scan button to initiate the repairing process.
- Once the scanning process is complete, all the recoverable information is displayed in the software’s left-hand panel. Click on any item to preview it before recovery.
- To save the repaired data, click the Save button, and enter a destination of your choice.
- Click OK.
Conclusion
This post outlined possible scenarios and their causes that may lead to corruption in MS Office 2016 files. It also emphasized how the inbuilt methods such as Open and Repair, and Repair Office Installation help to resolve the corruption issues. But these are not competent enough to resolve all the errors. With Stellar Toolkit for File Repair, you can resolve all sorts of corruption issues and recover data of Office 2016 files – Excel, Word, PPT, and PDF – in their original state.
Resolve Compile Error in Hidden Module in Excel: Causes & Solutions
The hidden module in Excel refers to a container with VBA codes, custom queries, and complex macros. The compile error in a hidden (protected) module in the Excel worksheet usually occurs when doing different activities on a macro-enabled sheet, such as merging .xls files. The error can result in macros execution failure. You need to quickly resolve this compile error to restore full functionality of the VBA code. Below, we’ll be discussing the solutions to fix this Excel error. But before that, let’s see why this error occurs.
You may encounter the Compile error in hidden module due to one of the following reasons:
- The code in the workbook is not compatible with the Excel application.
- Manual queries created in a previous version are no longer compatible with your current version of Excel.
- Missing references.
- Invalid .exe files (control information cache files) are automatically created with ActiveX control insertion in Excel file.
- Protected module is corrupted.
- The workbook with hidden module is damaged or corrupted.
- Incompatible add-ins.
- Incompatible Excel file version.
- The module is protected or password-protected.
- Missing or corrupted mscomctl.ocx file.
Excel can throw the compile error while compiling the code that exists in the protected module. So, first check the error and identify the hidden module that is creating the issue. You can unprotect the module. Also, ensure that you have permission to access the VBA code in the module. If the error still exists, follow the below troubleshooting methods.
Method 1: Re-register ActiveX Control Files or mscomctl.ocx Files
You can get the compile error in the Excel file, containing the VBA code related to ActiveX controls or OCX files. The ActiveX control files and OCX files (mscomctl.ocx files) are the components of Microsoft’s standard controls library. The compile error in the hidden module can occur if these files are missing. In this case, you can use the Regsvr32 tool to re-register the OCX files. The Regsvr32 is a command-line utility to register and unregister OLE controls in the Windows registry.
Method 2: Delete .exd Files
The .exd files are temporary files created by Excel when inserting ActiveX controls objects. These temporary files can lead to a compile error if they are corrupted. So, if this issue has occurred, particularly in the Excel file containing ActiveX controls, then deleting .exd files might fix the issue. To delete the .exd file, follow the below steps:
- First, open the Run window by pressing the Windows+R keys.
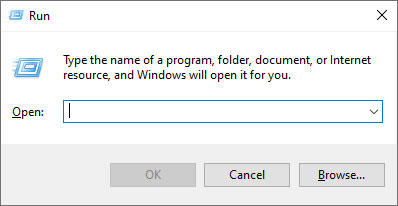
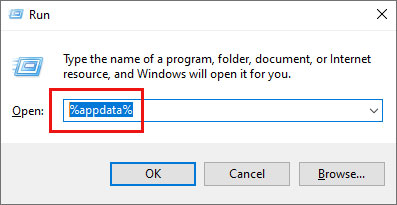
- In the Run window, type %appdata%.
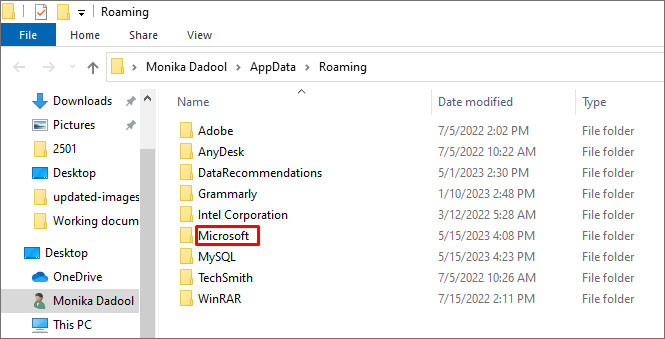
- In the Roaming window, click on the Microsoft option.
- Under Microsoft, you will see a list of folders. Search and click on Forms.
- Right-click on a file with .exd extension and select Delete.
- Once you delete the .exd files, restart your Excel application.
Method 3: Rollback the Office Updates
MS Office updates or upgrades may also cause the compile error in hidden module in Excel. If the error has occurred after downloading the recent Microsoft Office updates, try reverting to the previous version or uninstalling the recent updates to fix the issue.
Method 4: Unselect Missing References
The compile error in hidden module determine path in Excel can also occur if your file contains a reference to object library/type library, which is labelled as Missing. You can locate, check, and uncheck the references marked as ‘Missing’ to fix the issue. Here are the steps:
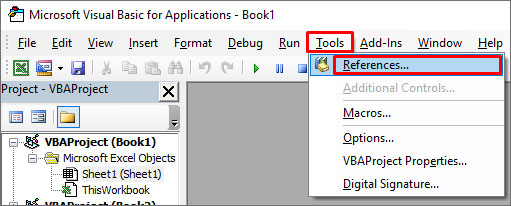
- Open your Excel and press Alt + F11 keys.
- The Visual Basic Editor is displayed.

- Go to the Tools option and then click References.
- In the References-VBAProject window, under Available References, search and unselect the references starting as “Missing”.
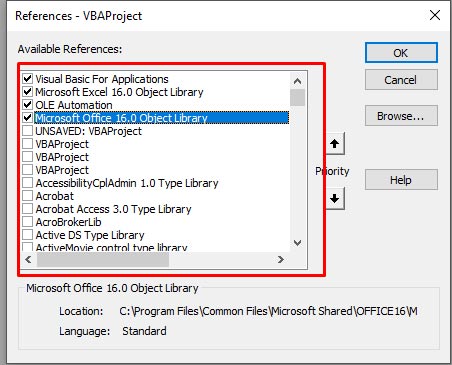
- Click OK.
Method 5: Check the Code in Module
The compile error in hidden module can occur if there are issues in the code within the module. The problems include incorrect or missing syntaxes, missing parameters/references, or the code contains incompatible functions or a wrong name of the object. You can check and fix these issues in the code by opening the VBA editor.
Method 6: Check and Remove Add-ins
In Excel, the compile error in macro-enabled files can also occur due to incompatible add-ins. You can check and disable the add-ins in Excel using the below steps:
- First, open the Run window and type excel /safe and then click OK. The Excel application will open in safe mode.
- Now try to open the affected Excel file. If it opens without the error, then check and remove the latest installed Excel add-ins.
- Navigate to the File option and then select Options.
- In the Excel Options window, click Add-ins.
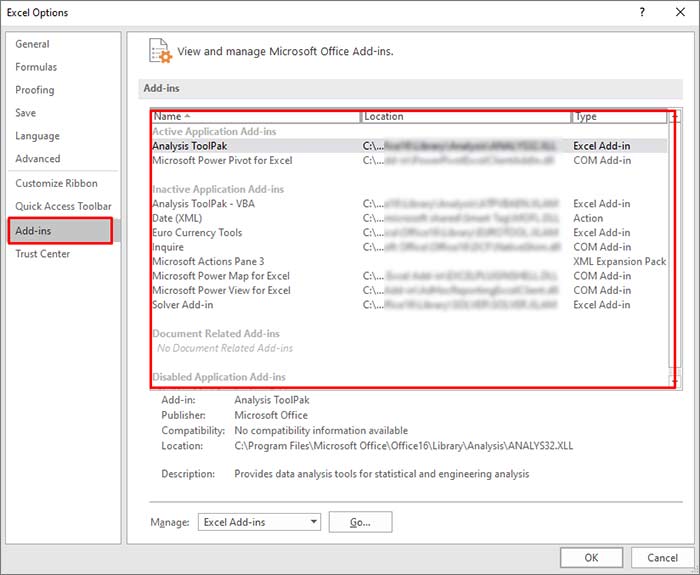
- Under Add-ins, search and select the latest add-ins, and then click on Go.
- In the Add-ins window, uncheck the add-ins and then click OK.

- Restart Excel and then check if the error is fixed or not.
Method 7: Repair the Corrupt Excel File
Corruption in the Excel file can affect the macros in the hidden module, which may result in the compile error. In such a case, you can try repairing the Excel file using Microsoft’s inbuilt utility -Open and Repair. To use this tool, follow these steps:
- Open your Excel application.
- Click the File tab and then click Open.
- Click Browse to select the affected workbook.
- The Open dialog box will appear. Click on the corrupted file.
- Click the arrow next to the Open button and then Open and Repair.
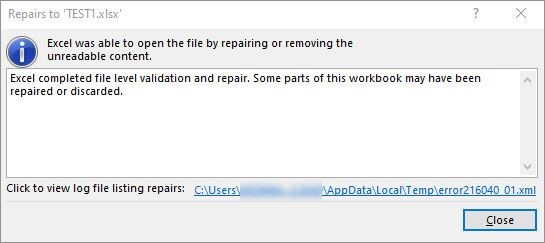
- You will see a dialog box with three buttons - Repair, Extract Data, and Cancel.

- Click on the Repair button to recover as much of the data as possible.
- After repair, a message is displayed. Click Close.
What if None of the Above Solutions Works?
If the above methods fail to get rid of the “compile error in hidden module” in Excel, then use an Excel repair tool such as Stellar Repair for Excel. This tool is specifically designed to repair the corrupted Excel file. It can recover all the components from corrupted Excel file (macros, queries, formulas, etc.) without changing their original formatting. The tool is compatible with all Excel versions and can be downloaded on a Windows system. You can download the free trial version of Stellar Repair for Excel to scan the corrupted Excel file and preview the data.
Closure
You can get the “compile error in hidden module” when Excel detects any issue while compiling the code in a protected module. It can occur when there is an issue with the macro-enabled Excel workbook or Excel add-ins. You can follow the above-mentioned methods to fix the issue. If the error occurs due to corruption in the database file, then you can try Stellar Repair for Excel . It can repair severely corrupted Excel files. It also helps recover all the Excel workbook’s components, including macros and queries. The tool has a simple and user-friendly interface.
Recover Excel Files from Virus-Infected Pen Drives for Free
Summary: Imagine you lost your important Excel file on which you had been working since the morning and in the next moment you realized that the file was not saved and you just lost hours of work. Wondering how to deal with this situation? Read this blog to know how Stellar free data recovery software can help you.

From making annual reports to business growth representation figures, excel is a commonly used program for organizing data, creating pivot tables, charts etc. People from all walks of life, know the importance of Excel and the part it plays. Although it is a common file, there is a probability that you may accidentally delete excel files while working or are unable to access it due to unexpected errors. In addition, one of the major issues users face is to recover excel files from a virus infected pen drive.
Pen drives have made it possible to store and carry our important files such as excel, word document, photos, videos, etc. with us day in and day out. They just fit perfectly in our pockets and are compatible with almost every device; hence, they are widely used for transferring data from one system to another. But what if your pen drive is infected by a virus and due to it you end up losing your excel files, how will you recover your excel files for free?
A user reported that his pen drive got virus-infected and to remove the virus from it, he ran an antivirus program which removed the virus but also deleted excel files stored on it.
When your pen drive is infected by a virus, the first thing you ought to do is stop using it, even not for removing virus as an antivirus utility may remove your files as well. Further, if you have a backup, then you can recover your excel files from it, else you can use these free data recovery methods to recover your excel files.
1. Free File Recovery Software Approach
Stellar Windows Data Recovery – Free Edition is an easy to use tool to recover files from a virus-infected pen drive. The software is equipped with powerful utilities to recover lost and deleted files for free. Further, it supports a wide range of file systems and is efficient in recovering files such as Excel, emails, word files, photos, audio and video files.
Using Stellar Windows Data Recovery – Free Edition, you can recover your files from all storage devices for free. Here’s how the software works:
- From the website, download Stellar Windows Data Recovery – Free Edition. Connect your pen drive to your system and launch the software
- On ‘Select What to Recover’ screen, select file types from the given option that you wish to recover. For instance, if you want to recover photos, then under Multimedia Files, select ‘Photos’ and click on ‘Next’
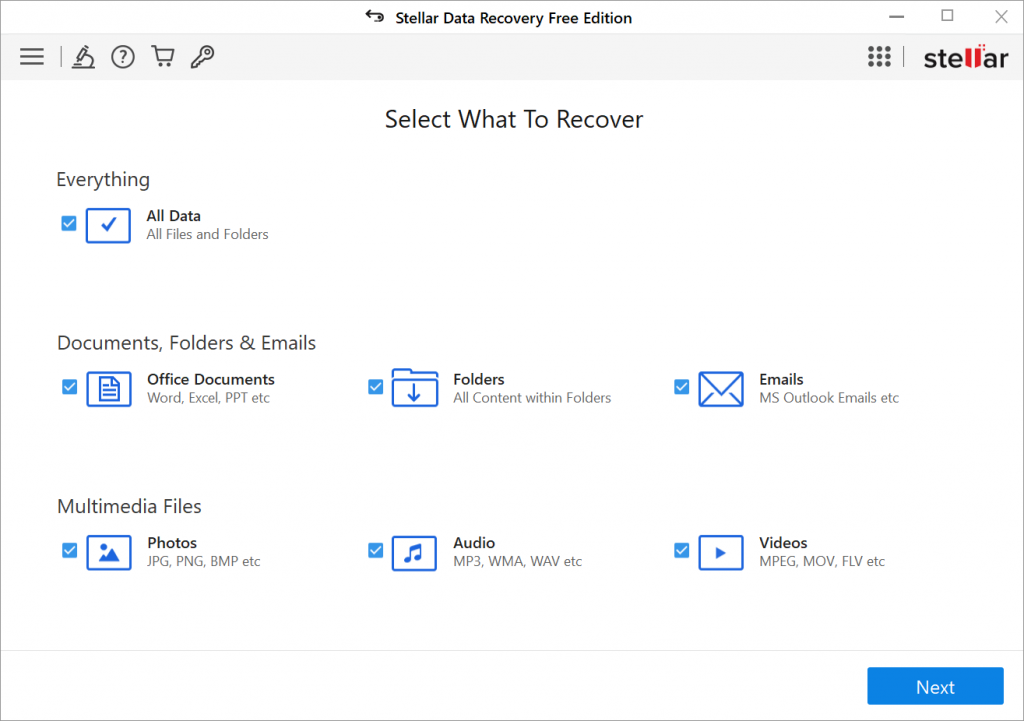
- From ‘Select Location’ screen, select the connected pen drive and click ‘Scan’
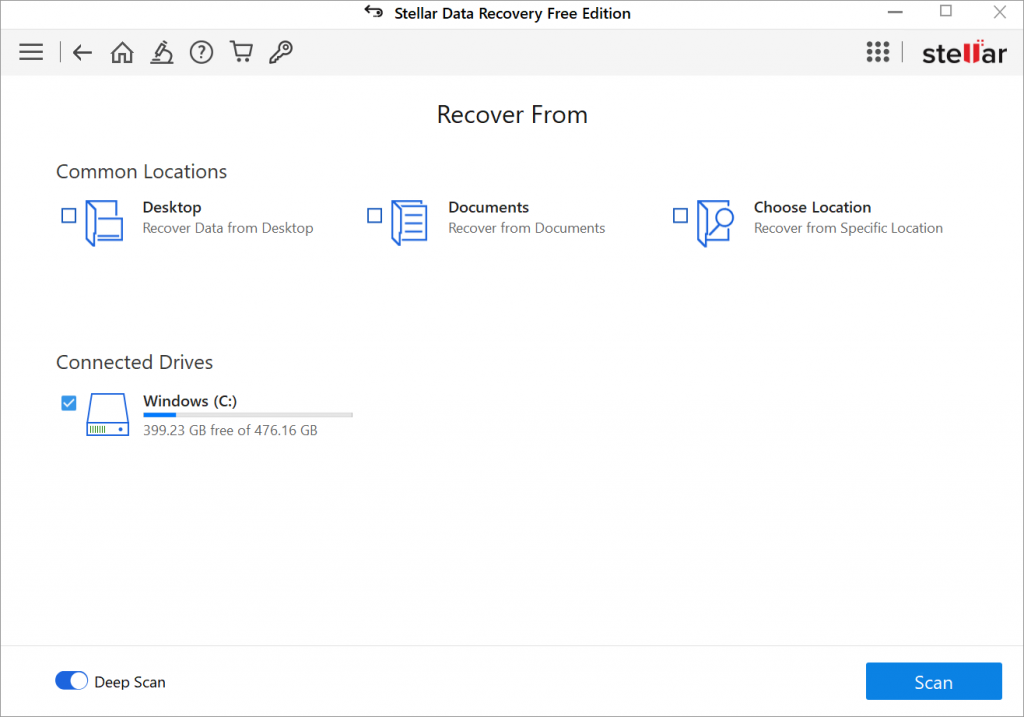
- The scanning process starts and once the process is complete, software lists all the recoverable files
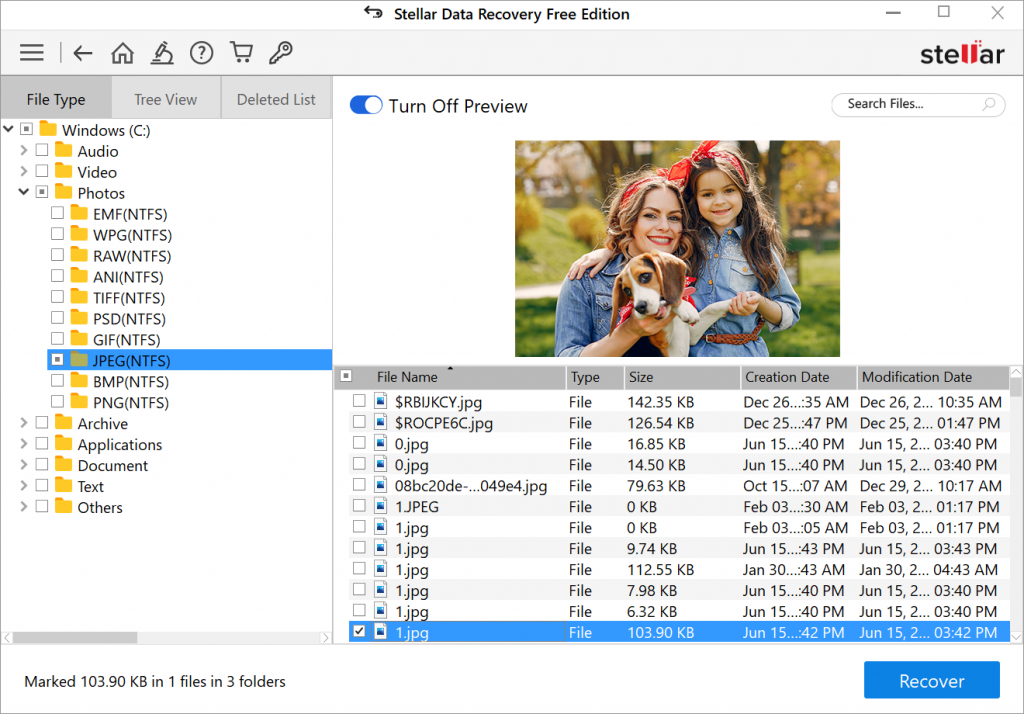
- Select the files from the list and click on ‘Recover’ to save the files
2. Restore Excel File from the Previous Version
If excel files are deleted from your pen drive or from your system; then you can recover them from the previous version. This feature works when Windows Backup option is enabled, else, it will not work.
Follow these steps to recover excel files:
- Connect your pen drive to your system, go to This PC and navigate to the folder of excel files
- Select the folder, right-click on it and select ‘Restore previous versions’
- From the available version of excel files, select the required one and click on ‘Restore’
3. Use Command Line to Recover Excel Files
The Command prompt should be your first choice to recover excel files from the virus-infected pen drive. Here’s how command prompt recovers your files:
- Connect your virus-infected pen drive to your system and then in the search box type ‘CMD’ and hit ‘Enter’
- In the command window, type in attrib –h-r-s /s/ drive letter:\*.*”, for example, “attrib -h -r -s /s /d G:\*.*” and hit ‘Enter’
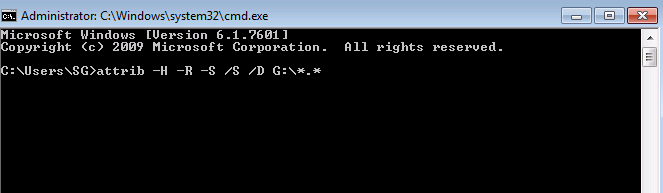
- Windows starts repairing the virus-infected pen drive and once the process is complete, you can access your pen drive and recover excel files.
Even after following the above-mentioned steps you’re unable to recover your excel files, then try a Home approach i.e. a data recovery tool.
To Sum Up
It is always a good idea to create a backup of important files since no one can anticipate what might go wrong. The scenario presented in the blog paints a clear picture of how you can recover your Microsoft excel files for free from a virus-infected pen drive. For quick and better results, you can always go with Stellar Windows Data Recovery – Free Edition.
[Fix] Excel formula not showing result
Summary: Is your Excel spreadsheet showing text of a formula you’ve entered and not its result? This blog explains the possible reasons behind such an issue. Also, it describes solutions to fix the ‘Excel formula not showing result’ error. You can try Stellar Repair for Excel software to recover engineering and shared formulas.
Sometimes, when you type a formula in a cell of worksheet and press Enter, instead of showing the calculated result, it returns the formula as text. For instance, Excel cell shows:

But you should get the result as:

Why Does Excel Show or Display the Formula Not the Result?
Following are the possible reasons that may lead to the ‘Excel showing formula not result’ issue:
- You accidentally enabled “Show Formulas” in Excel.
- The cell format in a spreadsheet is set to text.
- ‘Automatic calculation’ feature in Excel is set to manual.
- Excel thinks your formula is text (Syntax are not followed).
- You type numbers in a cell with unnecessary formatting.
How to Fix ‘Excel Showing Formula Not Result’ Issue?
Solution 1 – Disable Show Formulas
If only the formula shows in Excel not result, check if you have accidentally or intentionally enabled ‘show formula’ feature of Excel. Instead of applying calculations and then showing results, this feature displays the actual text written by you.
You can use the ‘Show Formulas’ feature to quickly view all formulas, but if you are not aware of this feature, and enabled it accidentally, it can be a headache. To disable this mode, go to ‘Formulas’ and click on ‘Show formula enabled.’ If it’s previously enabled, it will be disabled by just clicking on it.

Solution 2 – Cell Format Set to Text
Another possible reason that only formula shows in Excel not result could be that the cell format is set to text. This means that anything written in any format in that cell will be treated as regular text. If so, change the format to General or any other. To get Excel to recognize the change in the format, you may need to enter cell edit mode by clicking into the formula bar or just press F2.

Solution 3 – Change Calculation Options from ‘Manual’ to ‘Automatic’
There is an “automatic calculation” feature in Excel, which tells Excel to do calculations automatically or manually. If ‘Excel formula is not showing results’, it may be because the automatic calculations feature is set to manual. This issue is not easily detected because it results in calculating formula in one cell but if you copy it to some other cell, it will retain the first calculation and will not recalculate on the base of the new location. To fix this, follow these steps:
- In Excel, click on the ‘File’ tab on the top left corner of the screen.
- In the window that opens, click on ‘Options’ from the left menu bar.
- From ‘Excel Options’ dialog box, select ‘Formulas’ from the left side menu and then change the ‘Calculation options’ to ‘Automatic’ if it’s currently set as ‘Manual’.

- Click on ‘OK’. This will redirect you to your sheet.
Solution 4 – Type Formula in the Right Format
There is a proper way to tell Excel that your text is a formula. If you don’t write the formula in a particular format, Excel considers it as simple text and hence no calculations are performed according to it. For this reason, keep the following in mind when typing a formula:
Equal sign: Every formula in Excel should start with an equal sign (=). If you miss it, Excel will mistake your formula as regular text.
Space before equal sign: You are not supposed to enter any space before equal sign. Maybe a single space will be hard for us to detect, but it breaks the rule of writing formulas for Excel.
Formula wrapped in quotes: You need to make sure that your formula is not wrapped in quotes. People usually make this mistake of writing a formula in quotes, but in Excel, quotes are used to signify text. So your formula won’t be evaluated. But you can add quotes inside formula if required, for example: =SUMIFS(F5:F9,G5:G9,”>30″).
Match all parentheses in a formula: Arguments of Excel functions are entered in parenthesis. In complex cases, you may need to enter more sets of parenthesis. If those parentheses are not paired/closed properly, Excel may not be able to evaluate the entered formula.
Nesting limit: If you are nesting two or more Excel functions into each other, for example using nested IF loop, remember the following rules:
- Excel 2019, 2016, 2013, 2010, and 2007 versions only allow to use up to 64 nested functions.
- Excel 2003 and lower versions only allow up to 7 nested functions.
Solution 5 – Enter Numbers without any Formatting
When you use a number in the formula, make sure you don’t enter any decimal separator or currency sign, e.g. $, etc. In an Excel formula, a comma is used to separate arguments of a function and a dollar sign makes an absolute cell reference. Most of these special characters have built-in functions so avoid using them unnecessarily.
What to Do If the Manual Solutions Don’t Work?
If you’ve tried out the manual solutions mentioned above but still unable to resolve the ‘Excel formula not showing result’ issue, you can try repairing your Excel file with the help of an automated Excel repair software , such as Stellar Repair for Excel.
This reliable and competent software scans and repairs Excel files (.XLSX and .XLS). It also helps recover all the file components, like formulas, cell formatting, etc. Armed with an interactive GUI, this software is extremely easy to work with, and its advanced algorithms allow it to fend off Excel errors with ease.

Conclusion
This blog outlined the possible reasons that may cause ‘Excel not showing formula results’ issue. Check out these reasons and implement the manual fixes, depending on what resulted in the problem in the first place. If none of these fixes help resolve the issue, corruption in the Excel file might be preventing the formulas from showing the actual results. In that case, using Stellar Repair for Excel tool might help.
How to repair corrupt Excel file
Stellar Repair for Excel is an excellent tool to repair corrupt or damaged MS Excel files. Mentioned below are the steps to perform Excel repair with this tool:
- Download & Run the Stellar Repair for Excel.

- A dialog box appears on your screen, click ‘OK’ to proceed.
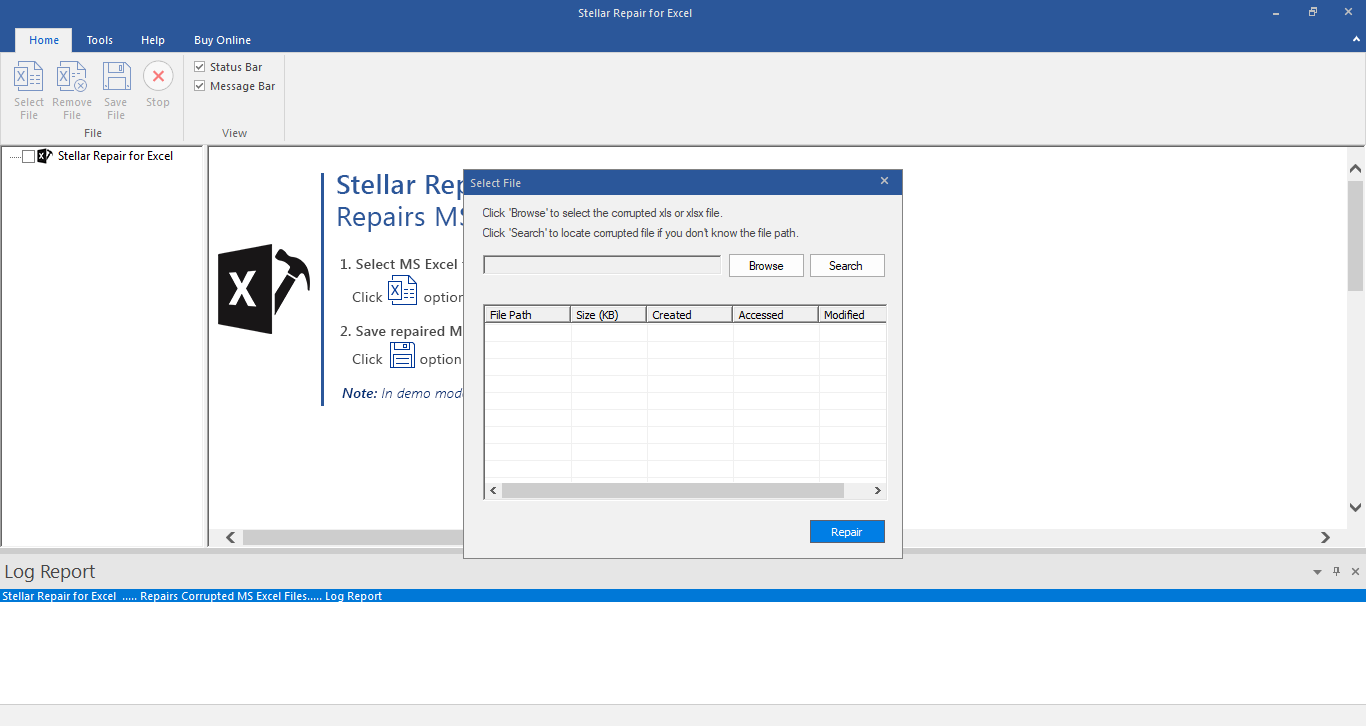
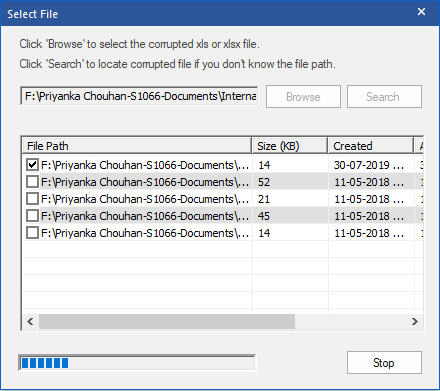
- To select your corrupt .XLS or .XLSX file, click ‘Browse’ button. However, if you do not know the location of your .XLS or .XLSX file, the software provides you the option ‘Search’ to search for your corrupt Excel files.

- Select the checkboxes against the files that you want to repair and click ‘Repair’. This starts the scanning process.
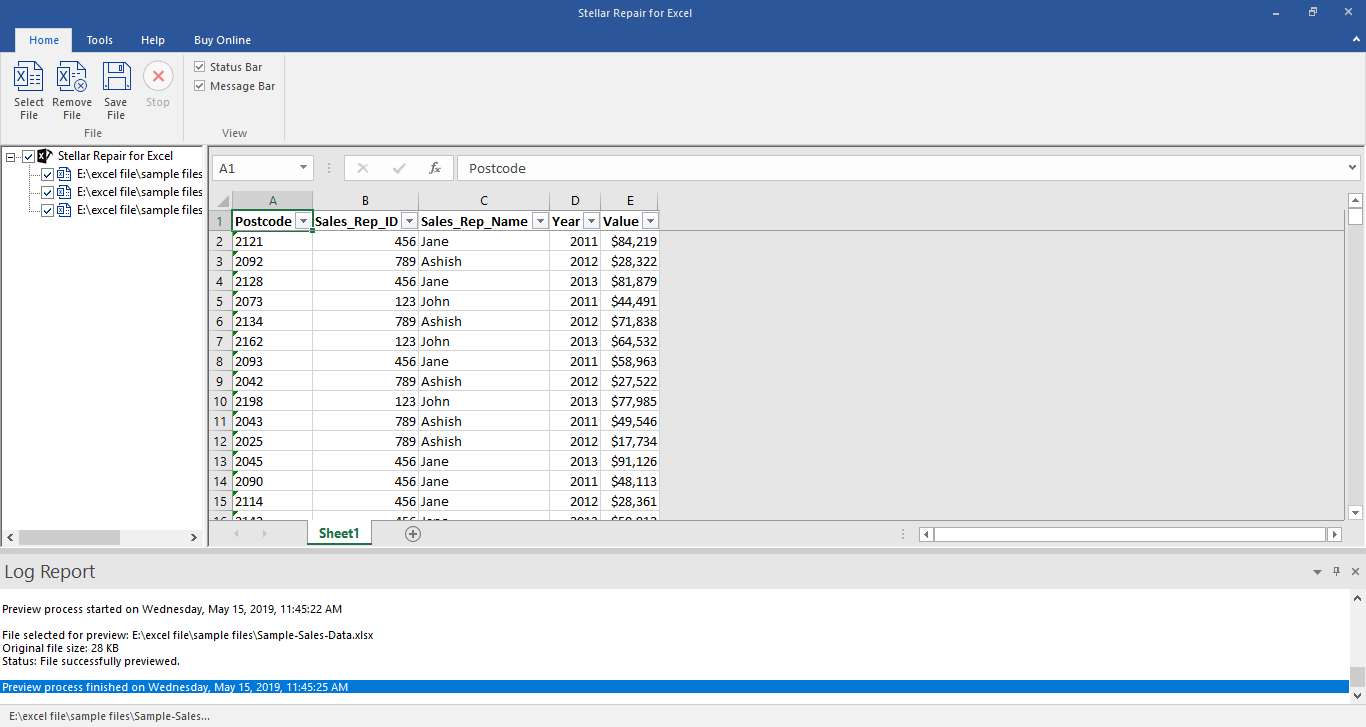
- The list of all the files that the software has scanned is displayed in the tree-view in the left pane. Click on a file from this tree-view to see its preview in the middle pane. From this list, you can select the file that you want to recover.
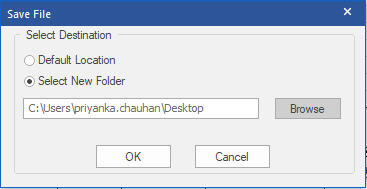
- You can either select the ‘Default location of file’ or ‘Select New Folder’ in the ‘Save Document’ dialog box to save the repaired files.
Stellar Repair for Excel Stellar Repair for Excel is the best choice for repairing corrupt or damaged Excel (.XLS/.XLSX) files. This Excel recovery software restores everything from corrupt file to a new blank Excel file.
How to fix runtime error 424 object required error in Excel
The Runtime error 424: Object required occurs when Excel is not able to recognize an object that you are referring to in a VBA code. The object can be a workbook, worksheet, range, variable, class, macro, etc. Some users have also reported that this error occurred when they tried to copy the values of the cells from one workbook to another.
Let’s understand the error through a small scenario. Suppose, I want to check the last field row in a table in a spreadsheet named “First” using the VBA code. To do this, I have added a command button and double-clicked on it and entered the below code in the backend:
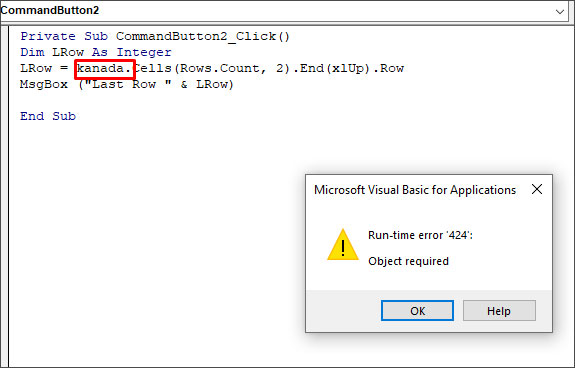
Private Sub CommandButton2_Click()
Dim LRow As Integer
LRow = Worksheets(“First”).Cells(Rows.Count, 2).End(xlUp).Row
MsgBox (“Last Row “ & LRow)
End Sub
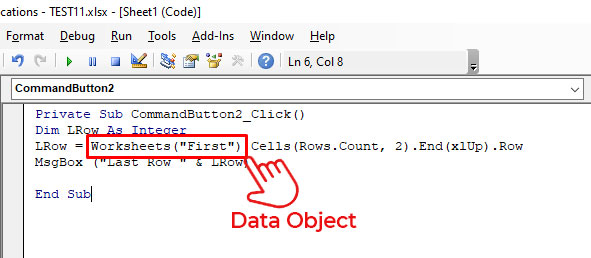
In this code, Worksheets(“First”) is a data object. If I mistakenly delete this data object and insert any random name (for example - kanada), then it will not be recognized by Excel. When I run this code, I will get the “Run-time error 424”.
Causes of Runtime Error 424 in Excel
The Runtime error 424: Object required can occur due to the following reasons:
- Incorrect name of the object you are trying to refer to in a code.
- You have provided an invalid qualifier to an object.
- You have not used the Set statement while assigning an object reference.
- The object is corrupted.
- Missing objects in a workbook.
- Objects you are trying to call in a code are mistakenly deleted or unavailable.
- You have used an incorrect syntax for object declaration.
- You are trying to perform an invalid action on an object in a code.
- Workbook is corrupted.
Solutions to Fix Runtime Error 424: Object Required in Excel
The VBA error ‘object required’ may occur due to different reasons. Based on the reason, you can follow the solutions mentioned below to fix the error.
1. Check the Name of the Object
The Runtime error 424 can occur when you run the VBA code using an incorrect name of the object. For example, the object name is ‘MyObject’ but you’re using “Backcolor”.
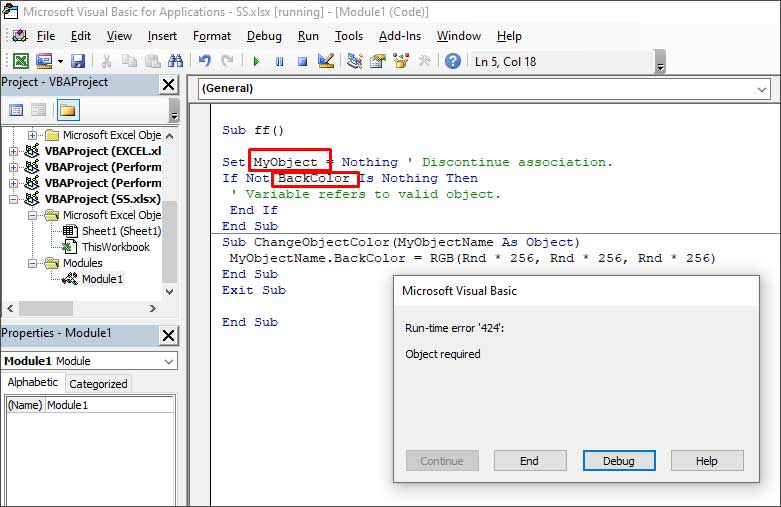
When you click the Debug button, the line with the error will highlight.

To fix the issue, you need to provide the correct name of the object.
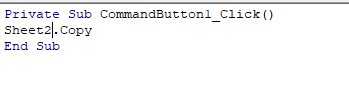
2. Check if the Object is Missing
The Runtime error 424 can occur if the object you are referring to as a method is not available or you are using the wrong object in a code. In the below example, you can see that the error occurs when an object named “Employee” is not available in the Project list.
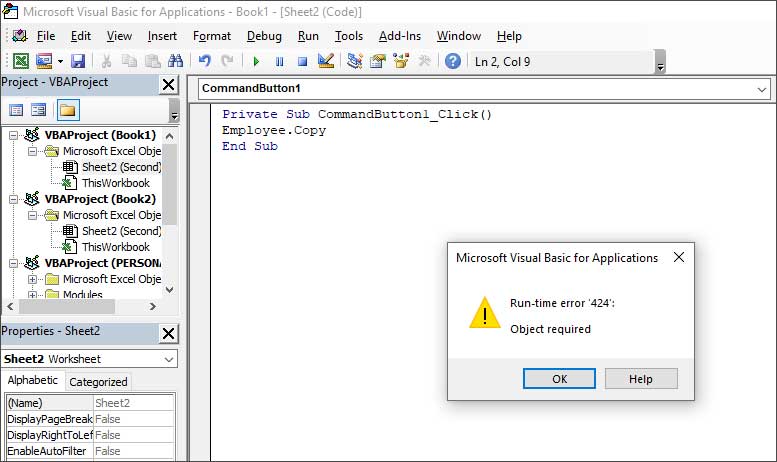
You can check and mention the object which is available. For instance, Sheet2 in the below code.
3. Check All References are Declared in the Code
You can get the Runtime error 424 if all the references are not declared. So, make sure you have declared all the references in the code. To verify this, you can use the debug mode by pressing F5 or clicking on the Debug option.

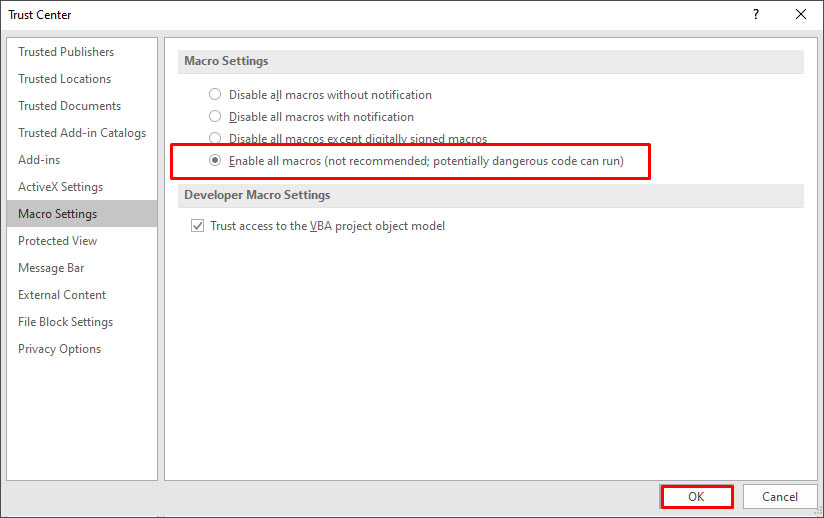
4. Check the Macro Security Settings
Sometimes, the error can occur if macros are disabled in the Macro Security settings. You can check and change the settings by following these steps:
- On the Developer tab, in the Code section, click Macro Security.
- In the Trust Center window, select Enable all macros.

- Click OK.
5. Repair your Workbook
Sometimes, the ‘Object required’ error can occur if your Excel file is damaged or corrupted. In such a case, you can try repairing the file using Microsoft’s in-built utility - Open and Repair. To use this utility, follow these steps:
- In Excel, go to File > Open > Browse.
- In the Open dialog box, click on the corrupted Excel file.
- Click the arrow next to the Open button and select Open and Repair from the dropdown.
- Select Repair to recover as much data from the file as possible.
If the Open and Repair utility fails or stops working, then you can try a professional Excel repair tool, such as Stellar Repair for Excel . It is an advanced tool that can repair severely corrupted Excel files (.xls, .xlsx, .xltm, .xltx, and .xlsm). It helps recover all the file components, including images, charts, tables, pivot tables, cell comments, chart sheets, formulas, etc., without impacting the original structure.
Conclusion
The Runtime error 424 usually occurs when there is an issue with the objects in your VBA code. In this article, we have covered some effective methods to resolve the “object required” error in Excel. If the error occurs due to corruption in Excel file, then you can repair the corrupt file using Stellar Repair for Excel. It is a reliable tool that can repair severely corrupted Excel file without changing its actual formatting. You can download the free trial version of the software to evaluate its functionality.
Excel AutoRecover not working, what is next?
Consider a Scenario
A professional with Windows 10 computer had MS Office 2016 installed on it. For an official purpose, he worked on an Excel workbook and saved it as an XLSX file. After working for hours on it, which was saved with a file name, a power outage occurred in his building for quite some time. After the power was back, he reopened Excel to find a list of recovered files in ‘Document Recovery’ section on the screen’s left side. However, the file that he had worked on recently was the ‘Original version,’ i.e. the last version saved by him and not the auto-saved Excel file. This meant the Excel document did not have any new data that was entered since the last time he saved it. Consequently, he lost hours of work. According to him, this happened despite the fact that the ‘AutoRecover’ feature was enabled. (Still, this needs to be checked and ensured.)
The ‘AutoRecover’ feature might not work in any of these cases:
- AutoRecover Feature is disabled - With this feature disabled, the Excel files are not auto-saved if the document is closed without saving, or the document closes unexpectedly due to an untoward incidence. To check, see if ‘Save AutoRecover information every * minutes’ and ‘Keep the last auto-saved version if I close without saving’ checkboxes are checked or unchecked. If either one is unchecked or both are unchecked, it signifies that the AutoRecover feature is disabled. Else, the AutoRecover is enabled.
- Corruption in the Excel XLSX file – If ‘AutoRecover’ is enabled, most probably the cause is ‘damaged Excel XLSX file.’
Before discussing solutions to resolve the ‘Excel AutoRecover not working’ issue, let’s have an overview of the ‘AutoRecover’ and ‘AutoSave’ features.
A Brief Overview of Excel AutoRecover and AutoSave Feature
AutoRecover is an inbuilt feature in MS Excel 2019, 2016, 2013, 2010, 2003, and 2007 that allows saving all of the ‘open Excel files’ at a fixed-interval in a user-specified location or AutoRecover file location. Besides, AutoSave is an add-in that exists in Excel 2002 and earlier versions to save all open Excel files in case of a crash, power outage, or accidental closure of Excel files without saving. Users can recover these files if Excel closes suddenly, for instance, at the time of power outage or failure. The auto-recovered Excel files are saved at a default location.
Methods to Fix ‘Excel AutoRecover Not Working’ Issue
Manual Methods
Method 1 - Enable the ‘AutoRecover’ Feature if Disabled
Make sure that you have the ‘AutoRecover’ feature enabled in your Excel application. If not, follow these steps to enable it:
- Open Excel with MS Excel 2016/2019
- Click on File and then on Options tab
- In ‘Excel Options’, click on Save tab
- Check ‘Save AutoRecover information every * minutes’ and ‘Keep the last auto saved version if I close without saving’ box
- Set the time in ‘Save AutoRecover information every * minutes’
- Click on the OK button
Note: With this method, it is not possible to recover data from the current Excel file. From next time onwards, the AutoRecover feature starts working following which Excel shall start auto-saving Excel files as per the time set in ‘Save AutoRecover information every * minute’.
Method 2 - Repair Corrupt Excel File
If corruption in Excel XLSX file has resulted in ‘Excel AutoRecover not working’ issue, you will need to repair Excel file . Use ‘Open and Repair’ inbuilt utility to fix and repair the damaged (corrupt) Excel file and extract its data. To use the inbuilt utility, execute the following steps:
- Go to location “C:\Users\AppData\Local\Microsoft\Office\UnsavedFiles” to find Excel TMP files and save it as XLSX file
Note: In Windows 8, the location is the same as mentioned above that is for Windows 10. In Windows 7, the location is “C:\Users\name\AppData\Roaming\Microsoft\Excel\”
- Open a blank Excel sheet; click File >> Open
- Go to the location and folder containing the damaged Excel file
- In the Open dialog box, choose the damaged Excel file and click the arrow next to the Open button, and then click Open and Repair
- In the window that appears, click Repair to recover as much data as possible
Now, open the Excel (XLSX) file to check if the Excel file is repaired and its data is recovered.
Use a Professional Excel File Repair Tool
Using a third-party Excel file repair tool can help you repair damaged Excel XLSX file and recover all the data. Stellar Repair for Excel is one tool you can rely on to repair severely corrupt Excel files (XLSX or XLS).
Here are a few other reasons why you should choose Stellar Repair for Excel software:
- Repairs Excel file while keeping the worksheet properties and cell formatting same as before.
- Recovers all of the Excel file components like tables, forms, reports, charts, chart sheets, cell comments, formulas, images, etc.
- Can batch repair multiple Excel files simultaneously
- Supports Excel 2019 and earlier versions
Conclusion
To help resolve the problem of ‘AutoRecover not working’, different methods have been discussed, depending on the cause of the problem. These solutions can be implemented to check the possibility of getting back maximum data added in last saved version of the Excel file. However, to fix corruption in the excel file, using a specialized tool such as Stellar Repair for Excel software recommended by MS Excel Experts and MVPs can help. The software can repair severely damaged Excel file easily and efficiently.
Also read:
- [Updated] 2024 Approved Unlock a Million Eyes Engaging Content Strategy
- [Updated] Chromebook Screen Capture Simplified Into Four Methods
- 2024 Approved Vault Selection for Top Corporate Use
- Different Methods for Resetting Itel S23 Phones with Screen Locked and Not | Dr.fone
- Enhance Your Livestreams with ManyCam – Top-Notch Virtual Webcam Technology for Seamless Broadcasts
- Finding the Ultimate Video Solution VLC and MX Showdown
- How To Get Out of Recovery on Apple iPhone 13 Pro? | Dr.fone
- How to Reset OnePlus 11R Without the Home Button | Dr.fone
- In 2024, How To Remove Screen Lock PIN On Sony Xperia 1 V Like A Pro 5 Easy Ways
- In 2024, Top 6 Apps/Services to Trace Any Realme C55 Location By Mobile Number | Dr.fone
- The way to get back lost messages from Realme 12 Pro 5G
- The way to recover deleted photos on Motorola Edge+ (2023) without backup.
- Updated GoPro Quik Review Is It the Best Video Editor for Your Needs for 2024
- Title: Repair Office 2010 Files (Word, Excel and PowerPoint)on Windows | Stellar
- Author: Ian
- Created at : 2025-02-16 18:10:09
- Updated at : 2025-02-19 16:35:16
- Link: https://techidaily.com/repair-office-2010-files-word-excel-and-powerpointon-windows-stellar-by-stellar-guide/
- License: This work is licensed under CC BY-NC-SA 4.0.