
Guide on How To Erase Apple iPhone 14 Devices Entirely | Dr.fone
Guide on How To Erase Apple iPhone 14 Devices Entirely With Dr.Fone
Device data is ceremonially essential, leading to the need for protection from any unauthorized access. While selling out an iPhone, erasing data from the Apple iPhone 14 device is considered the most crucial clause. Although people consider manually erasing the Apple iPhone 14 device’s data, it is not optimal. Thus, the need for a data eraser is appropriate. This guide comes with a comprehensive overview of how to use Dr.Fone - Data Eraser (iOS) to erase iOS data entirely.
Note: Wondershare Dr.Fone for Mac has not had an updated interface; however, it does not affect the functionality of Dr.Fone. The interface will soon be updated on Mac.
Upgrade to the Newest Dr.Fone Manage Your Phone Wherever You Go
- Step 1 Look for the Data Eraser Tool in Dr.Fone
Initiate the process by launching Wondershare Dr.Fone on your computer and continue to connect your iOS device to the computer through a cabled connection. Select Data Eraser from the home page to erase data.

The Dr.Fone Mac version still has the old interface, but it does not affect the use of the Dr.Fone function. We will update it as soon as possible.
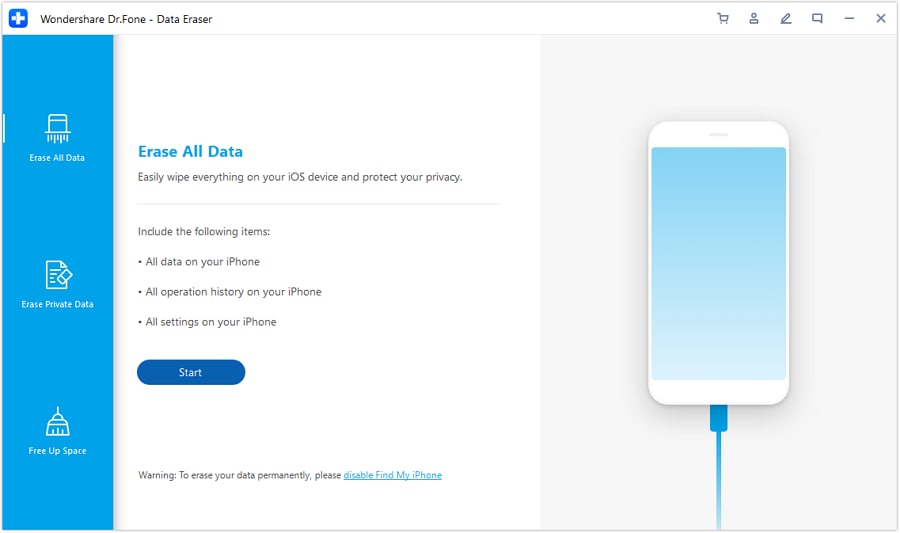
- Step 2 Initiate Data Eraser Tool
As the platform shows a successful connection of the Apple iPhone 14 with the computer, it will lead to the main page of Dr.Fone - Data Eraser. Navigate to the Erase All Data tab on the left and select Start to initiate the process.
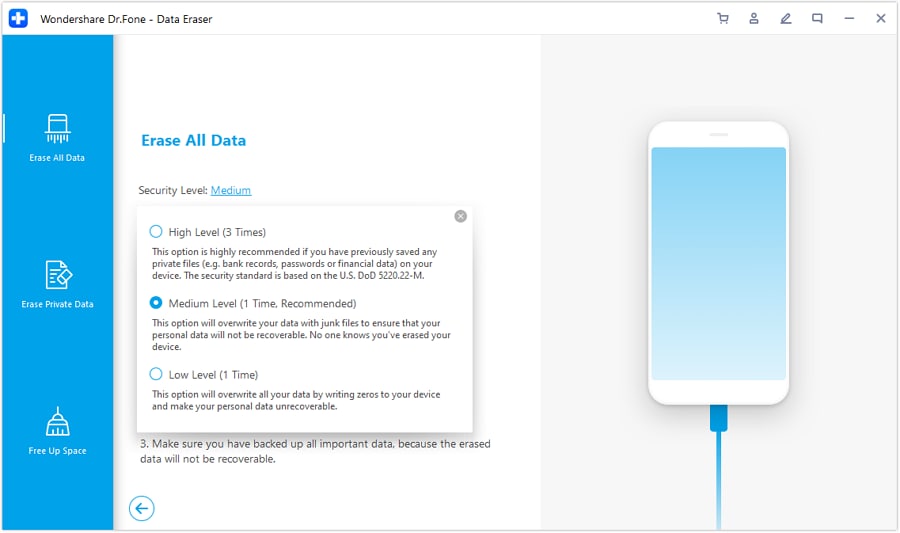
- Step 3 Set Security Level for Data Erasing
While you continue to the next screen, you will first have to select the Security Level. Dr.Fone - Data Eraser offers three different levels. The higher the security level, the lower the possibility your data can be recovered. Meanwhile, a higher security level takes a long time to erase.
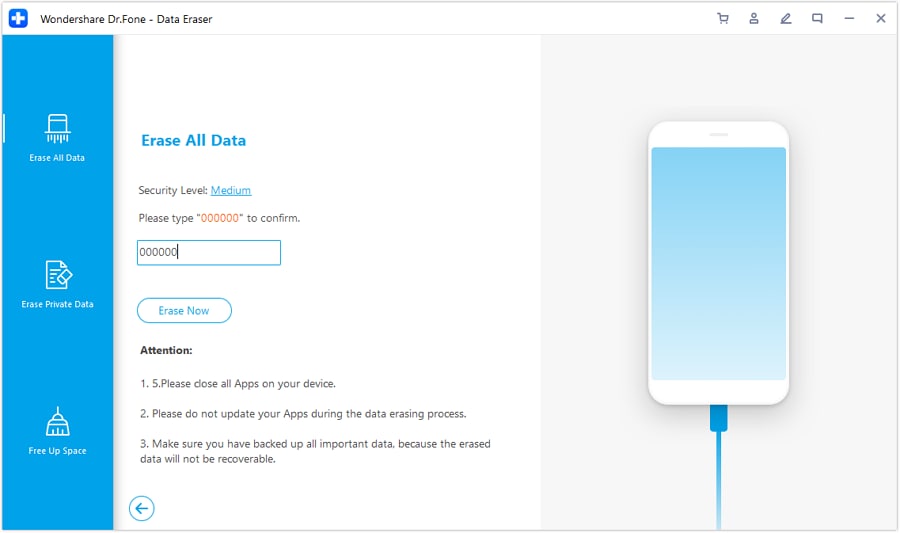
- Step 4 Execute Erasing Process
Since the erased data can’t be recovered, you need to be careful and enter “000000” to confirm your operation.When you’re ready, click Erase Now to begin the process of erasing your iOS device completely.
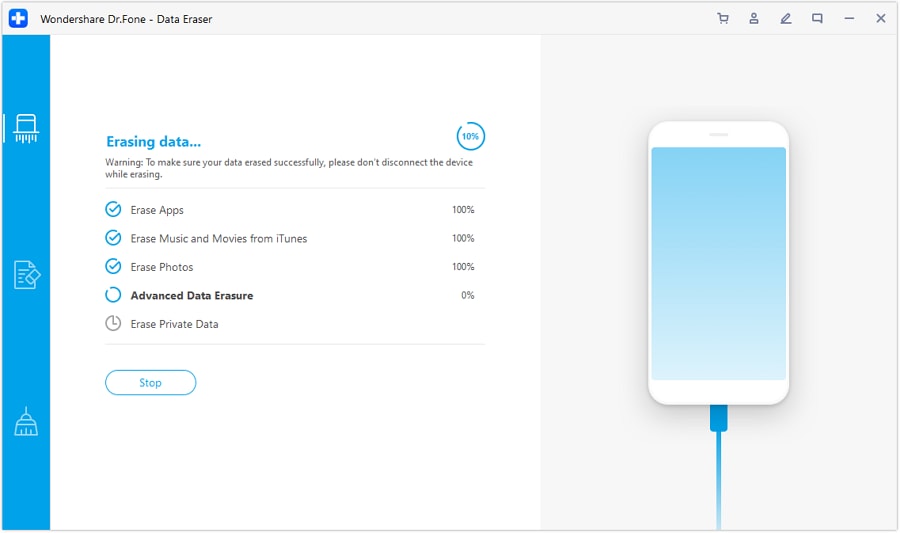
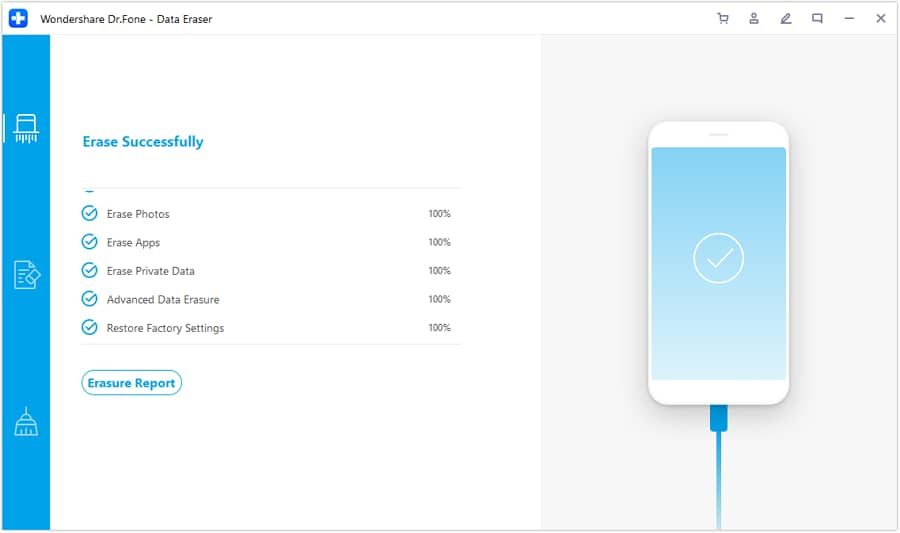
- Step 5 View Progress
The following window shows the ongoing process, enabling you to verify the type of data being erased from the Apple iPhone 14 device. If you wish to stop the process, click Stop.
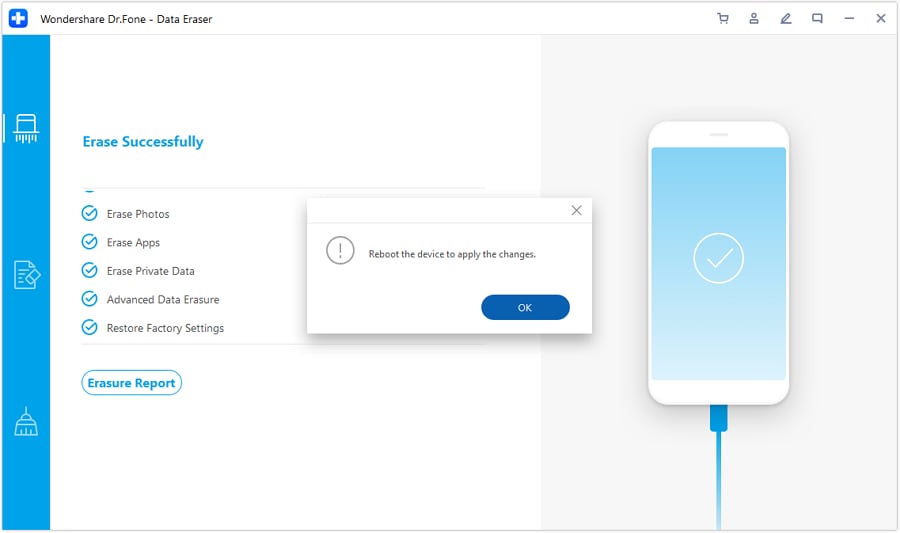
- Step 6 Complete the Process and Restart iDevice
Once the process completes, it will prompt them to reboot the Apple iPhone 14 device to apply all changes. Click OK to restart your iDevice automatically.
- Step 7 View Erasure Report
Following this, to view the comprehensive report of the type of data that is erased, tap Erasure Report to direct to the location where the report is saved by the data eraser.
- Step 8 View Report in Folder
As you find yourselves in the folder, open the report to view the details.

The report will display the details of the connected iDevice, followed by the data that is erased through the feature.

How To Erase Private Data From Apple iPhone 14 Device?
The Erase Private Data function for iOS can help you wipe personal data, such as contacts, messages, call history, photos, notes, calendars, Safari bookmarks, reminders, etc. Moreover, you can also select only the deleted data for permanent erasure. Everything is completely erased and won’t be recovered again.
Upgrade to the Newest Dr.Fone Manage Your Phone Wherever You Go
- Step 1 Access Data Eraser Tool
Download and install the latest version of Dr.Fone - Data Eraser (iOS) on your computer and launch it. Continue to connect your iOS device to the computer and redirect to select Data Eraser from the available options.
- Step 2 Progress to Erase Private Data
Select Erase Private Data from the left panel and observe a list of data types that come under private data.
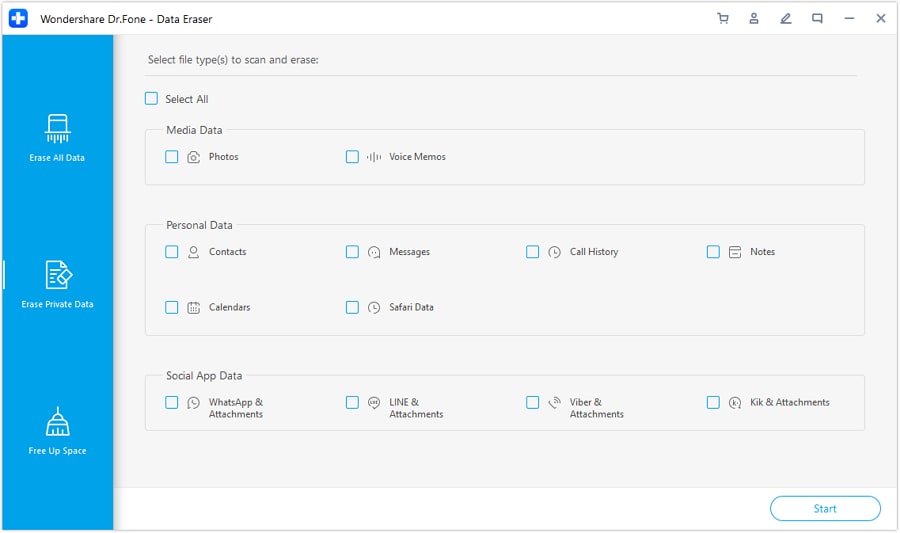
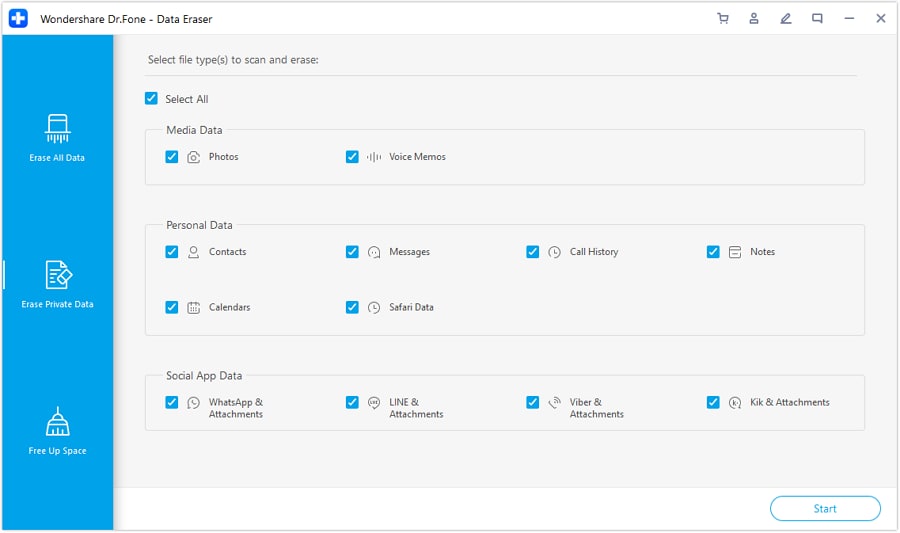
- Step 3 Select Data Types to Erase
Checkmark all data types that you wish to erase from the iPhone and continue to click Start on the bottom-right of the screen.
- Step 4 Preview Data and Continue to Erase
The screen then continues to analyze and scan all the data that is to be erased from the Apple iPhone 14.
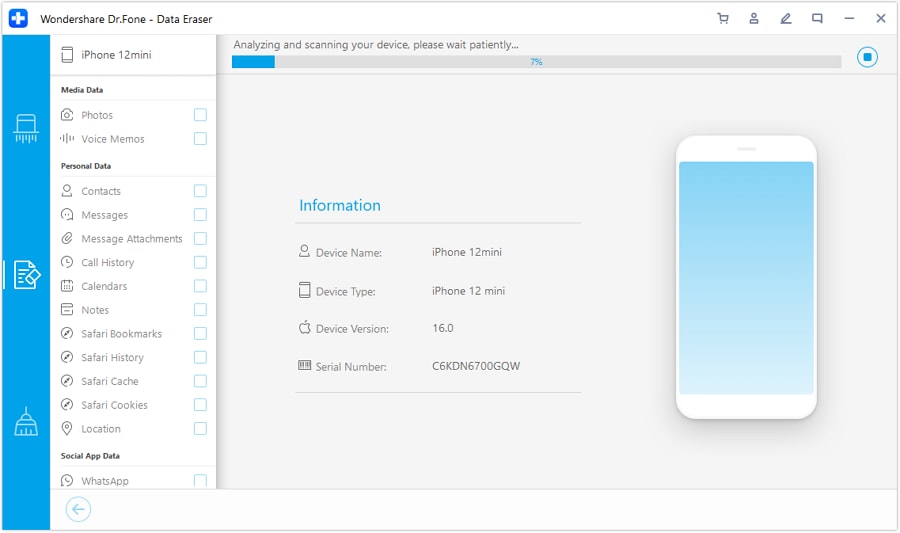
Once done, you can preview the data on the screen in your front and navigate through the categories from the left panel.
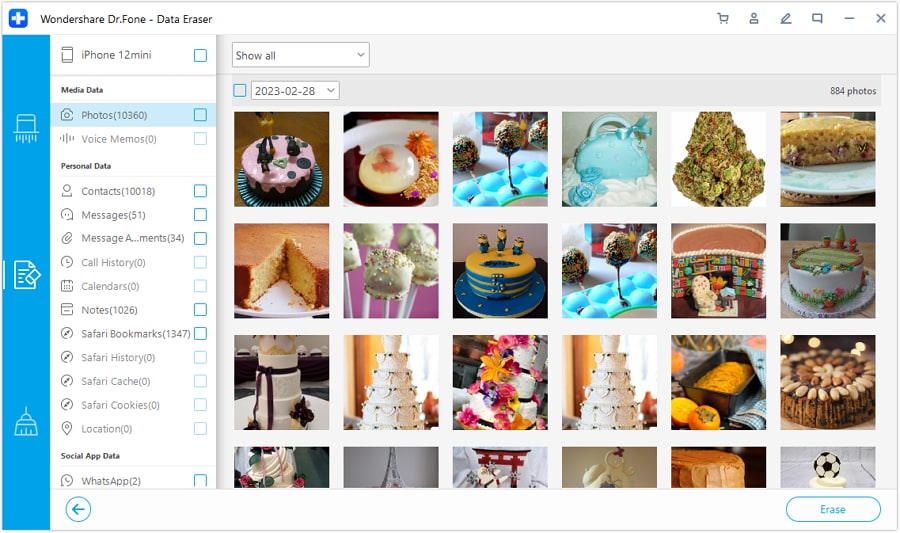
If you wish to preview specific content, select the drop-down on the top and select either option of Select all or Only Show the deleted. Continue to select the Erase button on the bottom-right of the screen to initiate the process.

- Step 5 Confirm and Erase
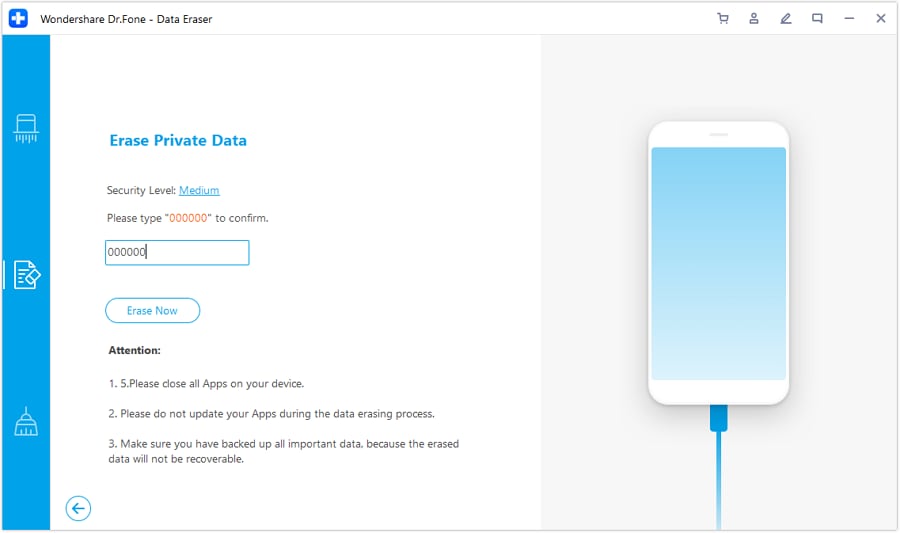
To confirm the operation, you will have to type in the confirmation code, select the respective Security Level, and continue to select the Erase Now button.
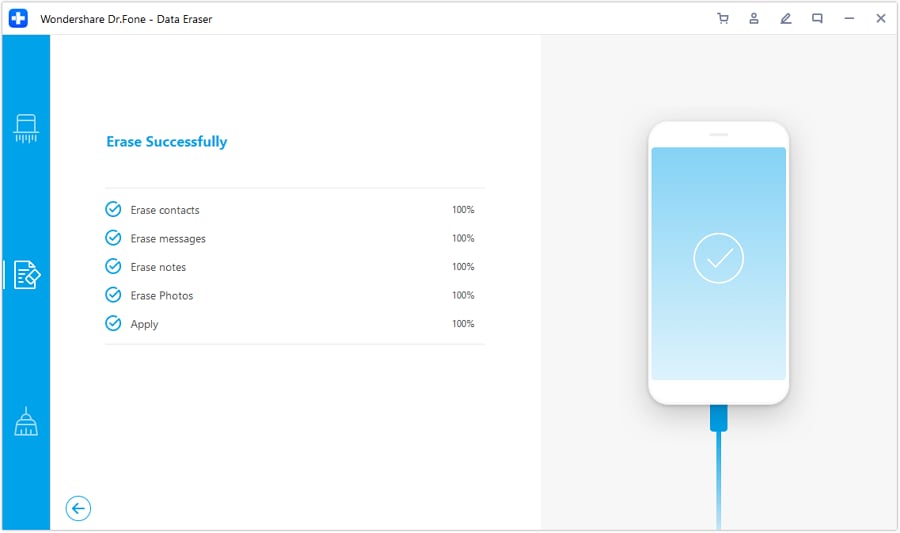
- Step 6 Conclude the Data Erasing Process
The final window will display the completion of the process. You will successfully erase iOS private data from your iDevice.
Guide on How To Erase Apple iPhone 14 Devices Entirely With Dr.Fone
Device data is ceremonially essential, leading to the need for protection from any unauthorized access. While selling out an iPhone, erasing data from the Apple iPhone 14 device is considered the most crucial clause. Although people consider manually erasing the Apple iPhone 14 device’s data, it is not optimal. Thus, the need for a data eraser is appropriate. This guide comes with a comprehensive overview of how to use Dr.Fone - Data Eraser (iOS) to erase iOS data entirely.
Note: Wondershare Dr.Fone for Mac has not had an updated interface; however, it does not affect the functionality of Dr.Fone. The interface will soon be updated on Mac.
Upgrade to the Newest Dr.Fone Manage Your Phone Wherever You Go
- Step 1 Look for the Data Eraser Tool in Dr.Fone
Initiate the process by launching Wondershare Dr.Fone on your computer and continue to connect your iOS device to the computer through a cabled connection. Select Data Eraser from the home page to erase data.
The Dr.Fone Mac version still has the old interface, but it does not affect the use of the Dr.Fone function. We will update it as soon as possible.
- Step 2 Initiate Data Eraser Tool
As the platform shows a successful connection of the Apple iPhone 14 with the computer, it will lead to the main page of Dr.Fone - Data Eraser. Navigate to the Erase All Data tab on the left and select Start to initiate the process.

- Step 3 Set Security Level for Data Erasing
While you continue to the next screen, you will first have to select the Security Level. Dr.Fone - Data Eraser offers three different levels. The higher the security level, the lower the possibility your data can be recovered. Meanwhile, a higher security level takes a long time to erase.
- Step 4 Execute Erasing Process
Since the erased data can’t be recovered, you need to be careful and enter “000000” to confirm your operation.When you’re ready, click Erase Now to begin the process of erasing your iOS device completely.
- Step 5 View Progress
The following window shows the ongoing process, enabling you to verify the type of data being erased from the Apple iPhone 14 device. If you wish to stop the process, click Stop.
- Step 6 Complete the Process and Restart iDevice
Once the process completes, it will prompt them to reboot the Apple iPhone 14 device to apply all changes. Click OK to restart your iDevice automatically.
- Step 7 View Erasure Report
Following this, to view the comprehensive report of the type of data that is erased, tap Erasure Report to direct to the location where the report is saved by the data eraser.
- Step 8 View Report in Folder
As you find yourselves in the folder, open the report to view the details.
The report will display the details of the connected iDevice, followed by the data that is erased through the feature.
- Title: Guide on How To Erase Apple iPhone 14 Devices Entirely | Dr.fone
- Author: Ian
- Created at : 2024-09-20 18:08:07
- Updated at : 2024-09-24 16:50:29
- Link: https://techidaily.com/guide-on-how-to-erase-apple-iphone-14-devices-entirely-drfone-by-drfone-ios-full-data-eraser-ios-full-data-eraser/
- License: This work is licensed under CC BY-NC-SA 4.0.