
Guide: Activating Windows' Latest Test Features with ViVeTool

Guide: Activating Windows’ Latest Test Features with ViVeTool
Quick Links
- What Is ViVeTool, and How Does It Work?
- Is ViVeTool Safe to Use?
- Should You Use the GUI or Command-Line Version of ViVeTool?
- How to Use ViVeTool (GUI) to Activate Windows Features
- How to Use ViVeTool (Command-Line) to Activate Windows Features
Key Takeaways
- ViVeTool is a third-party tool that allows you to enable experimental features on your Windows PC.
- It has both GUI and command-line versions. The GUI version is easier to use for those without command-line expertise, while the command-line version provides more flexibility.
- ViVeTool is safe to use, but it’s important to create a restore point before use, as the Windows features you enable may not be stable.
Do you want to try out experimental features on Windows to stay ahead of the curve? One way to do that is by joining the Windows Insider Program. However, Microsoft gradually rolls out these experimental features to Insiders, meaning you might not get immediate access or, in some cases, not even be selected for the controlled rollout. This is where ViVeTool steps in.
ViVeTool is a third-party tool that allows you to enable experimental Windows features on your computer. But how does this tool work, and is it safe to use? Let’s find out.
What Is ViVeTool, and How Does It Work?
Before knowing about ViVeTool, it’s essential to understand the Windows Feature Store. It is a system component that manages Windows features. These features can be anything from updating the navigation pane to adding a new Task Manager to introducing tabs in File Explorer .
While these features serve diverse purposes, their main goal is to reduce the size of Windows updates. This is done by adding unfinished features in earlier updates, allowing Microsoft to incrementally refine them and enable them permanently once they’re stable. Moreover, if a feature harbors a major bug or security flaw, Microsoft can easily disable it.
Windows Insider builds often contain numerous features that are disabled by default. These features represent upcoming functionalities that haven’t been officially announced yet, or those for which you haven’t been selected in their controlled rollout. Fortunately, ViVeTool, a third-party console tool, allows you to manipulate the Windows Feature Store and activate these features.
ViVeTool interacts with the Windows Feature Store by using feature IDs. Each feature in the Windows Feature Store possesses a unique ID, which ViVeTool uses to toggle the feature’s state. By default, feature IDs are set to state 0, indicating the feature’s normal behavior. To disable a feature, you’ll need to change its state to 1. Conversely, to forcibly enable a feature, you’ll need to set its state to 2.
Is ViVeTool Safe to Use?
You might be wondering whether ViVeTool is safe to use, especially since it modifies the state of Windows features. The answer is that ViVeTool itself is safe to use, but the features you enable using it might not be safe for your computer.
ViVeTool toggles on or off features that are already present in the Windows Feature Store. It doesn’t install any additional features on your device. However, the features you enable using ViVeTool are often experimental and may contain bugs or security flaws. This means that enabling an experimental feature could potentially damage your computer.
Therefore, it is important to proceed with caution when using ViVeTool. You should only enable an experimental feature if you’re prepared to deal with its potential consequences. Ideally, you should wait for Microsoft to release the stable version of a feature before enabling it.
However, if you’re eager to try out new features before anyone else, make sure to back up your data and create a restore point first. Additionally, it is recommended to use a virtual machine rather than your main system to test experimental features.
Should You Use the GUI or Command-Line Version of ViVeTool?
ViVeTool offers two versions: a GUI (graphical user interface) and a command-line version. Both versions function equally well, but the primary distinction lies in their user-friendliness.
The GUI version of ViVeTool is easy to use and requires no prior command-line expertise. Conversely, the command-line version is slightly more complex to operate, as it involves executing and memorizing commands.
In summary, if you are comfortable with command-line tools like Command Prompt and want more flexibility, the command-line version of ViVeTool is the better choice. However, if you prefer a simpler interface and don’t have much expertise in executing commands, the GUI version is a more suitable option.
How to Use ViVeTool (GUI) to Activate Windows Features
It’s very easy to use ViVeTool’s GUI version to activate features on your computer. Begin by visiting the ViVeTool GUI GitHub page , and download the latest version of the setup.exe file. You might have to expand the “Assets” dropdown to find the ViVeTool.GUI.Setup.exe file.
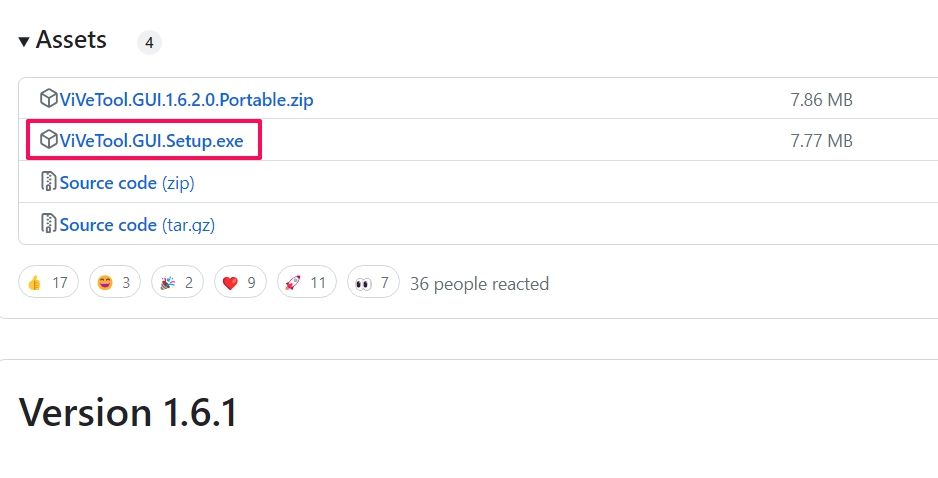
Open the downloaded file and follow the on-screen instructions to complete the installation.

Once the installation is complete, open the app, click the drop-down icon in the top-left corner, and choose your current Windows build . ViVeTool will now populate the data grid view, which may take some time, so be patient.
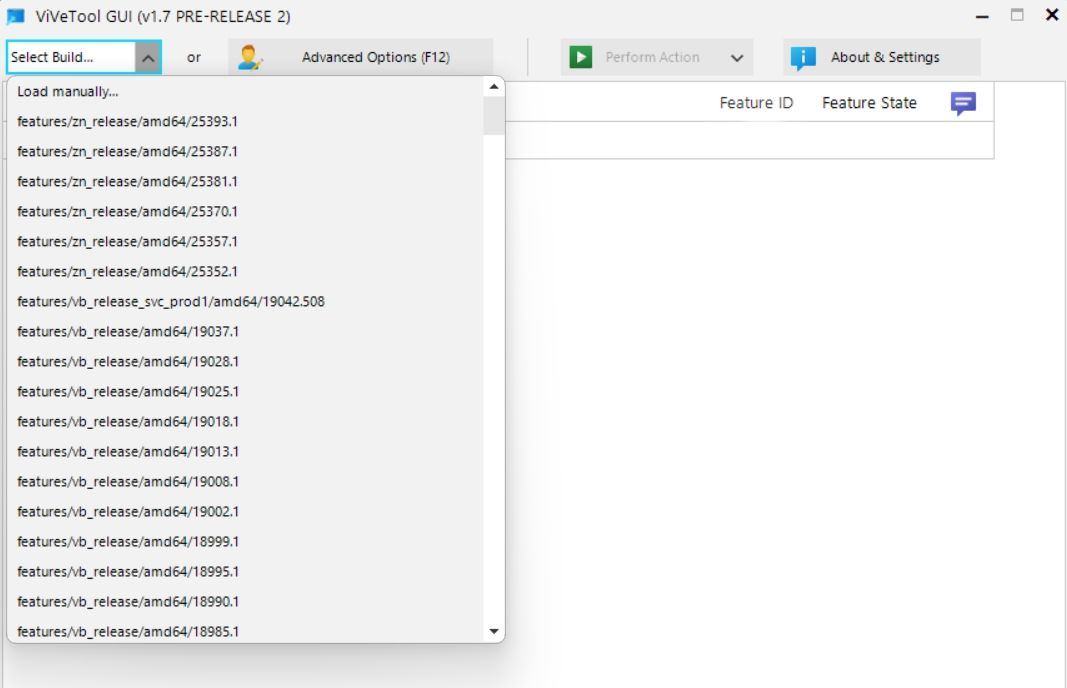
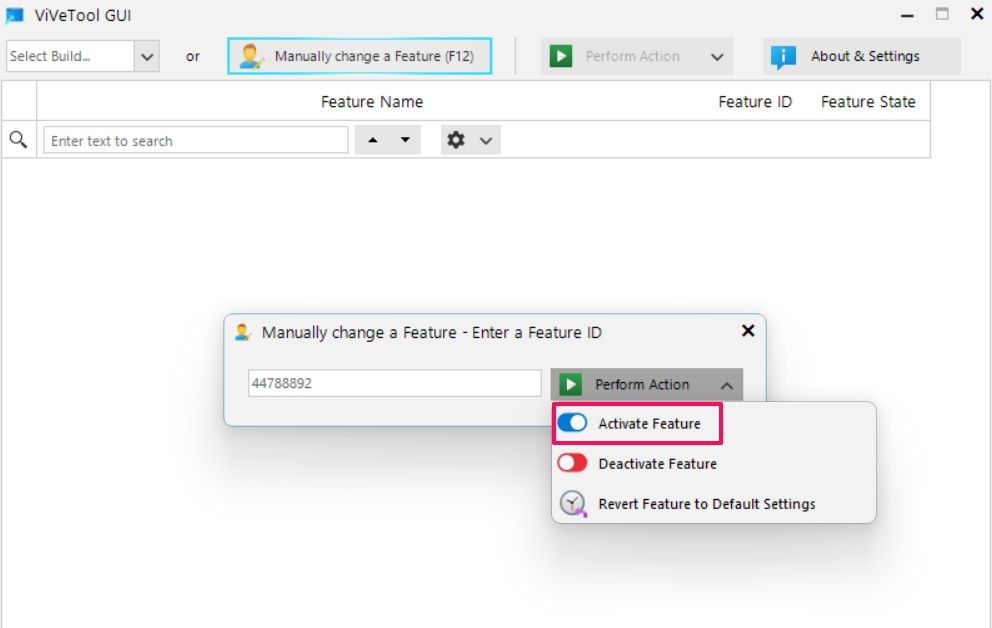
Choose the feature you want to enable, click the “Perform Action” drop-down menu, and choose “Activate Feature.” Alternatively, you can click the “Manually Change a Feature” field, enter the ID of the feature you want to enable, and choose “Activate Feature” from the menu.
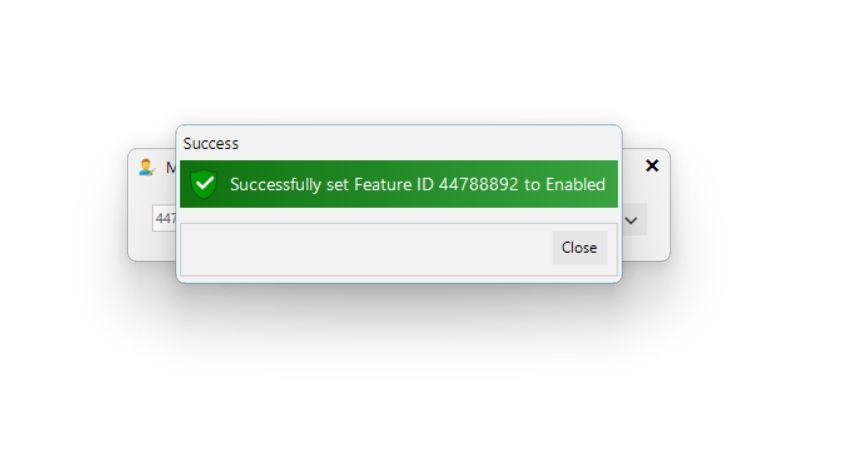
You’ll see the “Success” prompt, indicating the feature has been successfully enabled.
If you want to disable a feature, enter the feature ID in the “Manually Change a Feature” field and choose “Deactivate Feature” from the drop-down menu.
How to Use ViVeTool (Command-Line) to Activate Windows Features
As mentioned earlier, if you’re comfortable using command-line tools like Command Prompt, you can use the command-line version of ViVeTool to activate Windows features.
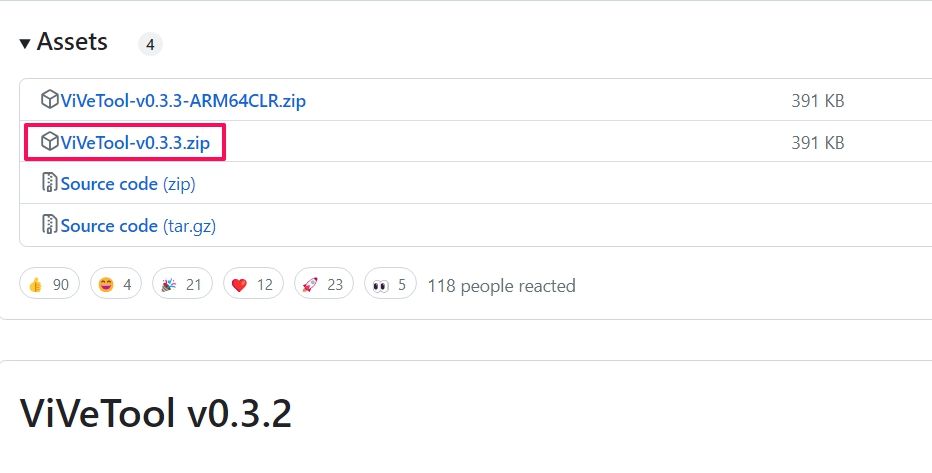
To begin with, go to the ViVeTool page on GitHub and download its latest version. Click on “Assets” and then click on the zip file.
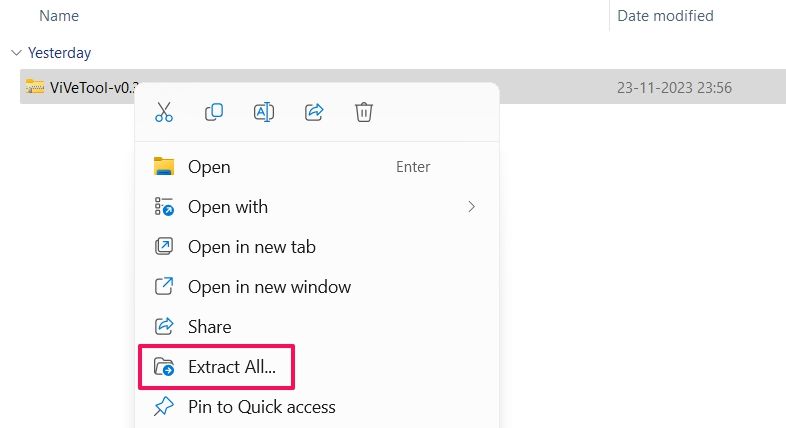
Right-click on the downloaded zip file and choose “Extract All” from the menu that appears.
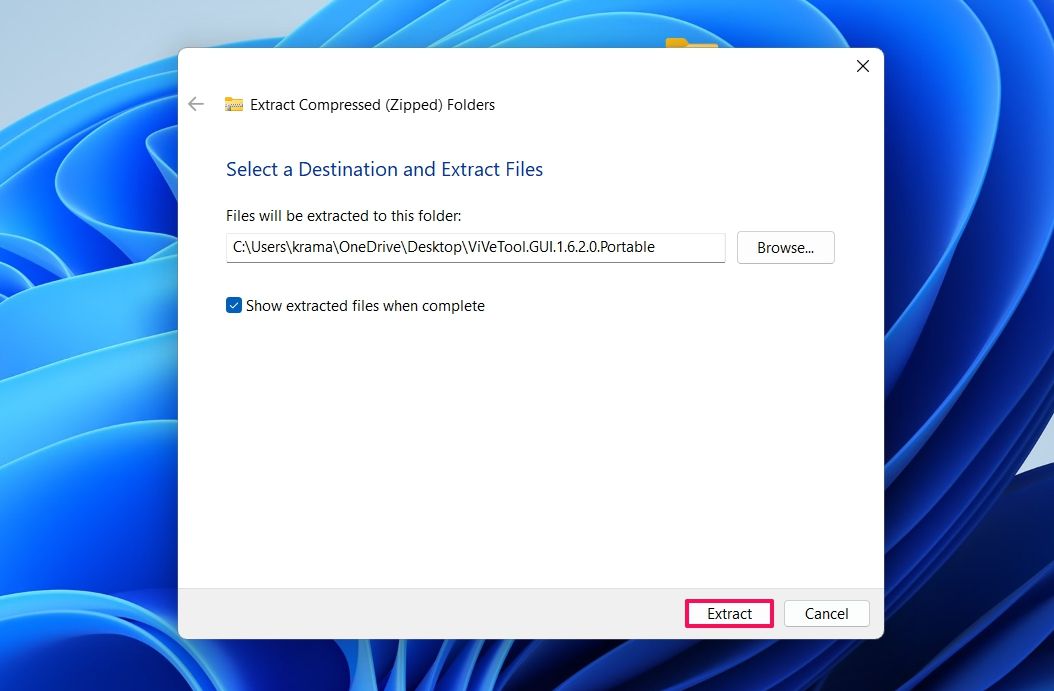
Choose a location where you want to extract the file and then click the “Extract” button.
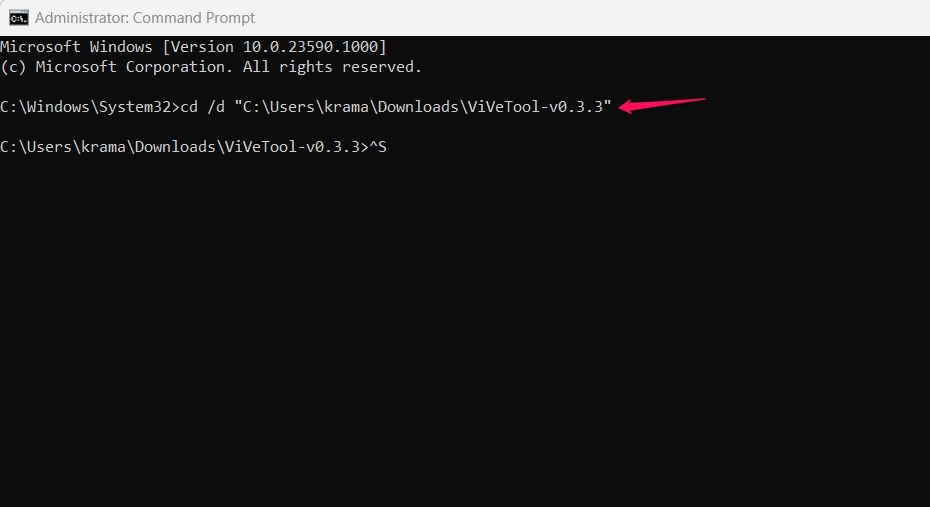
Now, open Command Prompt as an administrator (check out ways to open Command Prompt with elevated rights ) and change the directory to the extracted folder . To do this, type the following command and press Enter:
cd /d PathOfViVeToolFolder
Next, type the following and press Enter to enable a feature:
ViVeTool.exe /enable /id:featureID
You can find the feature ID of the feature you want to enable on the Microsoft Community page . Alternatively, you can also check out the Mach2 repo for the feature IDs.
For instance, if you want to enable Windows Copilot , type the following and press Enter:
ViVeTool.exe /enable /id:44788892
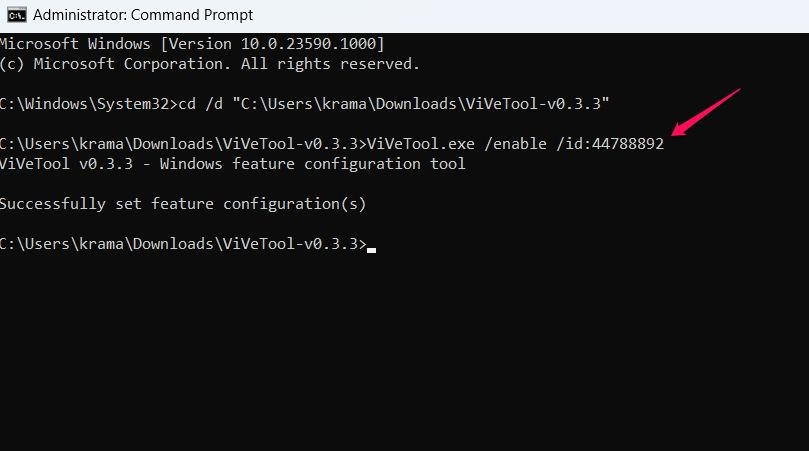
Once the command executes successfully, close Command Prompt and restart your computer ; the changes will take effect upon restart.
In the future, if you wish to disable the feature, open Command Prompt as administrator, type the following and press Enter:
ViVeTool.exe /disable /id:44788892
And that’s how you can use ViVeTool to turn experimental features on or off on your Windows PC. Remember that experimental features may contain bugs that could potentially harm your computer. Therefore, it’s crucial to back up your system before enabling any experimental features.
Also read:
- [New] 2024 Approved Nostalgia Spin-Off The Goofy Movie on Tape
- [Updated] 2024 Approved Channel Profits Soar The Secrets to Successful YouTube Monetization
- [Updated] In 2024, From Idea to Execution A Comprehensive YouTube Video Guide
- [Updated] Superior Smartphone Editors Elevating Your GoPro Shots
- [Updated] Ten Practices to Avoid VR Motion Sickness
- 2024 Approved Capture Professional Quality with Complimentary & Subscription LUTs
- Complete Tutorial for Nokia C32 Hard Reset | Dr.fone
- How to Downgrade Apple iPhone 12 Pro Max without Data Loss? | Dr.fone
- How to Factory Reset Oppo A2 If I Forgot Security Code or Password? | Dr.fone
- How to Perform Hard Reset on Oppo Reno 10 Pro 5G? | Dr.fone
- How to Remove DVD Copy Protection on Your Computer: Windows & Mac Xdvd Guide
- How To Transfer WhatsApp From Apple iPhone 15 Pro Max to other iPhone 11 Pro Max devices? | Dr.fone
- In 2024, Advanced Tactics for Maximizing the Use of Virtual Boards During Zoom Sessions (Desktop/iOS/Android)
- Remove Google FRP Lock on Vivo Y27 4G
- Three Solutions to Hard Reset Samsung Galaxy S23 FE? | Dr.fone
- Top 5 Car Locator Apps for Samsung Galaxy XCover 6 Pro Tactical Edition | Dr.fone
- Your Complete Guide To Reset Vivo T2x 5G | Dr.fone
- Title: Guide: Activating Windows' Latest Test Features with ViVeTool
- Author: Ian
- Created at : 2025-02-16 21:13:30
- Updated at : 2025-02-19 16:51:34
- Link: https://techidaily.com/guide-activating-windows-latest-test-features-with-vivetool/
- License: This work is licensed under CC BY-NC-SA 4.0.