Craft Your Own Telegram Stickers: Step-by-Step Tutorial for Designing Personalized Sticker Sets

Craft Your Own Telegram Stickers: Step-by-Step Tutorial for Designing Personalized Sticker Sets
Quick Links
If you’re looking for a specific sticker for your mood but can’t find it in the Telegram sticker store, why not do it yourself? Maybe you want to turn your favorite memes into stickers. Or you have pictures on your camera roll that’ll make the perfect sticker pack. This is the only guide you need.
Everything You Need
You need three things to get started.
- Image Editing Tool: You can use any image editing app to create the assets for your stickers. I’ll be using Adobe Photoshop for this demonstration. For video stickers, you’ll need a video editing tool. Telegram also has a built-in sticker editor, but it’s not a full-blown editing suite. If your stickers have a simpler design, you’re welcome to try the official Telegram editor.
- Assets (the video or image file you want to convert into a sticker). The image has to be in PNG or WEBP format. For video stickers, the video file should be in the WEBM format .
- Sticker Bot. Telegram has a dedicated bot for creating, editing, organizing, and publishing sticker packs. It makes the whole process quick and effortless. You can find it by searching “@stickers” on the Telegram app.
I’ve split this guide into three sections. First, I want to show you how to create a sticker. Then, we’ll make a sticker pack out of multiple stickers. Finally, we’ll learn how to share and use custom stickers. You don’t need any special skills to follow along.
Create a Sticker
I’m using Photoshop, but any basic editor can get the job done. Start by creating a canvas of 512 pixels by 512 pixels. One of the dimensions has to be 512 pixels. The other can be 512 pixels or smaller. Import the picture or graphic (that you want to turn into a sticker) into the image editing tool of your choice.
If the editor doesn’t support canvas creation, you can simply resize your image to those dimensions.
The next step is toisolate it from the background . You don’t have to create a clear cut-out for your sticker. I just prefer it with a transparent background. Likewise, you can add a white stroke to give it that classic sticker “feel.” To do that, I use the selection tools to highlight the subject and place it on its own layer. Then I double-clicked that layer to open its Layer Styles menu. The Stroke setting puts a stroke around the isolated layer.
Close
After the sticker is ready, export is as a PNG or WEBP (both support transparency). That’s all you need to make a static sticker. If you’re not interested in animated stickers, you can skip to the next section.
For Animated Stickers
Animated stickers are packaged in a special format that Telegram invented, called TGS. Creating stickers with this format is so involved that it’ll need a guide of its own). Creating animated stickers out of videos is a lot simpler. You don’t need any technical knowledge for it. So that’s what we’re going to do.
Any simple video editor will do the job. Windows has the built-in Clipchamp editor. I’m using Kdenlive here. It’s free and multi-platform, so you can download it on your computer and follow along if you want. But there are a few things you need to remember:
- The video should be 512 x 512 pixels. You can create a new project file with those dimensions.
- The video shouldn’t have sound.
- The clip should be under 3 seconds.
- It should be exported or rendered in WEBM format, encoded in the VP9 codec at 25 frames per second.
- The exported file should be under 256 KB.
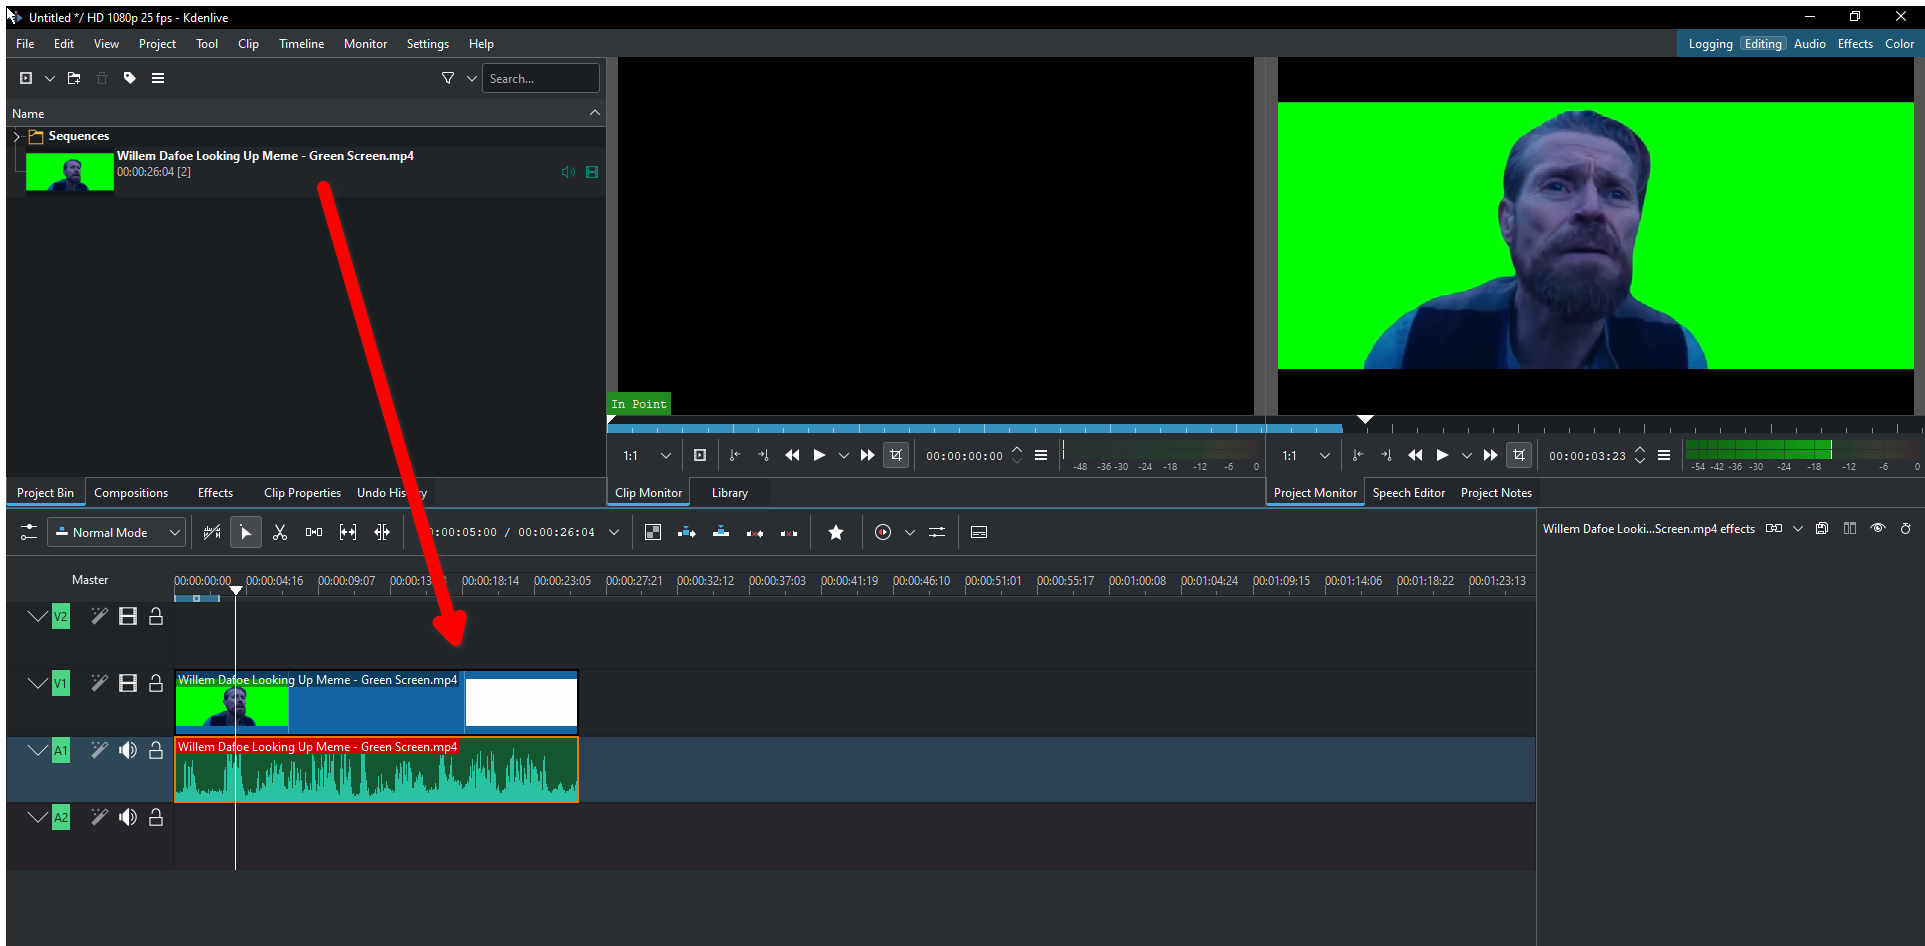
I started by importing the footage into Kdenlive. Just drag and drop it into the Sequences section. From there, we drag it into the timeline.

Right-click on the clip and select “Ungroup Clips.” That separates the audio from the video. We want to remove the audio, so right-click on the audio clip and select “Delete.”
Close
If the clip is over 3 seconds, you can use the Razor tool to trim it. Click the intended endpoints with the razor tool and delete the rest.
Close
Once again, I recommend it, but you can skip this step if you want. I’m going to isolate the background and create a clean cutout for our video sticker. Click the “Effects” tab and find “Chroma Key: Basic” under the “Alpha, Mask, and Keying” group. Then click the Eyedropper tool and tap the green area on the monitor tab.
Close
Click “Project” and choose “Render” from the drop-down menu. Pick these settings, and click “Render to File.” This is what my file looks like.
Close
Create a Sticker Pack
Even if you want to create just one sticker, it has to go in a pack. Telegram’s official bot lets you do just that. It’s device-agnostic, so wherever you can use Telegram, you can use the Stickers bot. Since we created our assets on the desktop, it’s more convenient to use the desktop version of Telegram.
Search “@stickers” in the search bar and click the official Stickers bot. Click the big “Start” button to launch the bot. Type “/newpack” and send. This will create a new sticker pack. Send a name for it. Then, upload the PNG or WEBP file you created before.
Close
Remember to upload it as a document, not as a photo.
Then, send the emoji that will link to this particular sticker. At this point, you’ve added one sticker to your pack. You can keep going by uploading more files and assigning emojis to each.
Close
For Video Stickers
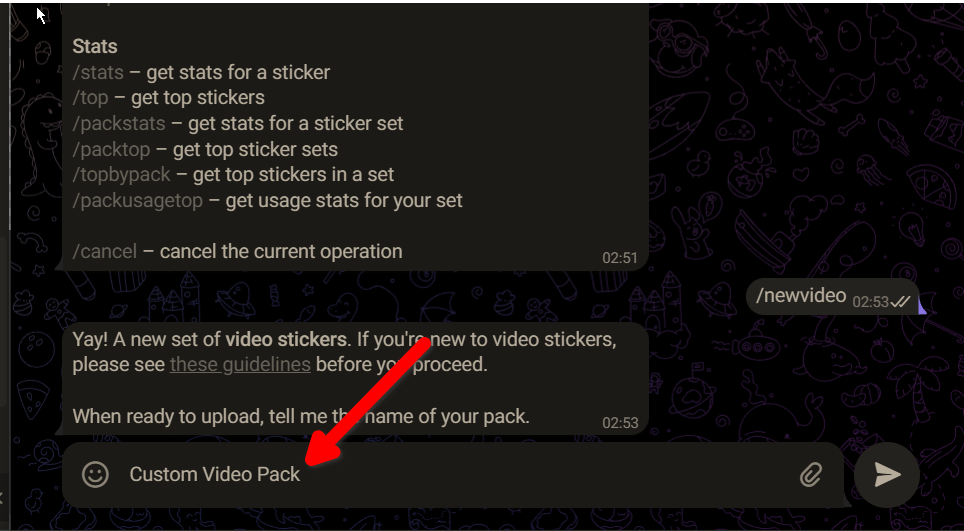
Video stickers go in their own pack since they can’t be bundled with static stickers. Type “/newvideo” and send to start a new video sticker pack. Give it a name. Then, upload the WEBM file you created before.

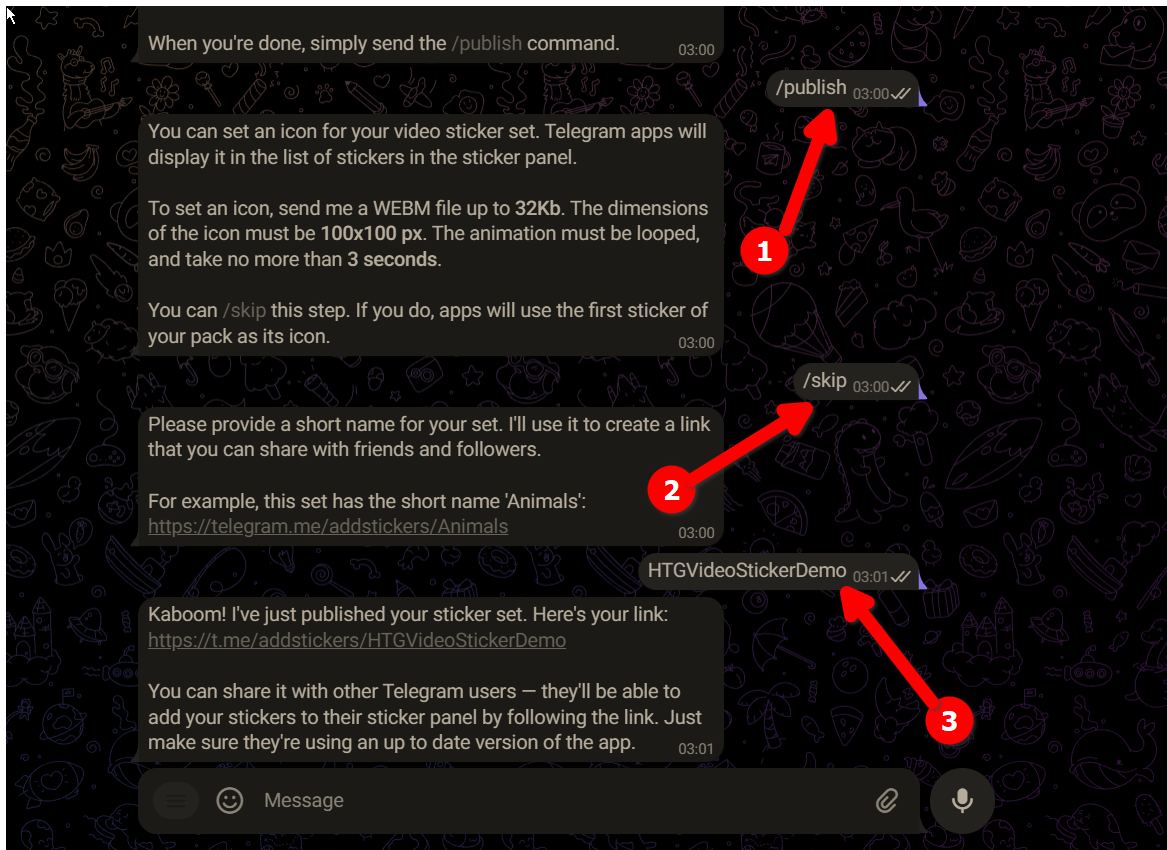
When you’re done, type “/publish” and send. Stickers bot asks if you want to attach an icon to your sticker pack. You can create a 100 X 100 graphic if you like. I skipped it with the “/skip” command.

Finally, give it a short name without any spaces or special characters. The Stickers bot will use it to generate a URL.
Close
Share and Use Your Stickers or Sticker Pack
Tap the URL to add the new sticker pack to your collection. You can also share that URL with other people to share the sticker pack. Alternatively, they can tap any one of your stickers to add the whole pack to their collections.
Pro Tips
- Shrinking images to 512 pixels might degrade their quality. You can use an image editing tool that allows for non-destructive editing to keep the original quality.
- While it’s possible to create sticker packs on mobile devices (there’s even a built-in sticker maker in the Telegram app), the Stickers bot recommends using the desktop app if you’re working on higher-quality stickers.
- For video stickers, it’s important to match the format, codec , and size. The bot will not accept your file otherwise.
Also read:
- [Updated] The 4 Fastest Lenovo Record Methods
- [Updated] Top Picks HD Cameras Under $100 for Extreme Sports
- Birimizde En Mükemmel Beklenen Ücretsiz Microsoft Film Yapımcıları - 18 Adet Türküleri Bazılacağız!
- Comparative Study of Premium Video Services
- Complete Tutorial for Samsung Galaxy A54 5G Hard Reset | Dr.fone
- How To Restore Missing Photos Files from Vivo Y27s.
- How To Transfer Data From Apple iPhone SE To Others ios devices? | Dr.fone
- How To Transfer WhatsApp From Apple iPhone 6 Plus to other iPhone? | Dr.fone
- In 2024, The Best iSpoofer Alternative to Try On Sony Xperia 5 V | Dr.fone
- Solutions to restore deleted files from Motorola Edge+ (2023)
- The Future of Home Entertainment TV or Projection for 4K?
- Your Complete Guide To Reset Nubia Z50 Ultra | Dr.fone
- Title: Craft Your Own Telegram Stickers: Step-by-Step Tutorial for Designing Personalized Sticker Sets
- Author: Ian
- Created at : 2025-02-14 01:05:57
- Updated at : 2025-02-19 17:21:35
- Link: https://techidaily.com/craft-your-own-telegram-stickers-step-by-step-tutorial-for-designing-personalized-sticker-sets/
- License: This work is licensed under CC BY-NC-SA 4.0.