
:max_bytes(150000):strip_icc():format(webp)/012_how-to-make-video-call-on-android-bd93ab594aa648c7977f4c1ecf42c85b.jpg)
Complete Tutorial for Lava Yuva 3 Pro Hard Reset | Dr.fone
Best Fixes For Lava Yuva 3 Pro Hard Reset
If you are looking for the best fixes for Lava Yuva 3 Pro hard reset, then you have come to the right place. In this guide, we will discuss the best ways to hard reset your Lava Yuva 3 Pro device. We will also provide you with some tips and tricks to help you avoid common issues that may arise during the process.
Do you want to hard reset your Lava Yuva 3 Pro phone? When your phone is not showing its peak performance, it can be very annoying because its working gets slower. If your phone is lagging and apps are not working properly, then there is a problem with its software. The only way to fix this problem is with a hard reset that will restore factory settings in your phone. You can do it to fix your phone or to remove all data if you want to sell it.
If you are facing some troubles with Lava Yuva 3 Pro hard reset, then we have the five best ways to factory reset your phone. Each method is best for certain situations, such as if you forget your password, you only want to erase data, or you want to fix software problems. We will give you simple step-by-step tutorials for each method. Although the procedure is simple, it is best to follow each step.
Using Lava Yuva 3 Pro Hard Reset in What Situations?
1: Erase All Data and Settings
One of the most common reasons for a hard reset is to erase all data and settings from the phone. When your phone runs out of storage, you can only delete the previous data if you want to save something new. Although Lava Yuva 3 Pro phones provide a lot of storage and support SD cards, you can only erase unwanted data if you run out of space. Here is the deal, you can save your data on another device like your laptop and do an Lava Yuva 3 Pro hard reset. This way, you can keep your previous data, make room for new data, and save time.
2: Restore Your Phone Back to Original Operating System and Apps
If your phone is working slower than usual or starts lagging, you can do a factory reset instead of wasting time figuring out the problem. Most problems in a phone come from trash file build-up and software updates. Suppose your phone doesn’t work properly after an update. In that case, you can revert it back to the original operating system by using a factory reset. You can also do it if you don’t like an update’s new features and settings. Before your Lava Yuva 3 Pro hard reset, make sure to backup your data on cloud storage to restore it afterward.
3: Other Situations (like selling your phone…)
Aside from the two situations discussed earlier, you might also have to hard reset your phone in other cases. Let’s say you want to buy a new phone or upgrade to a newer model. You will not use your old phone and will probably sell it. Before you sell it, you have to erase all data and personal information like passwords and accounts from your phone. In another scenario, let’s say your phone is stolen or you lost it. All you need to do is use the Lava Yuva 3 Pro hard reset to ensure no one can access your personal data.
1: Hard Reset from Settings (if you have password)
The easiest way to do an Lava Yuva 3 Pro hard reset is by using the factory reset option in the settings. This method will erase all data and settings, and you can easily do it in two easy steps. But it only works if you know the password of your phone. If you don’t know the password and the phone is unlocked, it will still require a password for confirmation. Follow these steps for a hard reset from settings.
- Open settings and tap on the “system” option.
- Tap on the “Reset Options” in the system menu.
- Tap on Erase all data or factory reset.
- Enter the Password and tap reset for confirmation.
- The system will erase all data and reboot.
2: Restore with Recovery Mode
Suppose you want to hard reset your locked Lava Yuva 3 Pro phone, use the recovery mode. With recovery mode, you don’t have to go to settings and erase data after providing the password. The only drawback of using recovery mode is that it is not best for beginners. Follow these steps for your Lava Yuva 3 Pro hard reset using recovery mode.
- Power off your mobile phone.
- Hold the volume up and power buttons.
- Enter the menu and navigate using the volume up and down buttons.
- Select Wipe data/factory reset using the power button.
3: Dr.Fone - Data Eraser (delete all data and settings)
 safe & secure
If you want to hard reset your phone just to erase all its data and settings, instead of using the long factory reset method, erase data with Dr.Fone. With third-party software like Dr.Fone, you can erase anything from your mobile in one click. It helps you save time, and you don’t have to set up your phone after you are done. You can also restore the erased data using Dr.Fone as well. Here are the steps for erasing data from your mobile using Dr.Fone.
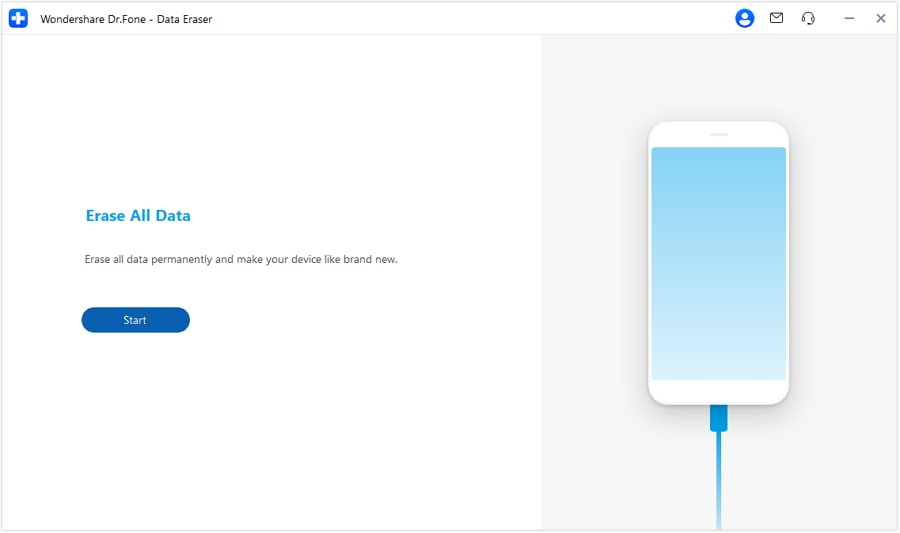
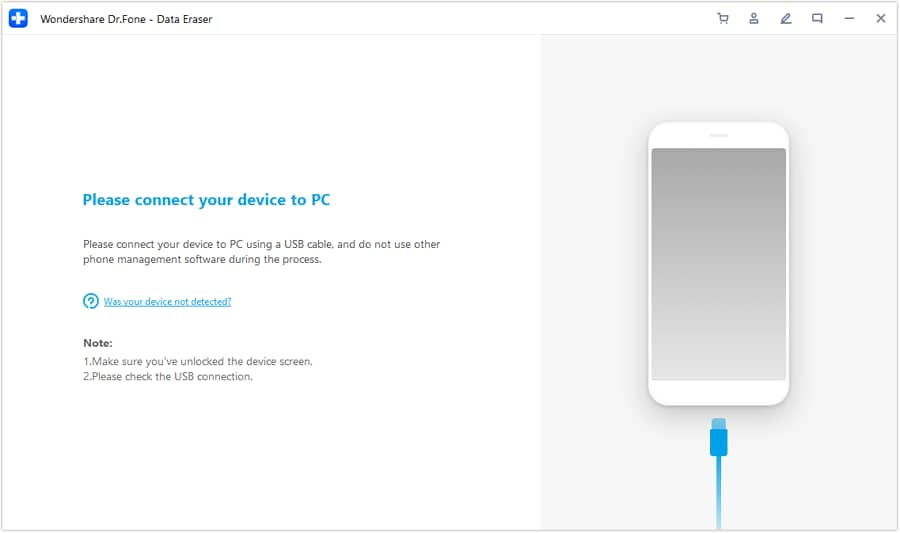
- Launch Dr.Fone on your computer, select “Data Erase”, and connect your mobile with your computer using a USB cable.

- Click on the Start button to erase the data on your mobile.
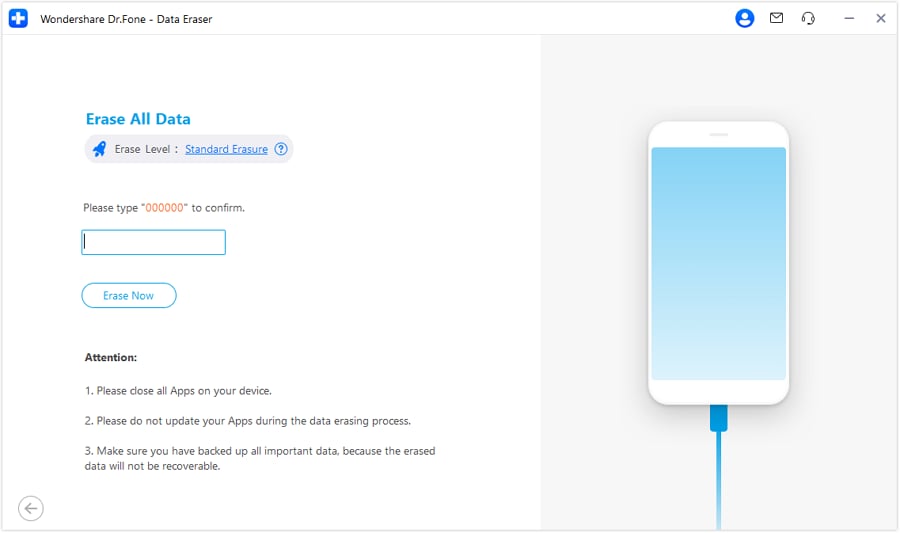
- Type the key and click on “erase now”.
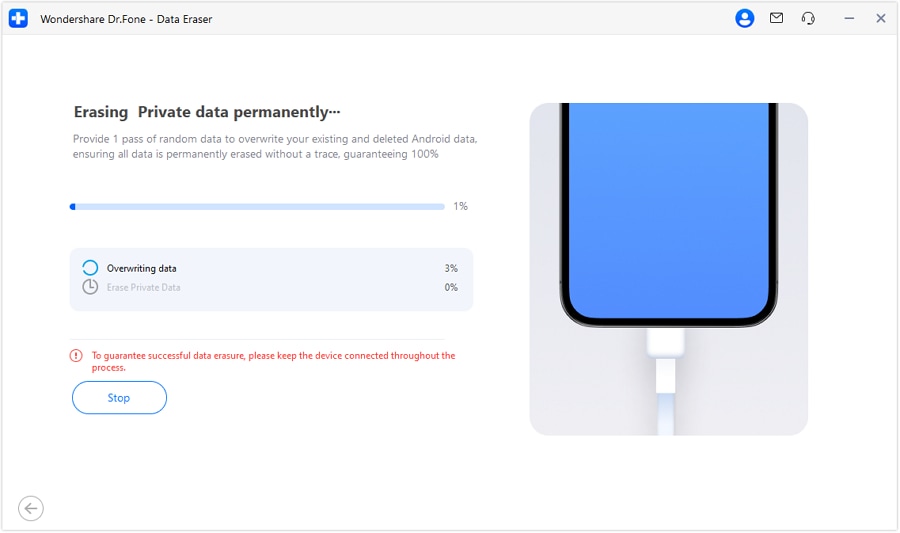
- Dr.Fone will erase all types of data on your device, and you can see the progress on your computer screen.
4: Dr.Fone - Screen Unlock (when you forget password)
Most people do an Lava Yuva 3 Pro hard reset because they forget their screen lock or password. But it also erases all their data and settings, which is a big loss just to recover a password of their phones. Instead of doing a hard reset, you can use the Dr.Fone screen unlock feature to unlock any phone without password. You can also reset a new password without any complicated procedure. Here is the guide on how to unlock phones with Dr.Fone.
safe & secure
- Launch Dr.Fone on your computer, select “screen lock”, and use a USB cable to connect your mobile with your computer.
- Select Lava Yuva 3 Pro on Dr.Fone and put your phone into the specific mode.

- Dr.Fone will automatically lead your phone to enter the specific mode. After downloading, click “remove now” to open the screen lock. Then wait for the unlock process to complete.

5: Dr.Fone - System Repair (fix some software problems)
safe & secure
If your phone is lagging, or you want to fix software problems, doing a factory reset sounds a bit excessive. It might fix your phone, but you will lose all your data in return. In such cases, you can use the system recovery feature of Dr.Fone to fix any issue with your phone’s software. It can solve display problems, sound issues, heat-up issues, etc. Follow these steps to fix software issues using Dr.Fone.
- Open Dr.Fone on your computer and connect your mobile phone with a USB cable.
- Click on “System Repair” and select “Android Repair.”

- Enter the Lava Yuva 3 Pro device information with its name, model, and country.

- Click on Next and type the code you see on the screen.

Bottom Line
This concludes our article on five ways to hard reset Lava Yuva 3 Pro phones. You might be wondering which method is best for your Lava Yuva 3 Pro hard reset. The best way to factory reset your phone, erase all data, or unlock the screen is by using Dr.Fone. It is multipurpose software that enables users to fix various problems without doing anything. All you need to do is install Dr.Fone on your computer and connect your phone with it. Dr.Fone has various other features like WhatsApp transfer, data recovery, and device transfer.
 safe & secure
Different Methods for Resetting Lava Yuva 3 Pro Phones with Screen Locked and Not
The Lava Yuva 3 Pro has made its place in the smartphone industry at a fast pace. Lava Yuva 3 Prois dealing with a broad spectrum of products from flagship phones to smartwatches and security cameras. No worries if you own a smartphone owned by the label and don’t know how to reset your Lava Yuva 3 Prophone without a password.
In the following article, you can learn all about factory resetting Lava Yuva 3 Prophones, including an apt checklist of things to do before wiping all the data from your device. Also, discover multiple easy methods to reset a Lava Yuva 3 Prophone with or without a password.
Part 1: When Should You Reset Your Lava Yuva 3 Pro?
Performing a factory reset on your phone is a significant step as it wipes all existing data on your device and leaves you with a blank slate. Here are some plausible reasons why you might want to reset your Lava Yuva 3 Prophone:
1. Performing a Full Wipe
Sometimes, erasing all data on your phone is an evident need. If you want to delete all apps on your phone or restore them to factory settings, a direct factory reset provides a simple solution for this.
2. Forgotten Passwords
Forgetting your phone’s password is a catastrophe, and everyone is prone to it. If you end up locking yourself out of your phone after too many attempted tries to unlock it, a hard factory reset is sometimes the only option left. You can learn how to factory reset your Lava Yuva 3 Prophone when locked and end up with a clean slate without any password.
3. Selling or Replacing Phone
If you choose to sell your Lava Yuva 3 Prophone and move on to a new one, you will need to wipe all data from your device. Deleting everything from your phone before changing it is essential to protect the integrity and privacy of your data. In such a situation, you can perform a factory reset, and your phone will be good as new.
4. Virus and Malware Attacks
If a virus or malware attacks your device, it can slow down your phone and put your data at risk. To ensure that no trace of malicious software is left on the Lava Yuva 3 Pro device, you will need to perform a factory reset on your Lava Yuva 3 Prophone.
5. Slow Performance
Apps installed from third-party sources can often hog up the storage on your phone and result in slow system performance. If your phone is acting slower than usual, you can factory reset it to resolve the issue.
Part 2: What Should You Do Before Formatting Your Lava Yuva 3 Pro?
If any of the above-mentioned reasons check a box and you wish to format your Lava Yuva 3 Prophone, it can be done in a few instants. However, keeping in mind the severity of the consequences, it is better to keep a few things in mind before proceeding with the process.
Performing a factory reset on your device cleans every last bit of data from it. This means that all the images, documents, contacts, cache files, app data, Google accounts, and other stuff will be permanently removed from your phone. Hence, before formatting your phone, it is advisable to make a complete and up-to-date backup of your data.
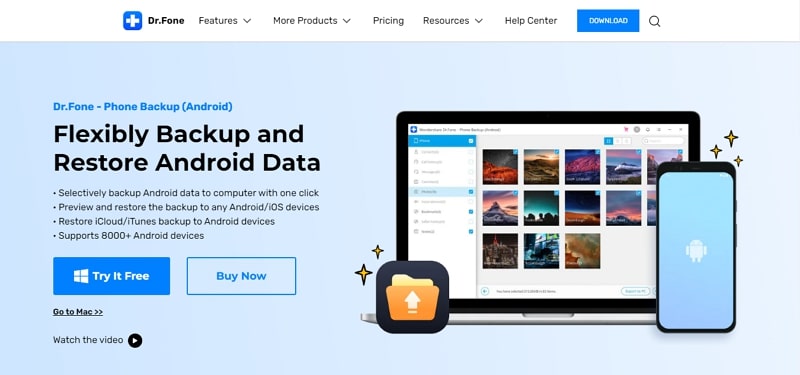
The Dr.Fone - Phone Backup tool for Android is a competent software that can help you make a complete backup of your data. With a single click, you can transfer all the data on your phone to your computer. You can also sync your Android data to popular cloud storage services such as Google Drive, Dropbox, etc.
Before formatting your device, you have to keep in consideration Google’s Factory Reset Protection (FRP) feature. This is a security feature in Android phones that prevents unauthorized use of devices. FRP makes sure that only the owner of the Google account signed into the Lava Yuva 3 Pro device can perform a factory reset on it. If you have forgotten your Google account password, reset it in advance so you can format your phone. Note that you have to wait for 72 hours after changing your Google account’s password before formatting a linked phone.
safe & secure
Part 3: How to Factory Reset Lava Yuva 3 Pro
If you know the passcode to your device, the procedure to factory reset your device is easy as a breeze. The following methods indicate how to factory reset a Lava Yuva 3 Prophone when it is not locked.
Method 1: Factory Reset Lava Yuva 3 Pro via Android Settings (Factory Reset)
The easiest way to perform a complete wipe on your phone is via your phone’s settings. Here are the steps for that:
Step 1: Go to the settings of your Lava Yuva 3 Prophone and scroll down to find the “Factory Reset” option. Typically, this option is under the “About Phone” or “Additional Settings” menu.

Step 2: Now click on “Erase all data” at the bottom of your Lava Yuva 3 Prophone screen.

Step 3: You will be prompted to type your phone’s passcode to proceed. Afterward, you can create a backup of your phone’s data by clicking on the “Back up” option. If not, hit the “Factory Reset” button and click “Next.”

Step 4: Wait for 10 seconds and click “OK” on the screen. Now, wait for the reset process to complete, and you are all done.

Method 2: Permanently Erase Everything with Dr.Fone - Data Eraser (100% Wipe Data)
Although the settings app provides an easy way to wipe your phone’s data, the feature has certain drawbacks. Luckily, Wondershare Dr.Fone - Data Eraser (Android) offers an easy alternative for resetting your phone using its Data Eraser tool.
Dr.Fone can permanently and completely wipe all data, including contacts, messages, images, app data, and more, from your phone in just a single click. The process is quick and easy and provides data security to users. The following steps indicate how to reset Lava Yuva 3 Prophone using Dr.Fone - Data Eraser (Android) tool:
Step 1: Use Data Eraser Tool
Install and launch Dr.Fone on your computer, and select the “Data Eraser” tool from the program’s main interface.
Step 2: Enable USB Debugging
Now connect your Lava Yuva 3 Prophone to your computer via a tethering cable and enable USB debugging on your Lava Yuva 3 Prophone.
Step 3: Start Erasing Lava Yuva 3 ProDevice
After attaching your phone to the computer, click on “Start.” Now, type in the confirmation code present on the screen and tap on the “Erase Now” button to reset your Lava Yuva 3 Prodevice.
The Difference Between These Two Methods
The conventional method of wiping your phone using the Android settings suffers a significant drawback. Due to the lack of data encryption by Android, data from almost 40% of formatted devices can be quickly recovered using data recovery tools. Even after a full factory reset, deleted files are retrievable to some extent.
The benefit of using Dr.Fone as your data eraser tool is that it can permanently erase everything on your phone. The program overwrites the phone memory with random data, hence securing your privacy. Data formatted via Dr.Fone cannot be recovered in any case, so you have nothing to worry about.
safe & secure
Part 4: How to Factory Reset Lava Yuva 3 Pro When Locked
If you got locked out of your Lava Yuva 3 Prophone, the process to factory reset your phone can differ slightly. The following methods describe how to factory reset Lava Yuva 3 Prophone when locked.
Method 1: Via the Recovery Mode
One of the go-to methods for factory resetting a locked Lava Yuva 3 Prophone is via the recovery mode. You can follow the steps given below to boot your phone in recovery mode and perform a factory reset on your Lava Yuva 3 Prophone without a password:
Step 1: Long press the Power button on your Lava Yuva 3 Prophone to turn it off. Now press and hold the Power button and the Volume Up button at the same time.
Step 2: Once the Lava Yuva 3 Prologo appears on the screen and you feel a vibration, let go of the Power button but keep pressing the Volume Up button. Let go once you see the “Recovery Mode” screen on your phone.

Step 3: Use the volume keys to scroll down the screen and find the “Wipe Data” option, then hit the Power button to select it.
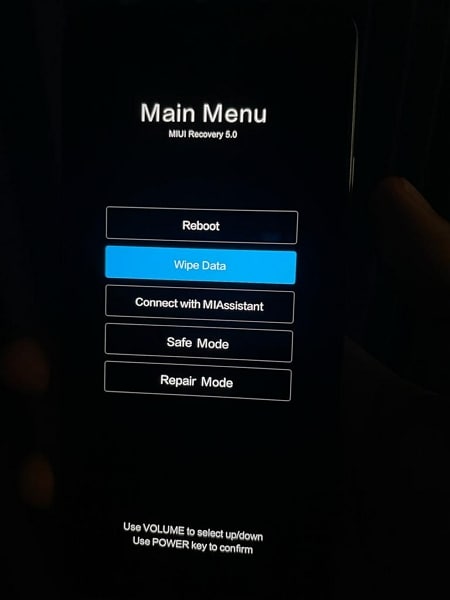
Step 4: Press the Power button again on the “Wipe All Data” option and do the same on the “Confirm” option. After the resetting process is complete, select the “Back to Main Menu” option and reboot your device.

Method 2: Via Find Device
Xiaomi offers a “Find Device” option, using which you can learn to factory reset your Lava Yuva 3 Prophone without a password using your Lava Yuva 3 Proaccount. Note that for this process to work, you will require an active internet connection and a signed-in Lava Yuva 3 Proaccount on your phone. Then, you can perform the following steps to wipe data from your Lava Yuva 3 Prophone:
Step 1: Launch the official website of Lava Yuva 3 Pro and sign in using your Lava Yuva 3 Proaccount.
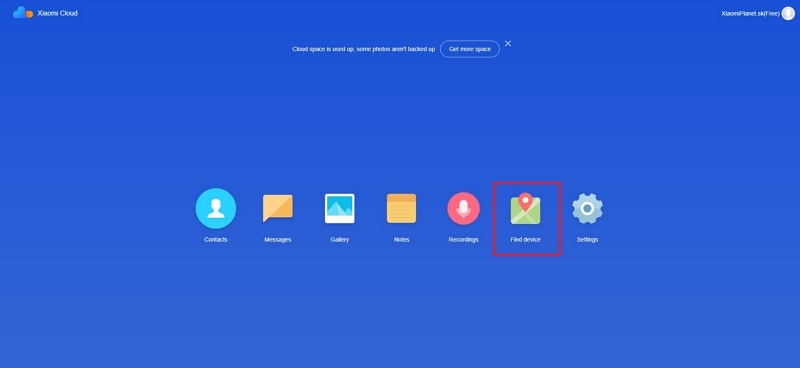
Step 2: Click on the “Find Device” option and select your phone from the screen’s upper-right corner. Next, tap on “Erase Data” and confirm the process to erase all data from your device.

Method 3: Using ADB Fastboot Tools
The Xiaomi ADB Fastboot Tools is a helpful app that enables users to perform ADB commands quickly and easily. The app comes with a range of beneficial tools that can help you wipe all data from your phone. Following is a step-by-step guide on how to reset Lava Yuva 3 Prophone when locked using the ADB Fastboot Tools:
Step 1: Hold down the Power button and the Volume Down button at the same time until you see the Fastboot splash screen.

Step 2: Use a USB cable to attach your Lava Yuva 3 Prophone to your computer and launch the Xiaomi ADB Fastboot Tools application.
Step 3: The app will automatically detect and display the information regarding your Lava Yuva 3 Prophone at the top-left corner of the screen.
Step 4: Under the “Wiper” section in the app, click on “Wipe cache and user data” to reset your locked Lava Yuva 3 Prophone.

Method 4: With Dr.Fone - Screen Unlock (Android)
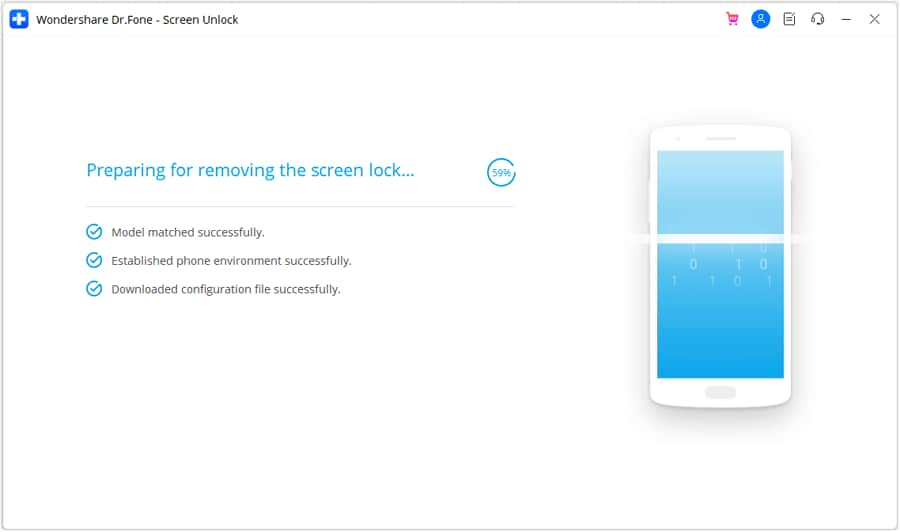
If you are searching for a reliable way to reset your Lava Yuva 3 Prophone without a password, Dr.Fone can come in handy. Using the Screen Unlock feature of the tool, you can easily remove the screen lock and then perform a complete wipe on your device. Here is how to factory reset a locked Lava Yuva 3 Prophone using Dr.Fone - Screen Unlock (Android) :
Step 1: Proceed with Screen Unlock
Launch Dr.Fone’s Repair Toolkit on your computer. From the “Home” tab in the main interface, click on “Screen Unlock.” Now attach your phone to the computer using a USB cable and click on “Unlock Android Screen.”
Step 2: Enable Lava Yuva 3 ProDownload Mode
Dr.Fone will detect and display your device information on the screen. Now boot your phone into Download Mode using the instructions present on the screen and download the recovery package for your device.

Step 3: Remove Lava Yuva 3 ProScreen Completely
Once the download is complete, click “Remove Now” to access your phone without a passcode. Then, you can factory reset your Lava Yuva 3 Prophone from the settings.
safe & secure
Part 5: FAQs about Lava Yuva 3 Pro
- How can I hard reset my Lava Yuva 3 Prophone without a PC?
A hard reset basically wipes out everything from your device, including media files, contacts, and app data. As the above-mentioned methods indicate, you can easily perform a hard reset (aka factory reset) on your device without a PC.
- What is the difference between a hard reset and a soft reset?
A soft reset means rebooting your device to fix minor issues. It is one of the easiest and quickest ways to refresh your device and improve performance speed. The process clears RAM data and can thus clear caches or other background processes interfering with your device’s operations.
A hard reset is a process of restoring a device to its original factory conditions. Executing a hard reset means removing all data from your device, leaving you with a clean slate. A hard reset is useful for fixing serious issues on your device, such as virus attacks.
- How can I restore my Redmi in recovery mode?
If your Redmi phone is stuck in recovery mode, you can try the following method to fix the issue:
Use the Volume Up and Down buttons to navigate your way through the recovery mode. Use the Power button to click on the “Reboot” option on the screen. This will make your device exit recovery mode and restart normally.
If this method does not work, you can wait for the battery to drain fully from your phone and reboot it normally.
Conclusion
Lava Yuva 3 Prois a famous brand that serves a large number of consumers worldwide. If you are also a Lava Yuva 3 Prouser, you now know how to factory reset your Lava Yuva 3 Prophone without a password owing to the in-depth guide mentioned above. Using these easy methods, such as Dr.Fone for resetting your device, can help save you a great deal of trouble.
Is your Lava Yuva 3 Pro working too slow? Here’s how you can hard reset it
If Lava Yuva 3 Pro 3.4 hard reset or Lava Yuva 3 Pro hard reset is the only option for your mobile phone, you can perform a factory reset to make your device function as it did on the first day. You may need a hard reset if it works slowly, hangs, you want to bypass screen lock, your memory is full, and you want to erase everything, you want to sell or give your device away, and you don’t want anyone to be able to access your files or passwords.
The following instructions will show you how to completely wipe up all of your data and restore the Lava Yuva 3 Pro to its factory-fresh condition.
Part 1: Why do I Need to Hard Reset My Lava Yuva 3 Pro?
We advise you to remove all accounts from the Lava Yuva 3 Pro device before performing a factory reset, especially if you plan to sell, give away, or donate the 3.4. It is also a good idea to unlink the Google account. By doing this, we can prevent issues for new users as some more recent smartphones have a feature called FRP, or Factory Reset Protection, which requires the Google account or PIN number that was originally used to set up the Lava Yuva 3 Pro when a device is factory restored.
Part 2: How to Hard Reset My Lava Yuva 3 Pro
1. Fastboot Mode
- Shut down your phone.
- Add a USB cord to your computer or laptop.
- Your phone should now start up in Fastboot Mode after you press and hold the Volume Down + Power buttons for a few seconds. Lava Yuva 3 Pro Recovery Mode and Fastboot Mode
- Using the ADB command, start Lava Yuva 3 Pro in Bootloader Mode or Fastboot Mode.
- If your computer has ADB and Fastboot drivers installed, and your phone has USB debugging turned on, execute the command below after connecting it.
- Launch Command Prompt (CMD) on your PC, then type the command listed below.
reboot bootloader using adb
- After some time, you will see that your Lava Yuva 3 Pro has been hard reset.
2. Hard reset with hardware key button
- Choose “wipe data/factory reset” on your Lava Yuva 3 Pro to do a hard reset. Scroll down with the Volume buttons, and press the Power key to agree.
- Next, choose yes from the menu if further confirmation is required, and then click the Power button once.
- Lastly, press the Power key and choose the Reboot system.
- Do not forget to charge your phone.
- Initially, turn off your phone.
- Now Press the Volume Up + Power key for a few seconds to enter recovery mode.
- Press and hold the Power and Volume Up buttons at the same time until the Lava Yuva 3 Pro device vibrates. Release all the presses if the Lava Yuva 3 Pro logo or Recovery screen shows.
- You can give your phone up to 30 seconds to display the recovery screen.
Bonus Tips
Dr.Fone - Data Eraser (delete all data completely)
Dr.Fone - Data Eraser helps you quickly get rid of all the unwanted information and all of your data however it is always advisable to back it up using the Dr.Fone - Phone Backup.
Let’s see how you can delete completely all the data using Dr.Fone - Data Eraser. do not worry the next section is about how you can back up and restore the data before erasing it completely using Dr.Fone - Phone Backup.
Step 1: Connect your Lava Yuva 3 Pro smartphone to your computer. Start Dr.Fone on your computer. Select “Data Eraser” from the tool list.
Connect your Lava Yuva 3 Pro to the PC via a USB wire. Ensure that your phone has USB debugging turned on. You will see a pop-up window on your phone asking you to approve USB debugging.
Step 2: Begin wiping your Lava Yuva 3 Pro phone.
Dr.Fone will then automatically recognize and connect to your Lava Yuva 3 Pro smartphone. To begin wiping all of your data, select “Erase All Data.”.
Before proceeding, ensure that you have backed up any critical data because deleted data cannot be retrieved. After that, type “000000” to confirm your activity.
Dr. Fone will next proceed to wipe the data on your Lava Yuva 3 Pro phone. The entire procedure takes only a few minutes. Turn off the phone and do not run any phone administration programs on the PC.
Step 3: Reset your phone’s factory data.
Once all app data, photos, and other private data have been completely erased, Dr.Fone will advise you to touch on Factory Data Reset or Erase All Data on the phone. You may use this to completely delete the phone’s settings.
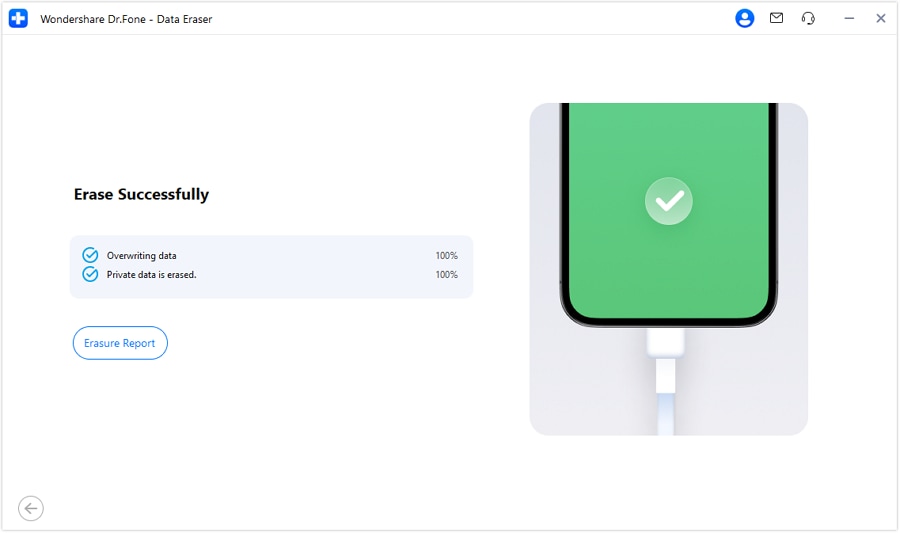
Your Lava Yuva 3 Pro phone has now been completely wiped, giving it the appearance of being brand new.
safe & secure
Dr.Fone - Phone Backup (easy backup before a new hard reset)
Step 1: Connect your Lava Yuva 3 Pro phone to your PC.
Launch Dr.Fone on your PC and choose “Phone Backup” from the list of options.
Then, connect your Lava Yuva 3 Pro phone to the computer using a USB cord. Please ensure that the phone is in USB debugging mode. If your Lava Yuva 3 Pro version is 4.2.2 or higher, a pop-up window on the Lava Yuva 3 Pro phone will prompt you to accept USB Debugging. Please press the OK button.

To begin backing up the data on your Lava Yuva 3 Pro phone, click Backup.
If you have previously used this application to back up your device, you may examine your backup history by clicking on “View backup history.”
Step 2: Choose which file types to back up.
After connecting the Lava Yuva 3 Pro phone, pick the file types you wish to back up. Dr.Fone has already tested all of the file kinds for you. Then, to begin the backup process, click Backup.

The backup will take a few moments. Please do not detach your Lava Yuva 3 Pro phone, use it, or erase any data from it during the backup process.

When the backup is finished, you can view the contents of the backup file by clicking the View the backup button.
safe & secure
The Bottom Line
Now that you know how to hard reset Lava Yuva 3 Pro it is time to implement all the possible ways and see which one works for you. We also recommend you to proceed with backing up and restoration of all the information so that you will not have to repent in the end. It is all about using smart tools like Dr.Fone - Data Eraser and Dr.Fone - Phone Backup.
Also read:
- Undelete lost pictures from Lenovo ThinkPhone.
- Factory Reset on Apple iPhone 6s Plus | Dr.fone
- Use Device Manager to identify some outdated drivers on Windows 11 & 10 & 7
- How to Upgrade Apple iPhone XS Max without Losing Any Data? | Dr.fone
- Things You Dont Know About Honor X50i Reset Code | Dr.fone
- Things You Dont Know About OnePlus 12 Reset Code | Dr.fone
- How to Reset a Samsung Galaxy F34 5G Phone That Is Locked | Dr.fone
- How To Transfer Data From Apple iPhone 7 To Other iPhone 14 Pro Max devices? | Dr.fone
- Undelete lost messages from Samsung Galaxy S24 Ultra
- Unlock a disable iPhone 12 mini using itunes
- How to Reset a Vivo Y77t Phone That Is Locked | Dr.fone
- Best Fixes For Samsung Galaxy S23 Hard Reset | Dr.fone
- How To Repair iOS System of Apple iPhone 14 Pro? | Dr.fone
- Your Complete Guide To Reset Tecno Spark 20C | Dr.fone
- What You Need To Know To Improve Your Samsung Galaxy S23 Ultra Hard Reset | Dr.fone
- How to Downgrade Apple iPhone 8 Plus without Losing Any Data? | Dr.fone
- Simple ways to get lost files back from Y27 4G
- Top 5 Ways to Fix Excel 2023 File Not Opening Error | Stellar
- How To Transfer WhatsApp From Apple iPhone 7 to other iPhone 14 devices? | Dr.fone
- How To Transfer Data From Apple iPhone 15 To Other iPhone 15 Pro Max devices? | Dr.fone
- How to Reset Infinix Note 30 VIP without Losing Data | Dr.fone
- How To Transfer WhatsApp From Apple iPhone 11 to Android/iOS? | Dr.fone
- Some MP4 won't play on my Samsung Galaxy S21 FE 5G (2023)
- Recover Apple iPhone 14 Pro Max Data From iOS iCloud | Dr.fone
- Recover Apple iPhone XS Data From iOS iCloud | Dr.fone
- How to Perform Hard Reset on OnePlus Open? | Dr.fone
- Complete Tutorial for Tecno Spark 10 4G Hard Reset | Dr.fone
- Full Guide to Hard Reset Your Vivo S17 Pro | Dr.fone
- What You Need To Know To Improve Your Infinix Zero 5G 2023 Turbo Hard Reset | Dr.fone
- How To Transfer Data From Apple iPhone 13 Pro To Other iPhone 12 Pro Max devices? | Dr.fone
- Is your Tecno Spark Go (2024) working too slow? Heres how you can hard reset it | Dr.fone
- Complete Tutorial for Xiaomi Redmi 12 5G Hard Reset | Dr.fone
- Simple ways to get lost files back from Infinix Hot 30i
- The way to recover deleted contacts on Tecno without backup.
- How to Reset Meizu 21 Without the Home Button | Dr.fone
- Remove Realme Lock Screen without Password(Realme C67 5G)
- In 2024, Top IMEI Unlokers for Your Oppo Find N3 Phone
- In 2024, Quick Steps to Change Weather Location on Apple iPhone SE | Dr.fone
- 4 Methods to Turn off Life 360 On Oppo Find X6 without Anyone Knowing | Dr.fone
- 11 Ways to Fix it When My HTC U23 Pro Wont Charge | Dr.fone
- How to Transfer Data from Realme 11X 5G to Samsung Phone | Dr.fone
- In 2024, How To Change Your SIM PIN Code on Your Huawei Phone
- In 2024, How To Reset the Security Questions of Your Apple ID From Your Apple iPhone 12 mini
- How To Remove or Bypass Knox Enrollment Service On Realme 12+ 5G
- How to Use Google Assistant on Your Lock Screen Of Xiaomi Civi 3 Disney 100th Anniversary Edition Phone
- How To Remove or Bypass Knox Enrollment Service On Xiaomi Redmi 13C
- In 2024, 10 Free Location Spoofers to Fake GPS Location on your Oppo F23 5G | Dr.fone
- Top 9 Xiaomi Redmi A2 Monitoring Apps for Parental Controls | Dr.fone
- Why Your WhatsApp Live Location is Not Updating and How to Fix on your Vivo Y78 5G | Dr.fone
- In 2024, The Best iSpoofer Alternative to Try On Samsung Galaxy XCover 7 | Dr.fone
- In 2024, Top 9 Apple iPhone 13 mini Monitoring Apps for Parental Controls | Dr.fone
- In 2024, How to Unlock Apple iPhone 11 Pro Max When We Dont Have Apple ID or Password?
- In 2024, CatchEmAll Celebrate National Pokémon Day with Virtual Location On Vivo Y100A | Dr.fone
- Super Easy Ways To Deal with Infinix Hot 30i Unresponsive Screen | Dr.fone
- Top 7 Skype Hacker to Hack Any Skype Account On your Apple iPhone 6s Plus | Dr.fone
- How to Fake Snapchat Location without Jailbreak On OnePlus 12R | Dr.fone
- Here Are Some Reliable Ways to Get Pokemon Go Friend Codes For Vivo X90S | Dr.fone
- Updated Free Video Editing Solutions for Chromebook Enthusiasts
- Title: Complete Tutorial for Lava Yuva 3 Pro Hard Reset | Dr.fone
- Author: Ian
- Created at : 2024-04-30 11:25:11
- Updated at : 2024-05-01 11:25:11
- Link: https://techidaily.com/complete-tutorial-for-lava-yuva-3-pro-hard-reset-drfone-by-drfone-reset-android-reset-android/
- License: This work is licensed under CC BY-NC-SA 4.0.
