Achieve Order and Efficiency: The Ultimate Strategy for Personal Organization with Trello

Achieve Order and Efficiency: The Ultimate Strategy for Personal Organization with Trello
Whether it’s moving home, planning a big trip, or working on a career change, personal project management apps can make your life much easier. Trello is free, powerful, and easy to use—here’s how to get started.
Why Use an App?
There are plenty of ways of organizing your life, from good old-fashioned pencil and paper notebooks, through notes apps, spreadsheets, and more (Excel for event planning , anyone?). I’ve even used the writing app Scrivener as a general planning tool.
Each approach has its pros and cons, and over the years I think there are very few of them I haven’t tried. But when it comes to a combination of flexibility, ease of use, and aesthetics, dedicated planning tools tend to have the edge. We’ll get more into the specifics in a moment.
Aren’t Project Management Apps for Work?
Project management apps probably aren’t the first thing that spring to mind when you think about planning personal projects. We tend to think of them in a work context, and they bring to mind large-scale team projects in enterprise companies.
You might also have heard people mention their qualifications in project management tools, which again has the effect of making them seem complex.
Some project management apps are indeed complicated—but there are also beautifully simple ones, like Trello.
Why Trello?
While I’ve played around with plenty of different approaches to planning both work and personal projects (you can use any number of apps to plan a project ), I’ve always quickly returned to Trello, for five reasons.
- Ease of use. It takes no more than 10-20 minutes to get the hang of it, and the processes it uses are very intuitive. For example, you can use drag-and-drop to move items up or down in priority or sequence, or to move them from one column to another.
- Flexibility. You can make Trello behave like a to-do list, a notes app, a spreadsheet, a database, a reminders app, you name it.
- It’s aesthetically pleasing—or can be very easily made so. When your project plans are pleasing to the eye, that’s not only a good thing in itself, but it tends to encourage you to spend more time working on them.
- Trello makes it incredibly easy to collaborate with other people.
- It’s free as in free forever. Technically, it’s a freemium project, with free and subscription tiers, but the free tier does everything you’re likely to need for personal projects. In five or six years of using it for dozens of different projects, I’ve never yet had to move to a paid tier.
A Few Examples
I’m currently midway through selling one apartment and buying another. One step is shortlisting potential purchases, so I created a Trello project (a “board” in Trello speak) for this.
Any listings I wanted to view were put in the Wait column. When I had a viewing arranged, I simply dragged it to the Scheduled column. If I eliminated it, then I simply archived it; if it was a contender, I moved it to the Shortlist column. And so on to an accepted offer (which I’ll believe when I’m standing in the apartment with the deeds in one hand and the keys in the other, but that’s another story!).

Ben Lovejoy
Another board is apartment design. I use this to clarify my goals for my new home, collate ideas, list the main things I’m taking with me, save links for things I want to buy, list things I plan to sell—and outline the smart home kit I plan to use, together with the scenes I want to create.

Ben Lovejoy
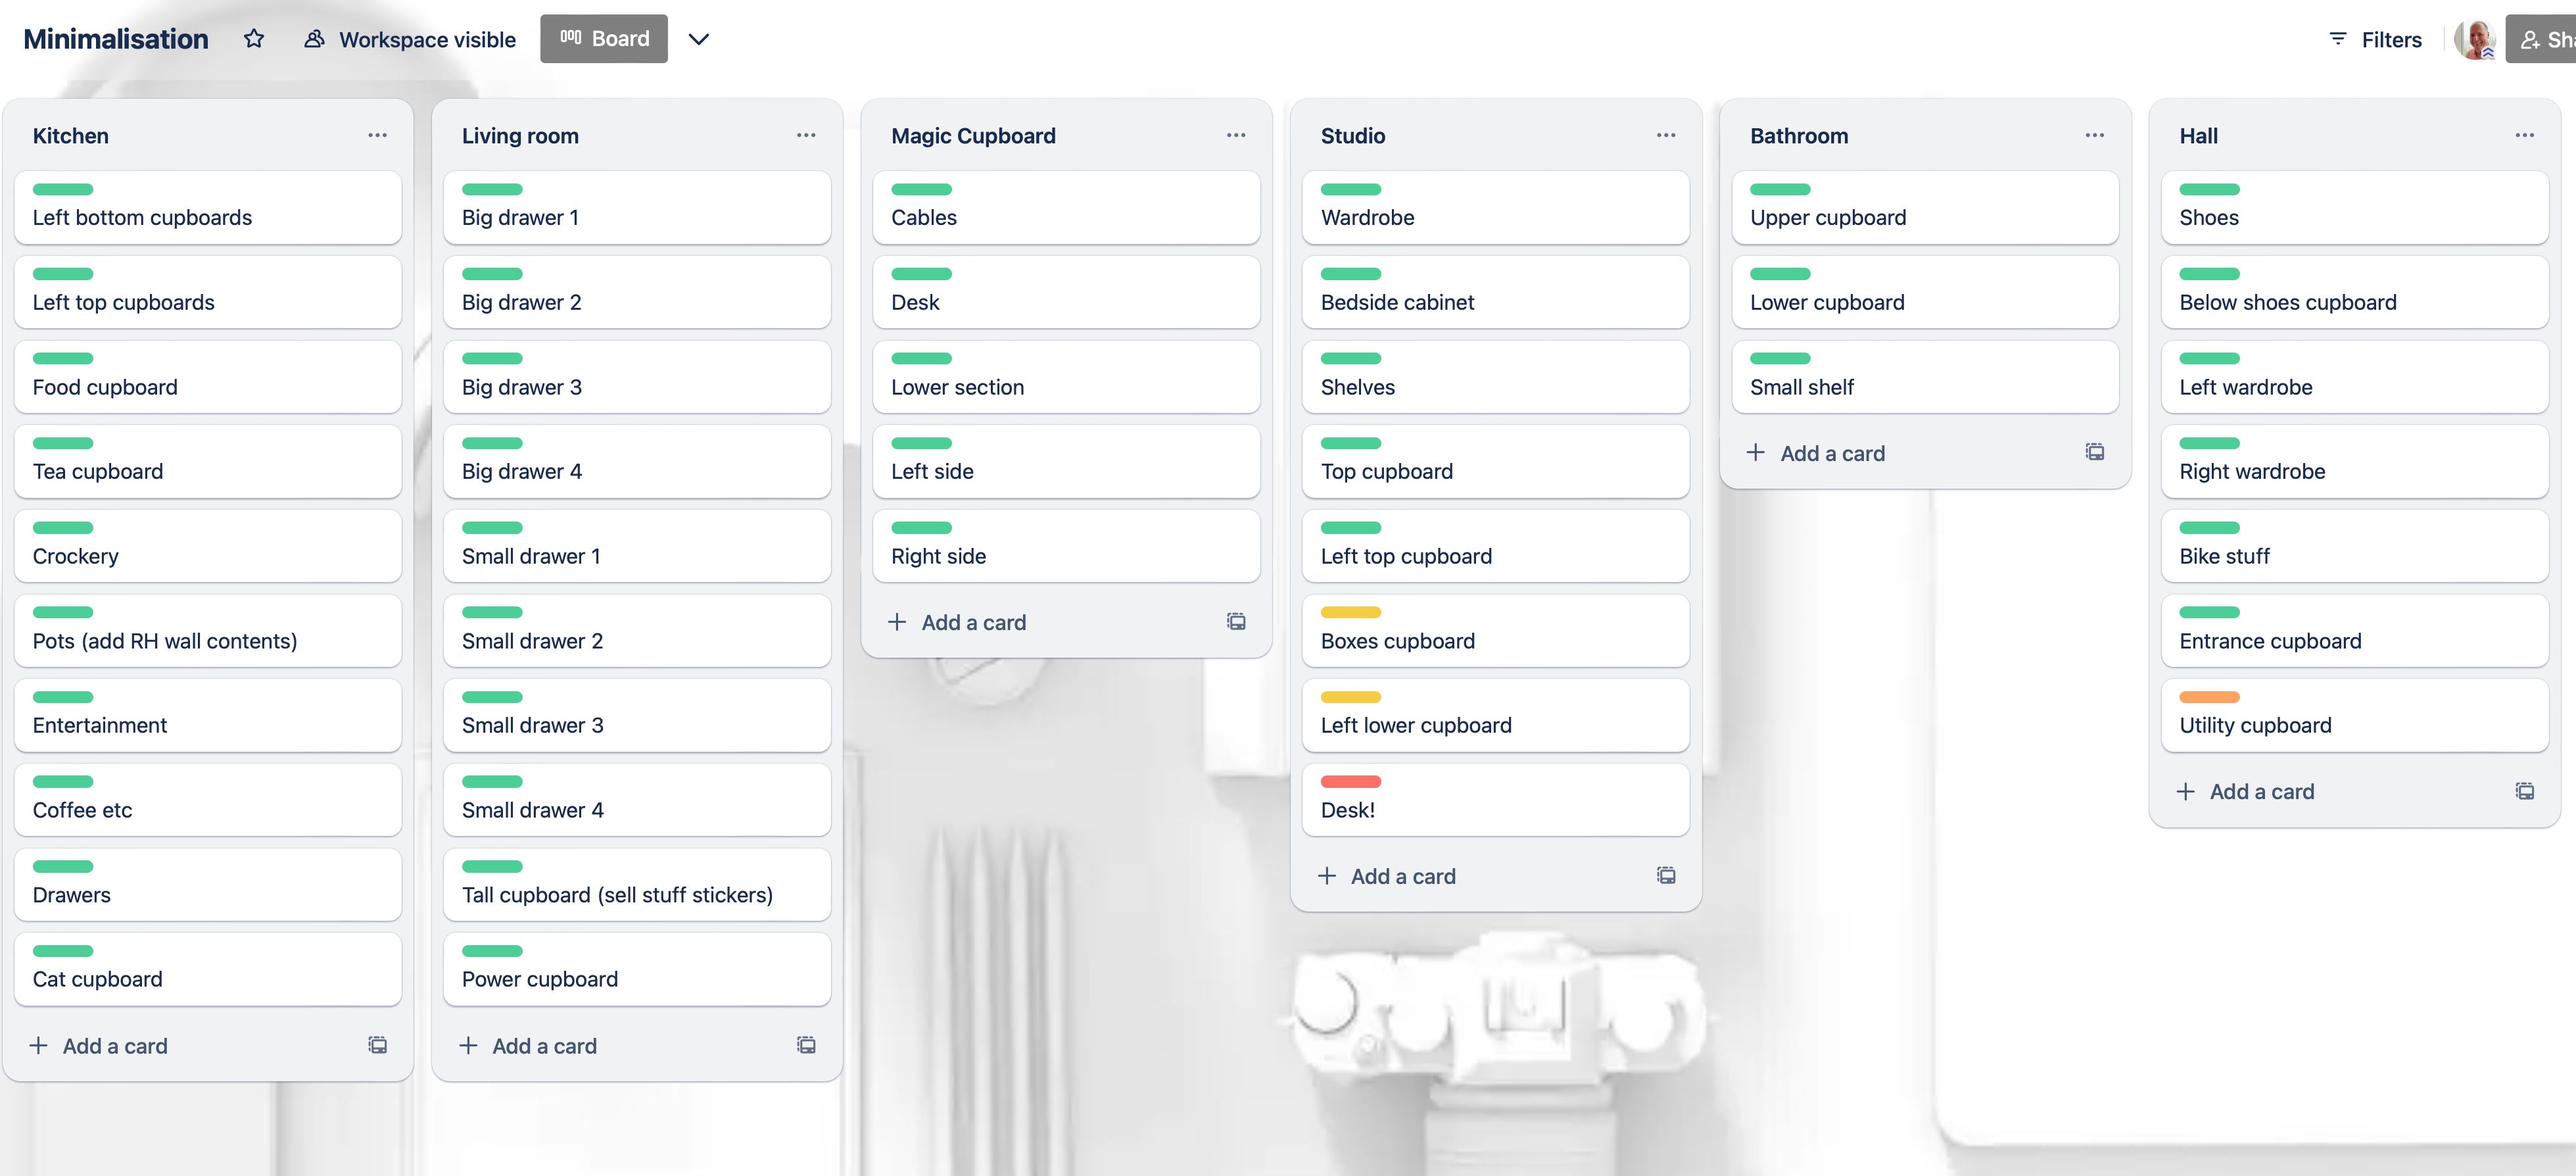
One of my goals for the move is to return to the more minimalist lifestyle I had until I moved in with someone who was very much not a minimalist. So one of the tasks I needed to tackle was to go through every cupboard and decide what to keep, what to sell, and what to give away.
I broke things down by room, then by individual cupboard or drawer. I’m using a simple color-coding system to track my progress, where red/amber/yellow indicates the scale of the [remaining] task (red meaning there are big decisions to be made), while green means it’s complete.

Ben Lovejoy
How to Use Trello
I’m illustrating here the web version of Trello, as personally I prefer it, but the desktop and mobile apps work in the same way.
Creating a Board
Visit trello.com and use the “Create an Account” link to register. If asked to choose your plan, opt for the “Free” one. Once you are registered, select “Boards” from the left-hand menu, and then click the big blue “+” sign at the top to add a board.
You’ll be asked to choose between “Create Board” and “Start With a Template.” Personally, I find it easier to use the first option to create something from scratch.
You can choose one of the standard backgrounds—either a color or an image—or “Custom” to upload your own. My personal preference is to have a minimalist but interesting background, so I search for free stock images on Unsplash and use one of those.
Creating Lists
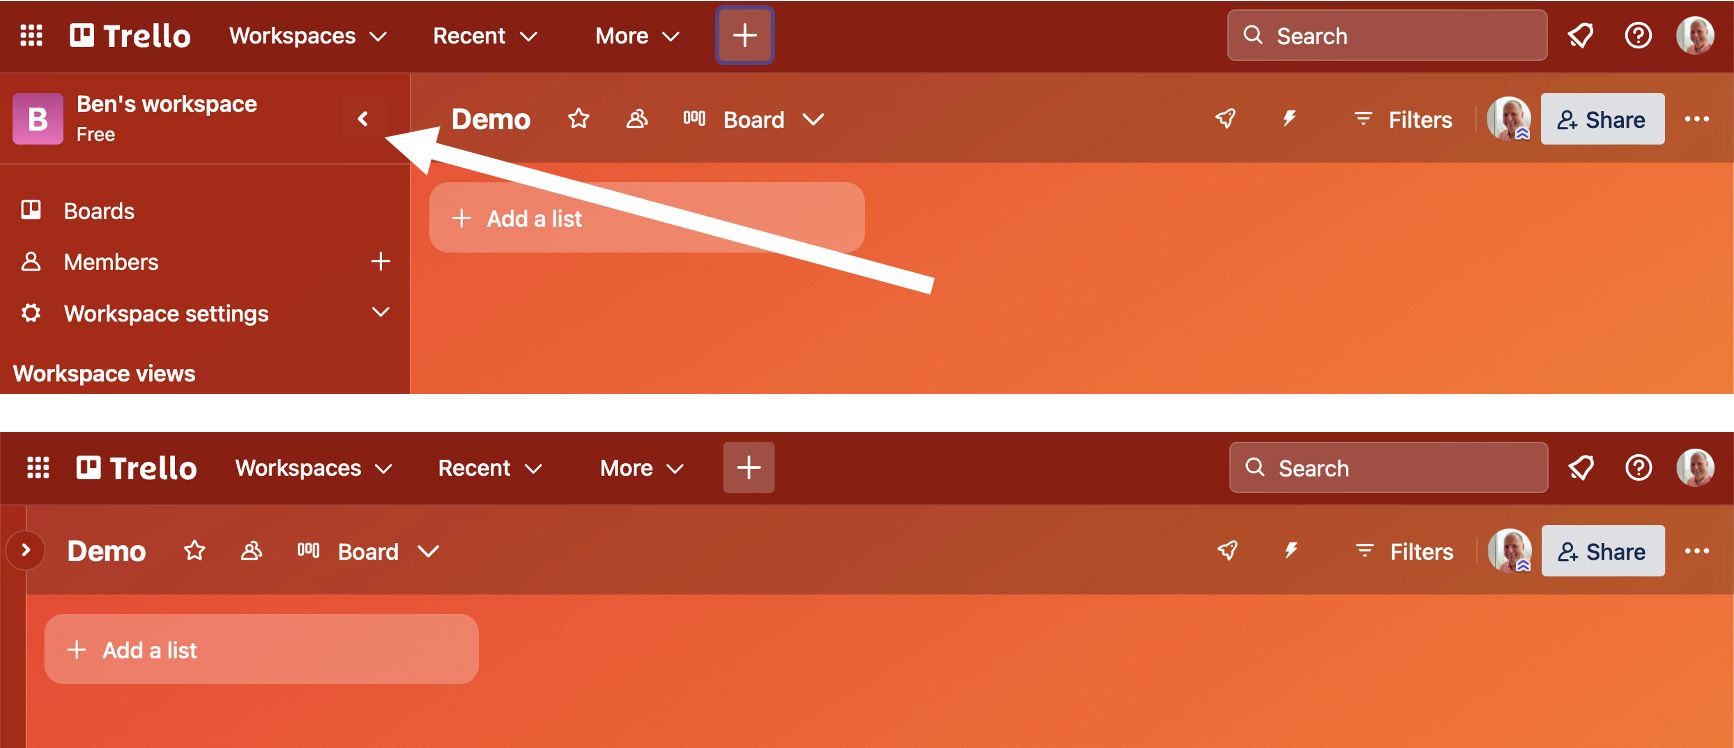
I recommend closing the side menu by clicking the “<” button shown below. That gives you a much cleaner screen.

Ben Lovejoy
You’ll now have an “Add List” button top left. Click that and give it a name, then click “Save.” Doing that will prompt you for your next list, so repeat until you have as many lists as you want.

Ben Lovejoy
Adding Cards
You’ll see each list now has an “Add a Card” button, so just click this to do so. Again, repeat as many times as desired to add as many cards as needed within each list.

Ben Lovejoy
Adding Photos
Click on any card to open it, and you’ll see all the options available. If you want to have a photo visible in your overview, as in my apartment hunt example, then this is called a cover photo. Click the “Cover” button and upload your photo.

Ben Lovejoy
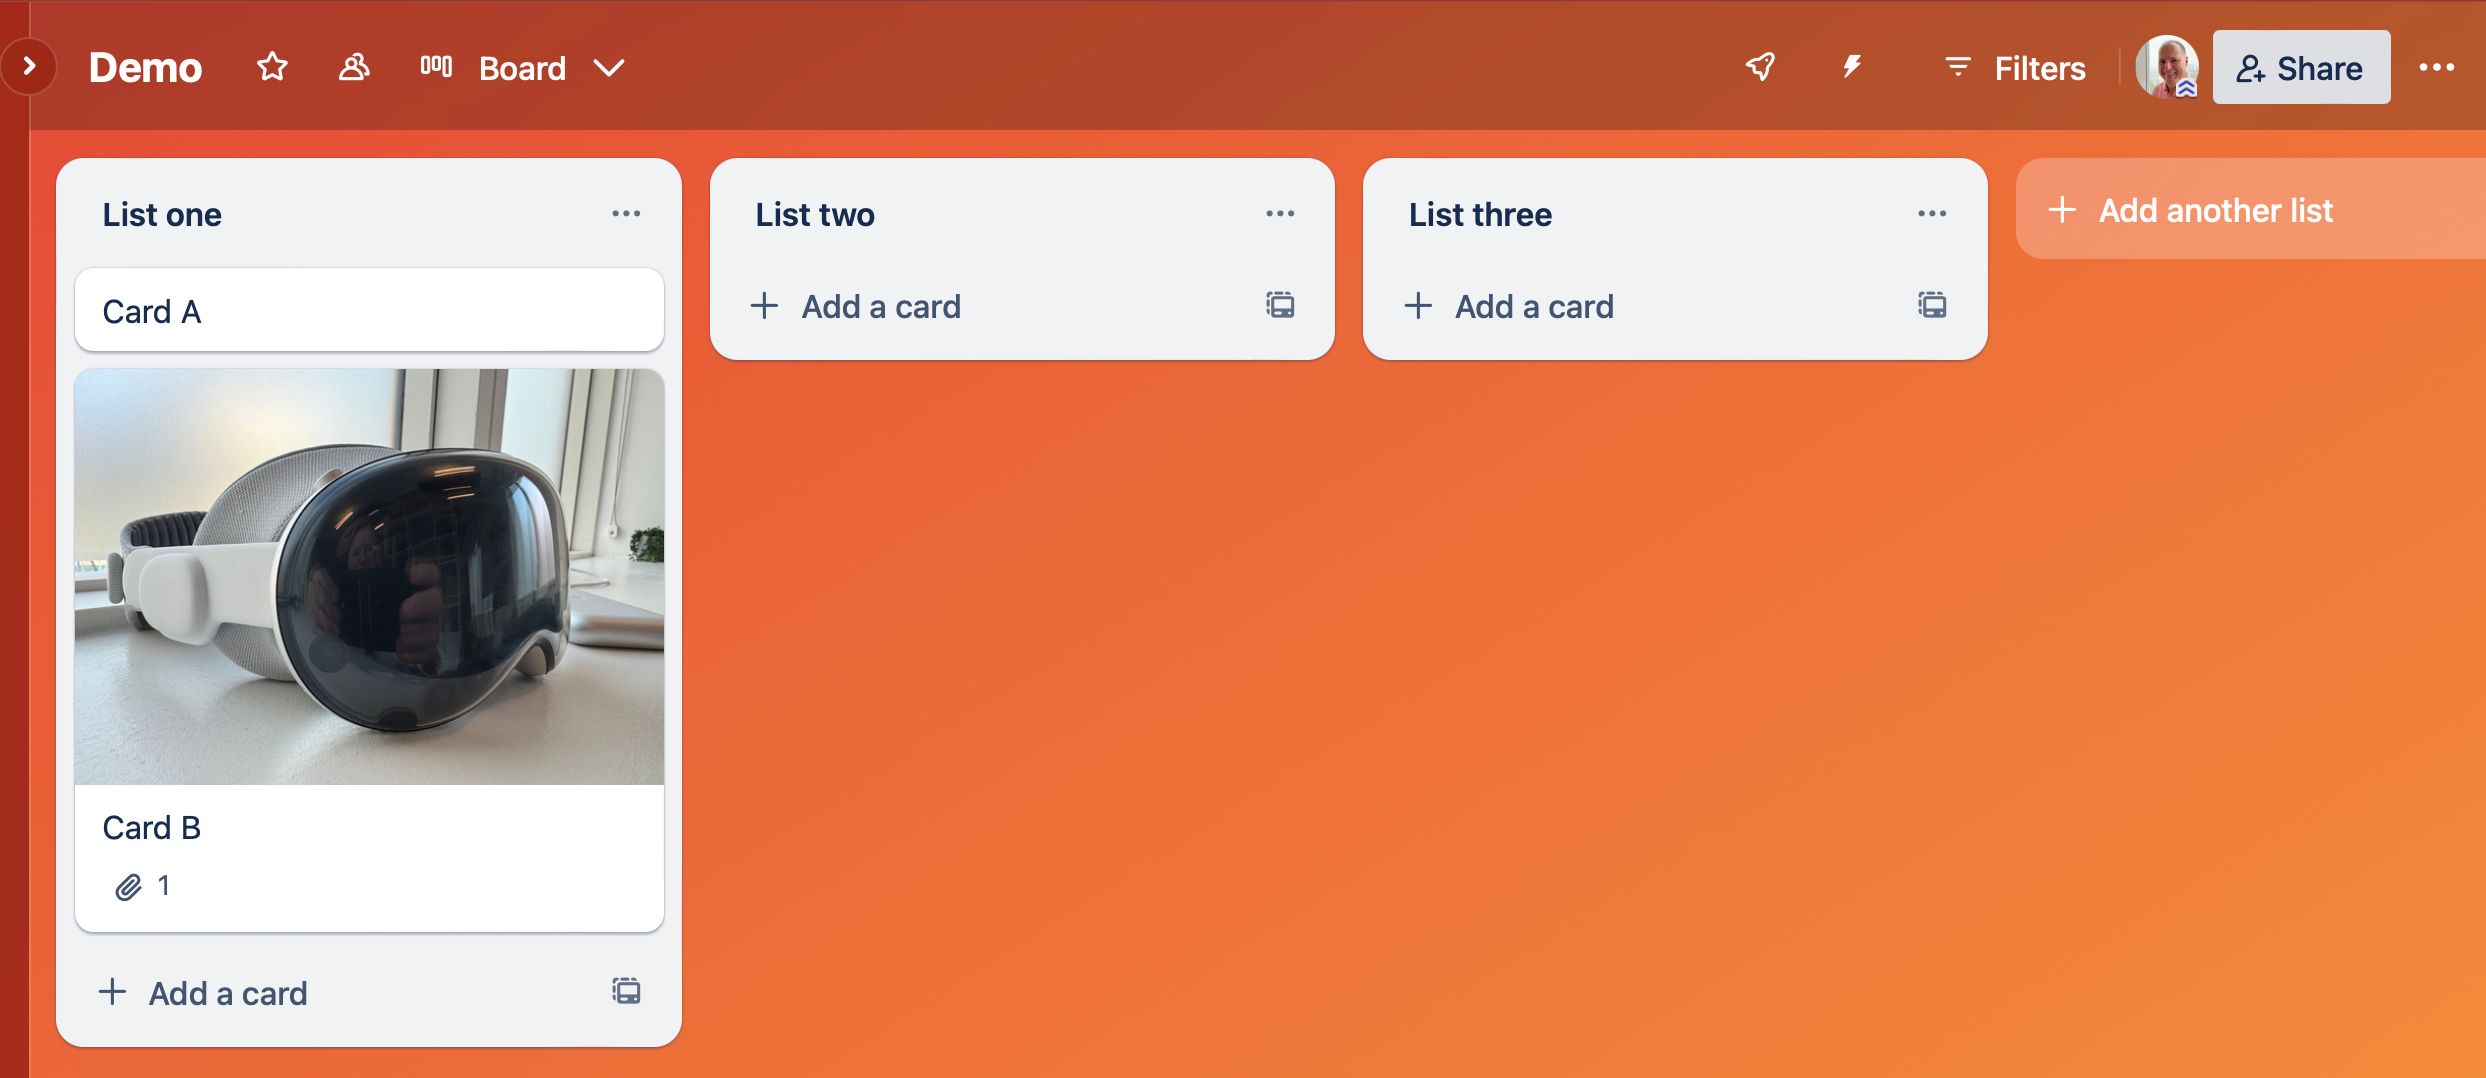
The photo will then show on the card in the main view:

Ben Lovejoy
If you instead only want a photo to be visible when you open the card, then use the “Attachment” button.
Adding Links
Click the card to open it, and then the “Description” button.
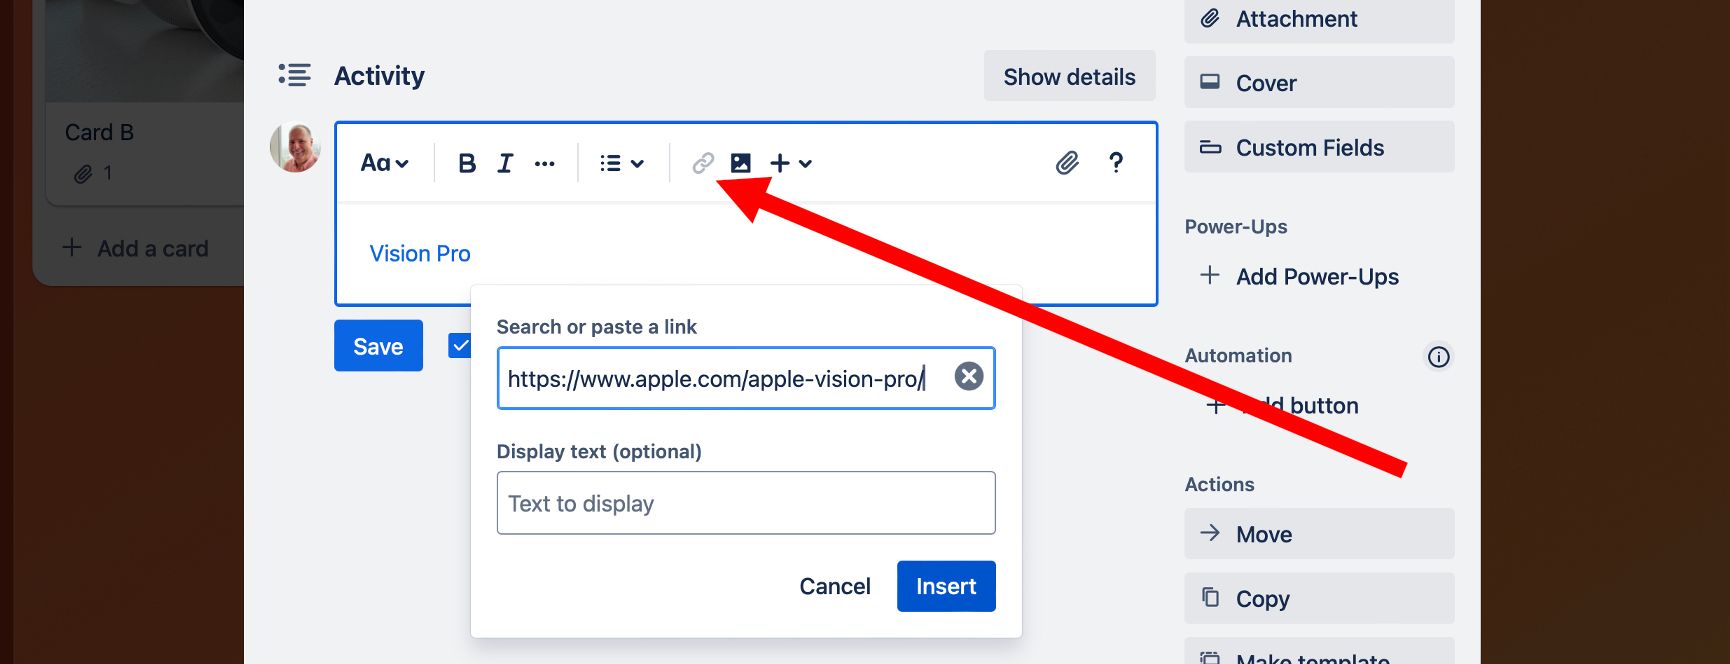
You can simply paste in a link, or you can do it HTML style: Type your description first, then highlight it and tap the link button highlighted below—this gives a neater look.

Ben Lovejoy
You’ll also see here options to link to existing cards.
Adding Checklists
Everything else from this point is added in the same way: Open the card, then choose the option from that right-hand menu we used to add the cover photo. I’ll skip the screengrabs, as these would just be the same image.
To add a checklist, simply click the Checklist button.
Adding Deadlines
If a card represents a task, you can set a deadline by clicking the “Date” button. By default, you’ll get a reminder the day before it becomes due, but you can change this from the dropdown.
Note that deadlines aren’t the only way you can use dates. For my flat-hunting, for example, I used the date to indicate the date of the viewing appointment.
Using Color Coding
To color-code cards, click the “Label” button. You’ll get a set of default colors, but can also edit these. Just check the box next to a color to add that to the card. If you want to give your color-coded labels names, click the pencil (edit) button next to the color and type your name.

Ben Lovejoy
Depending on how you use the feature, you may sometimes want to apply more than one color to a card, and Trello lets you check as many as you like.
You can see how these colors show up in my minimization board:

Ben Lovejoy
Moving Things Around (Lists and Cards)
Whether you want to move a card up or down a list, move a card from one list to another, or move a list to the left or right, you can do it all simply by dragging and dropping, picking the card up by its edge.
However, there is one quirk to watch out for. Trello also lets you drag one card inside another one by picking it up in the center, where it is added as an attachment (effectively a hyperlink from one card to another). If the card remains the same size and rounded shape when you drag it, you are dragging the card—but if it changes to a small square, you are in insertion mode. If you get that and don’t want it, then just drag it anywhere outside your lists and let it go.
Collaborating With Family and Friends
The final thing that’s incredibly easy in Trello is collaborating with other people. Just tap the Share button top-right, and enter their email address. They will then be given full access to the board, and can use and edit it just like you can.
There are some subscription-only features, but personally I’ve never needed any of them. You’re limited to a maximum of 10 active boards at any one time, but if you do need more you can close boards to make room for more. For almost everyone using Trello for personal projects, then, it remains free forever.
Also read:
- [Updated] Master Screen Record on Win 10 for 2024
- [Updated] Unlocking the Secrets of iRecorder for 2024
- Advanced Systems for Tracking Human Manoeuvres for 2024
- AI Is Redefining Work: Explore Future Careers With Novel Titles Yet to Be Decided
- Complete Tutorial for Tecno Pova 5 Hard Reset | Dr.fone
- Expert Strategies for Protected Email Registration in Server Environments
- Full Guide to Hard Reset Your OnePlus Nord N30 SE | Dr.fone
- Hard Reset Vivo Y100A in 3 Efficient Ways | Dr.fone
- How to Change Lock Screen Wallpaper on OnePlus Nord 3 5G
- How to Easily Hard reset my Xiaomi Redmi Note 12T Pro | Dr.fone
- How to Reset Poco F5 5G without Losing Data | Dr.fone
- How to Reset Xiaomi Redmi Note 12 Pro 4G without Losing Data | Dr.fone
- In 2024, How and Where to Find a Shiny Stone Pokémon For Vivo S18? | Dr.fone
- Reset pattern lock Tutorial for Xiaomi Redmi Note 13 5G
- Trouble with rtkvhd64.sys? Here's How You Can Resolve the BSOD Problem
- Undeleted lost videos from Honor X50i+
- Unlocking EXE Files: A Comprehensive Tutorial for Windows Users by YL Software
- Title: Achieve Order and Efficiency: The Ultimate Strategy for Personal Organization with Trello
- Author: Ian
- Created at : 2025-02-18 17:25:02
- Updated at : 2025-02-19 19:36:19
- Link: https://techidaily.com/achieve-order-and-efficiency-the-ultimate-strategy-for-personal-organization-with-trello/
- License: This work is licensed under CC BY-NC-SA 4.0.